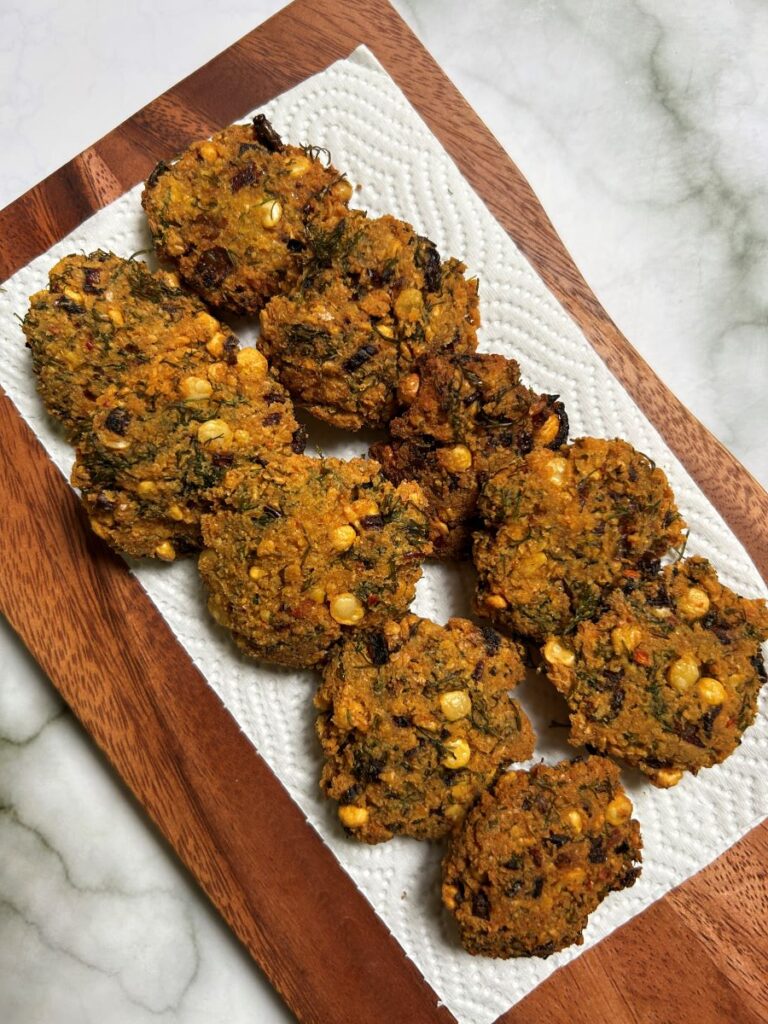
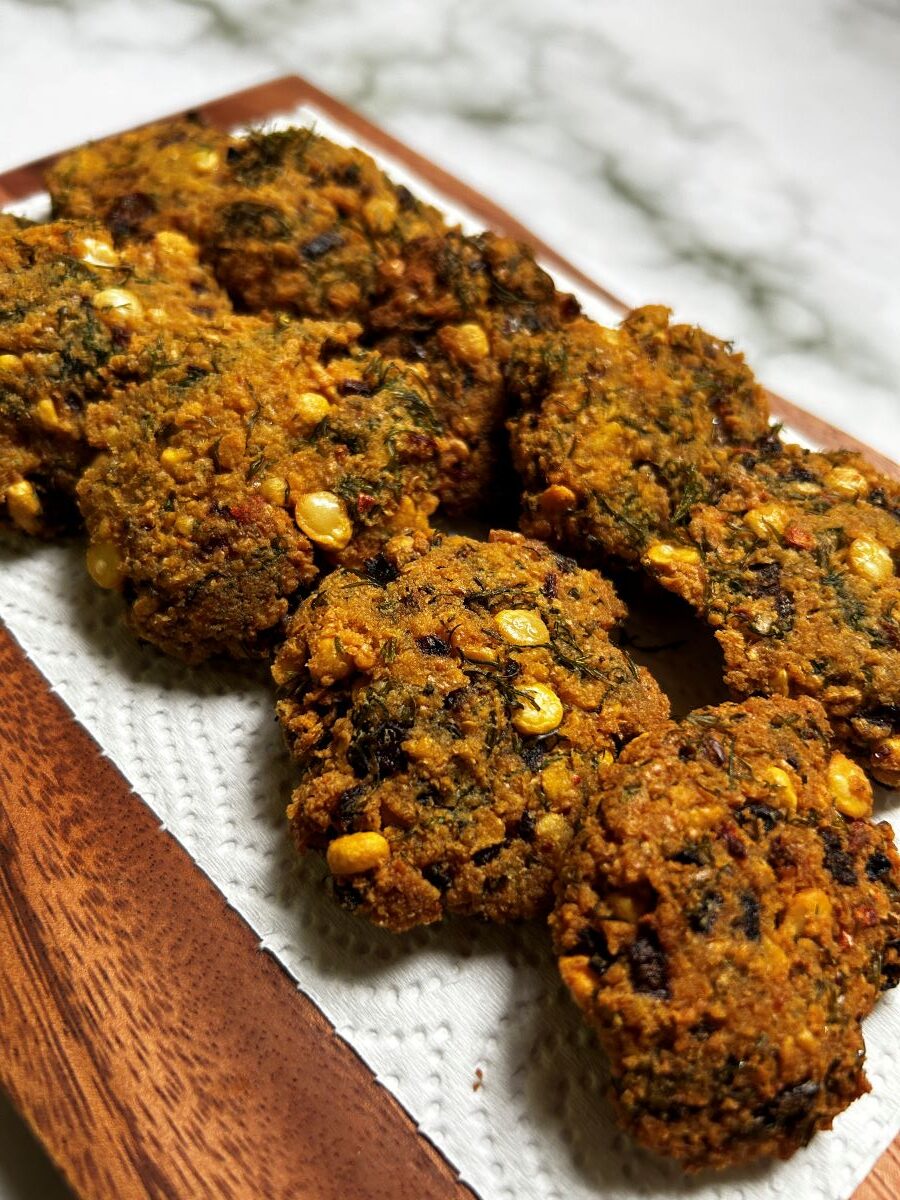
Masala Vada is a popular South Indian lentil based fritter seasoned with red chillies and asafoetida along with finely chopped onions, curry leaves and dill leaves.
Jump To
What is Masala Vada?
Masala Vada is a deep fried snack/tiffin with Chana dal as the main ingredient. Chana dal is soaked and ground with ginger and red chillies followed by flavouring with finely chopped onions and dill leaves.
This delicious snack is crunchy on the outside when deep fried and soft on the inside.
I serve this as an after-school snack or make it during festivals such as Diwali or Dussera. Masala Vada is almost always a part of the elai sapadu or banana leaf meal at weddings.

It can also be served as an appetizer at parties along with a spicy chutney like Coconut Chutney or Red Chutney. It goes by the name of Paruppu Vadai in Tamil, Ombode in Kannada, or Dal Vada in Hindi.
Ingredients to make Masala Vada
The hero ingredient of Masala Vada is Chana Dal. You will need up to one cup or 180 grams to make about 15-18 small masala vadas.
The ingredients that you use while grinding the chana dal are ginger and red chillies. If you do not like the taste of red chillies, you can use green chillies too. Ginger provides a nice warmth to the vada without it being too spicy.
Once the dal is ground and ready, the ingredients you can add to make it flavourful are onions, dill leaves, curry leaves and asafoetida, along with salt for seasoning.
The other ingredients you can add are cumin seeds, fennel seeds and coriander leaves. Since this recipe has dill leaves in the vada mixture, I have not used these 3 ingredients.
How to make Masala Vada

The first step to making the paruppu vadai is soaking the chana dal. Wash the dal thoroughly in water until it runs clear. Soak the dal in a large bowl as it will expand upon soaking.
You should soak for a minimum of 3 hours and a maximum of 6 hours.
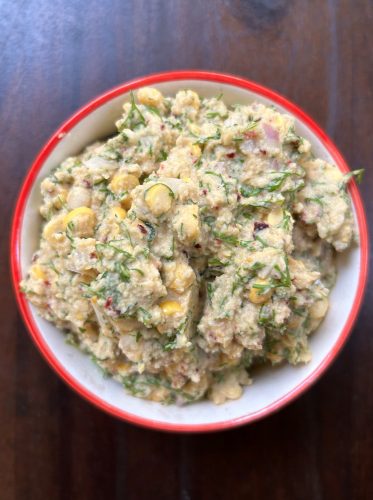
Once the dal has soaked, drain the water and keep the dal aside. I like to have a few kernels of chana dal as whole in the vada batter, as it will provide a nice crunchy texture when deep fried. So, at this stage I keep a handful of soaked chana dal aside to be mixed later in the ground up vada batter.
I like to add red chillies to the mixer along with the soaked chana dal. I also add ginger. This provides a nice heat to the vada without it having pockets of spice from a green chilli. Grind the chana dal, ginger and red chillies to a coarse paste without adding any water. If you feel that the mixture is getting too dry while grinding, add a teaspoon of water and nothing more than that.
The more water you add to the vada batter, the softer it will get. It is best to avoid moisture.
Take the ground batter in a bowl and add your chopped dill leaves. These leaves are my favourite and I would choose this over any greens anytime. Along with the dill leaves, you can add chopped onions too.
Mix it all with your hand and season with salt. You have to ensure that the vada batter is not too soft or too dry. If the batter is too soft, it means that there is excess water – you can fix this by adding a teaspoon or two of rice flour. If the batter is too dry, sprinkle some water and get it slightly moist.
Frying the Vadas
Once the batter is ready, the last step is to deep fry it.
Place a deep kadai with cooking oil on low to medium heat and allow it to warm up. Make sure you have at least 250 ml of oil or enough oil to ensure that the vadas rise to the top.
Take a small ball of the Vada batter and flatten it on your hand. You may use a dab of water to flatten it out on your hand and transfer it to the oil. (If you are a beginner, this might not come easily, but keep trying. The shape does not matter, only the flavour does when you are a beginner.)
Add as many vadas as possible without crowding them. They need the space to fry. Once the oil has stopped bubbling on one side, flip the vada to the other side to cook evenly.
At no point should you increase the temperature of the oil. Let it cook on low – medium heat. If the oil is on high heat, the outside of the masala vada may have cooked, but the insides might still be raw batter.
After cooking the vada on both sides, use a slotted ladle to drain the vadas onto a plate with kitchen tissue paper.
You can serve this delicious, crunch vada immediately with chutney. But I prefer to eat them as they are.
Masala Vada variations & serving suggestions
If you are not using dill leaves, you can add coriander leaves and curry leaves along with onions. You can also add cumin seeds and fennel seeds for extra flavour when not using dill leaves.
During festivals and family functions, Paruppu Vadai is prepared without onions. So jeera and curry leaves are the flavouring herbs used.
Storage & Shelf Life
Vada is best eaten hot, but they stay good for a day on the counter. You can make them in the morning and eat them at night too. This is because deep fried food does not go bad that quickly.
I will not recommend keeping vadas in the fridge, but you can prepare the Masala Vada batter and keep it in the fridge for a day or two.
It’ll be great if you tag me on Instagram @ Makepotato, when you make this recipe.
Please do leave a rating and a comment if you can, on the recipe below – it will help me grow and reach more food lovers like you.
Recipe
Masala Vada
Ingredients
- 1 cup Chana Dal 180-200g
- 1 inch Ginger
- 2-3 Dried Red Chillies
- 1 Onion finely diced
- 1 cup Dill Leaves plucked and washed
- 1 tsp Cumin seeds (optional)
- 1 tsp Fennel Seeds (optional)
- ½ tsp Salt adjust accordingly
- 250-300 ml Cooking oil for frying. Increase the quantity of oil when using a bigger kadai.
Instructions
- Wash and soak the chana dal with water. Soak the dal in water for a minimum of 3 hours and a maximum of 6 hours.
- Meanwhile, prep the other ingredients – plucking and washing dill leaves will take some time. Cut an onion and dice them into small bits. Wash and peel the ginger and cut them into small pieces.
- Drain the water from the soaked dal and rinse it out. Make sure to drain out all the water before adding it to the mixer jar for making the batter. To the chana dal, add the chopped ginger and dried red chilles. If you like, you can keep a handful of soaked chana dal aside to add to the batter.
- Grind into a coarse paste. Transfer the batter to a bowl.
- To the batter, add the chopped onions, chopped dill leaves, soaked full chana dal and salt. Mix all the ingredients well and check for seasoning. Once done, keep the batter aside and get the oil ready for deep frying.
Frying the Masala Vadas
- Place a kadai on low to medium heat and add the cooking oil. Once the oil is warm, take a small piece of batter and check if the oil is hot enough. If it floats to the top, then the oil is ready.
- Take a small ball of the masala vada batter and flatten it out on your left palm with some water. Take it with your right hand fingers and transfer it to the hot oil. (The flatter the vada, the crispier it will be. The rounder the vada, the denser it will be. )
- Add as many vadas as possible without crowding the oil. Once the bubbling slows down on one side, flip the vada to the other side and allow it to cook.
- Do not change the temperature of the oil to hasten the cooking process. You might end up with a vada cooked on the outside but raw on the inside.
- Once both sides are done, with the help of a slotted spoon/ladle, remove the vadas from the oil to a plate lined with kitchen tissue paper.
- Serve your Masala Vadas hot with a chutney of your choice.
If you are looking for more Indian Appetizers Recipes, please click here.
Do follow me on Instagram at Make Potato — I post daily lunch box ideas and quick snack recipes.


