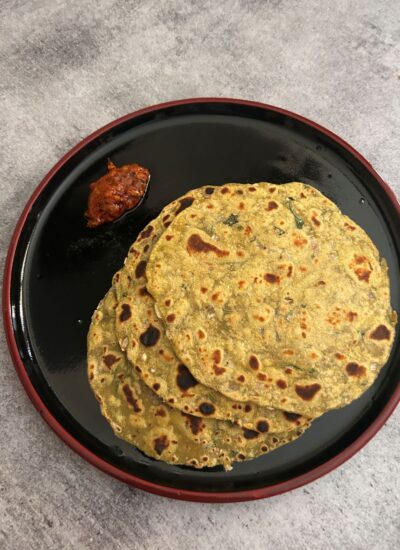
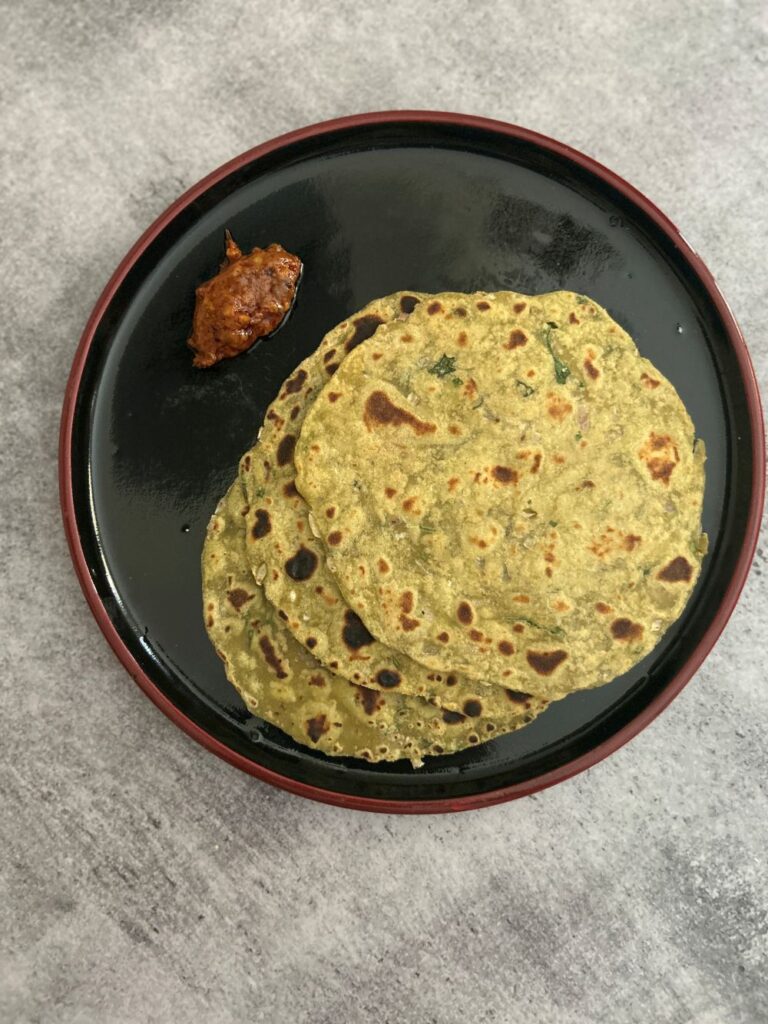
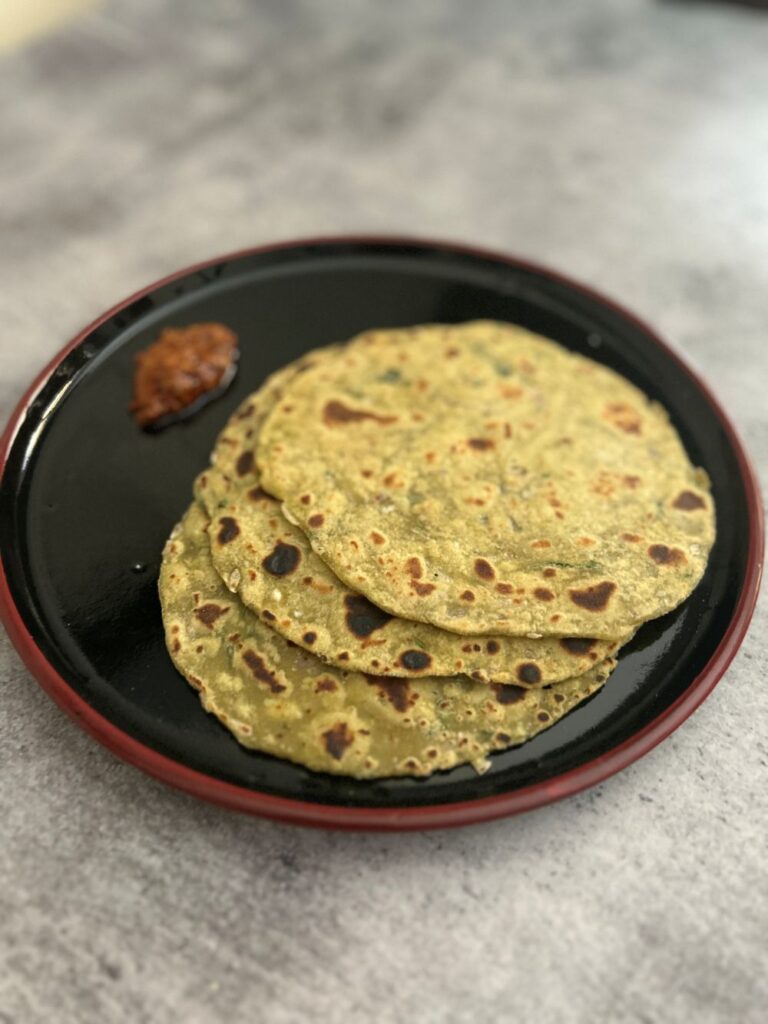
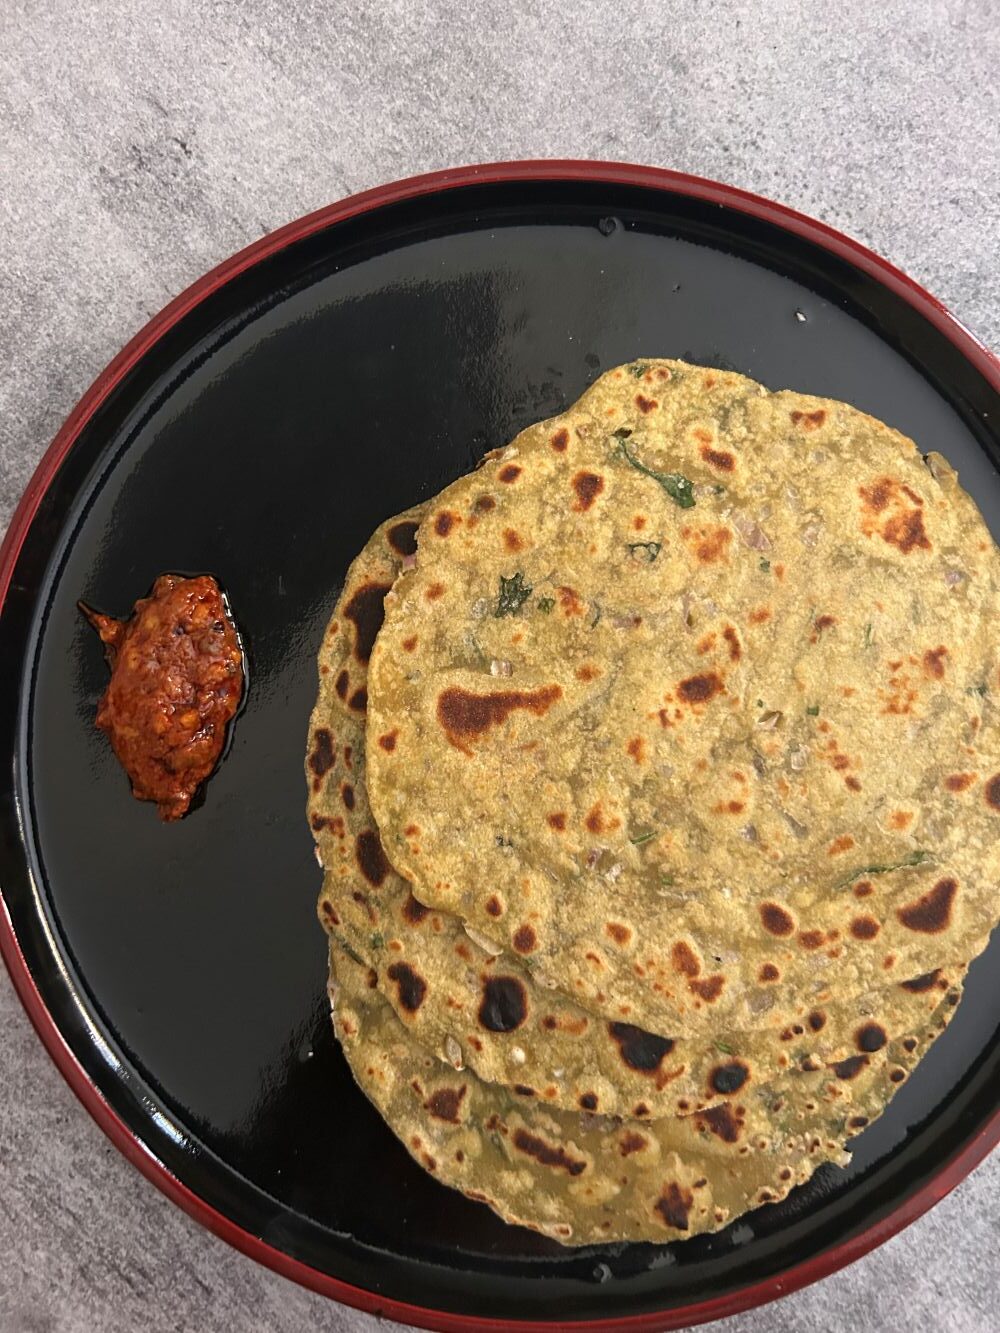
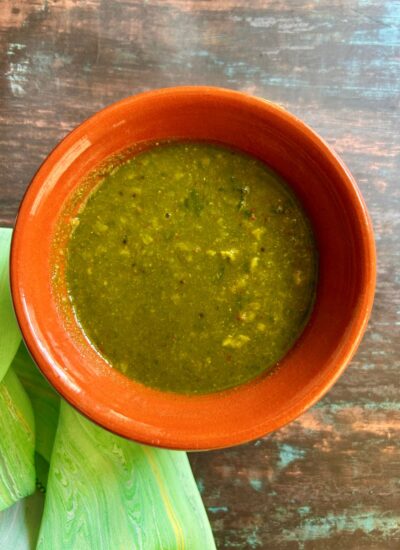
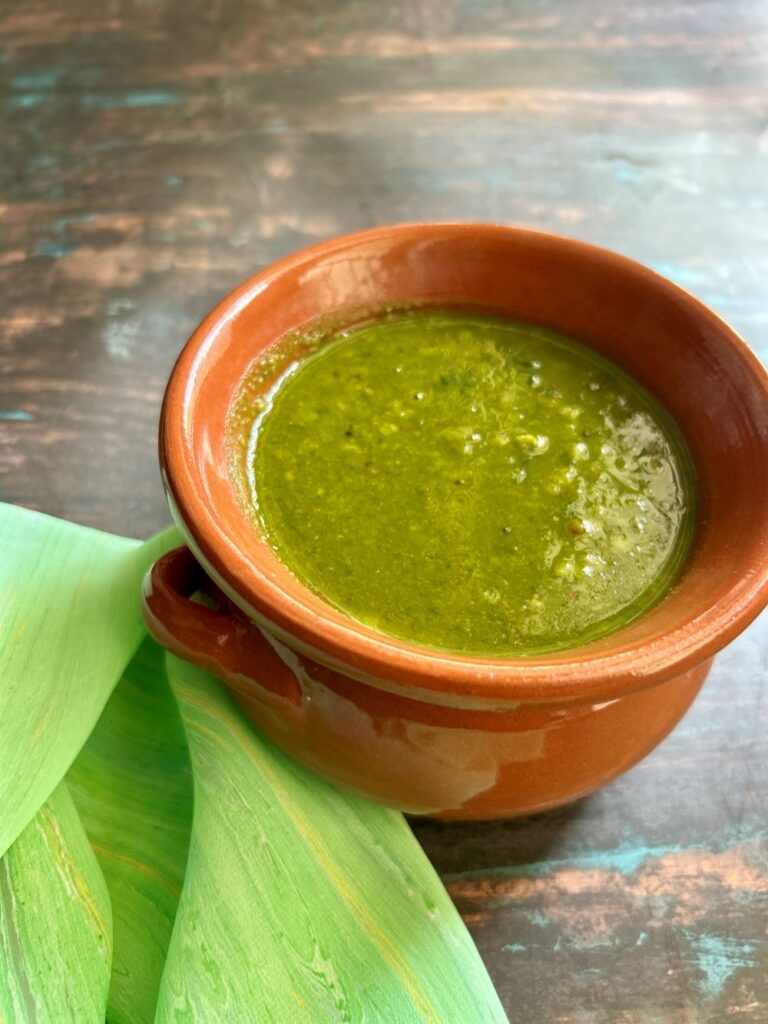
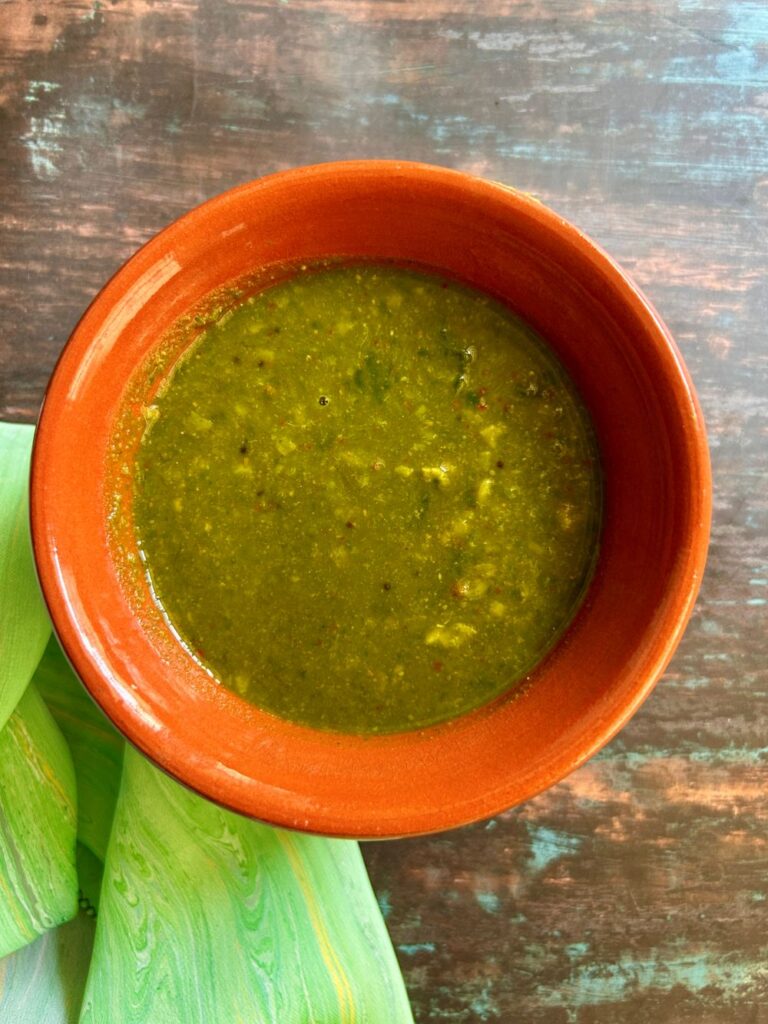
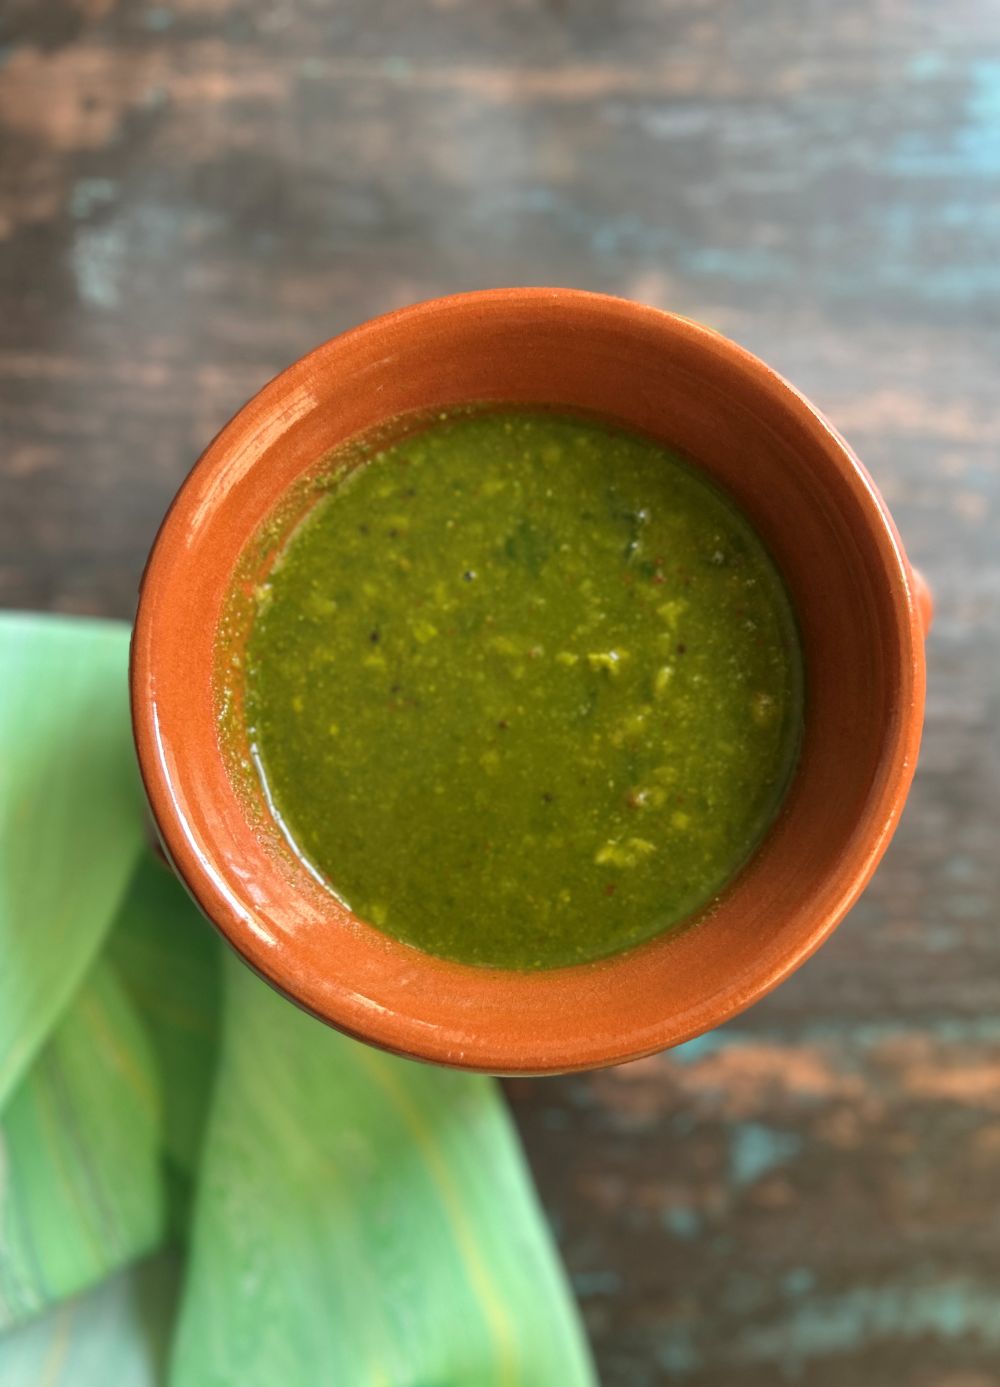
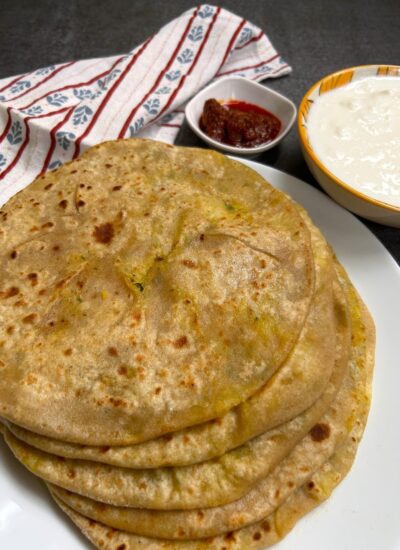
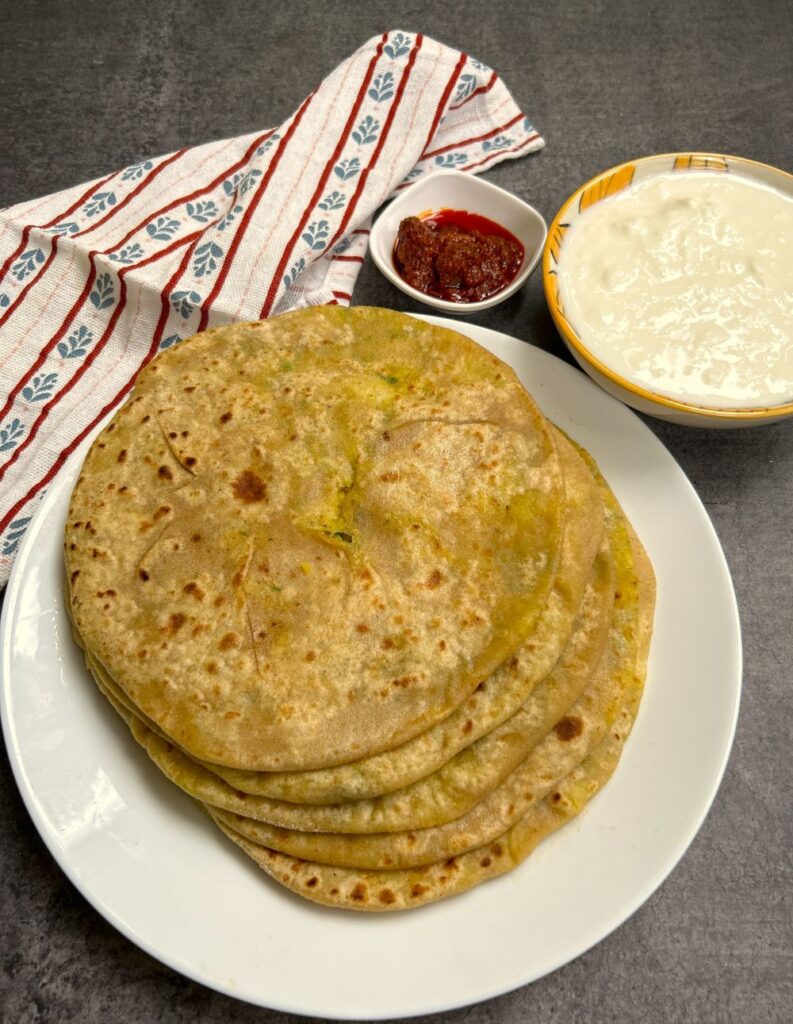
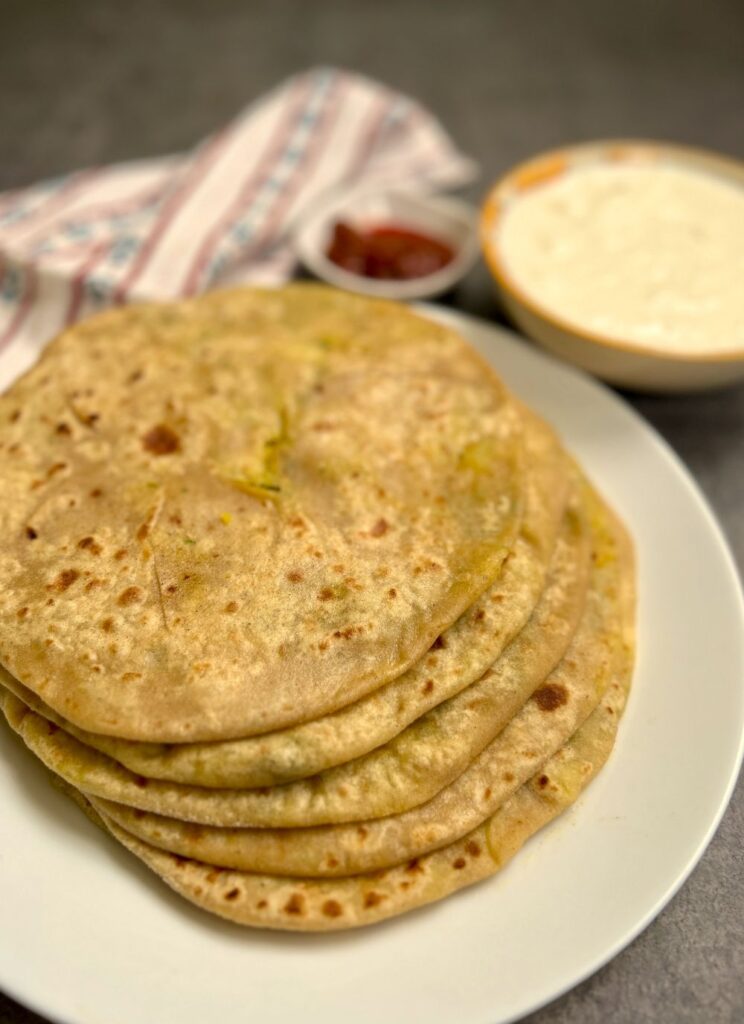
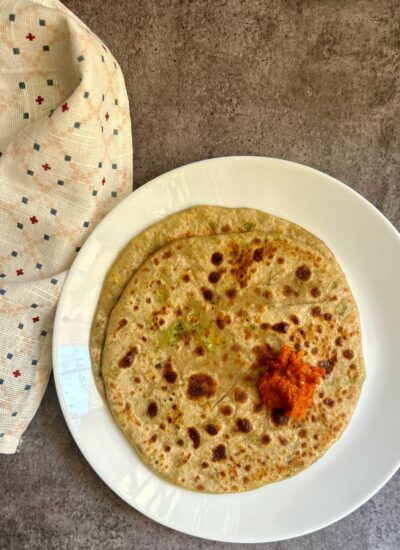
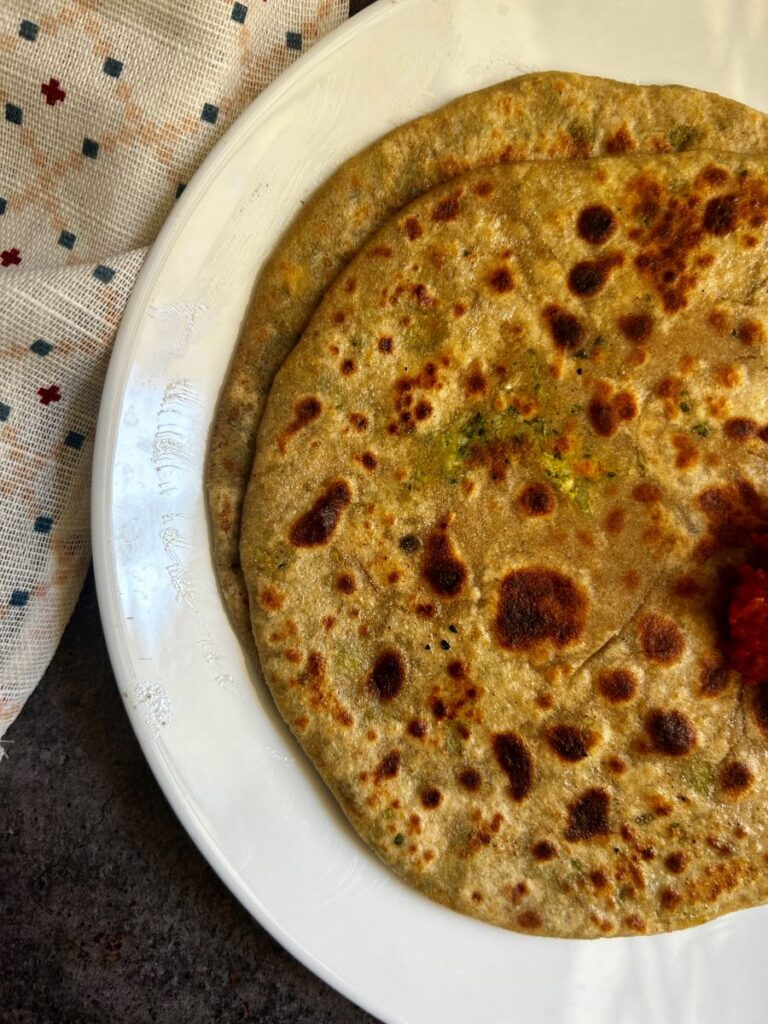
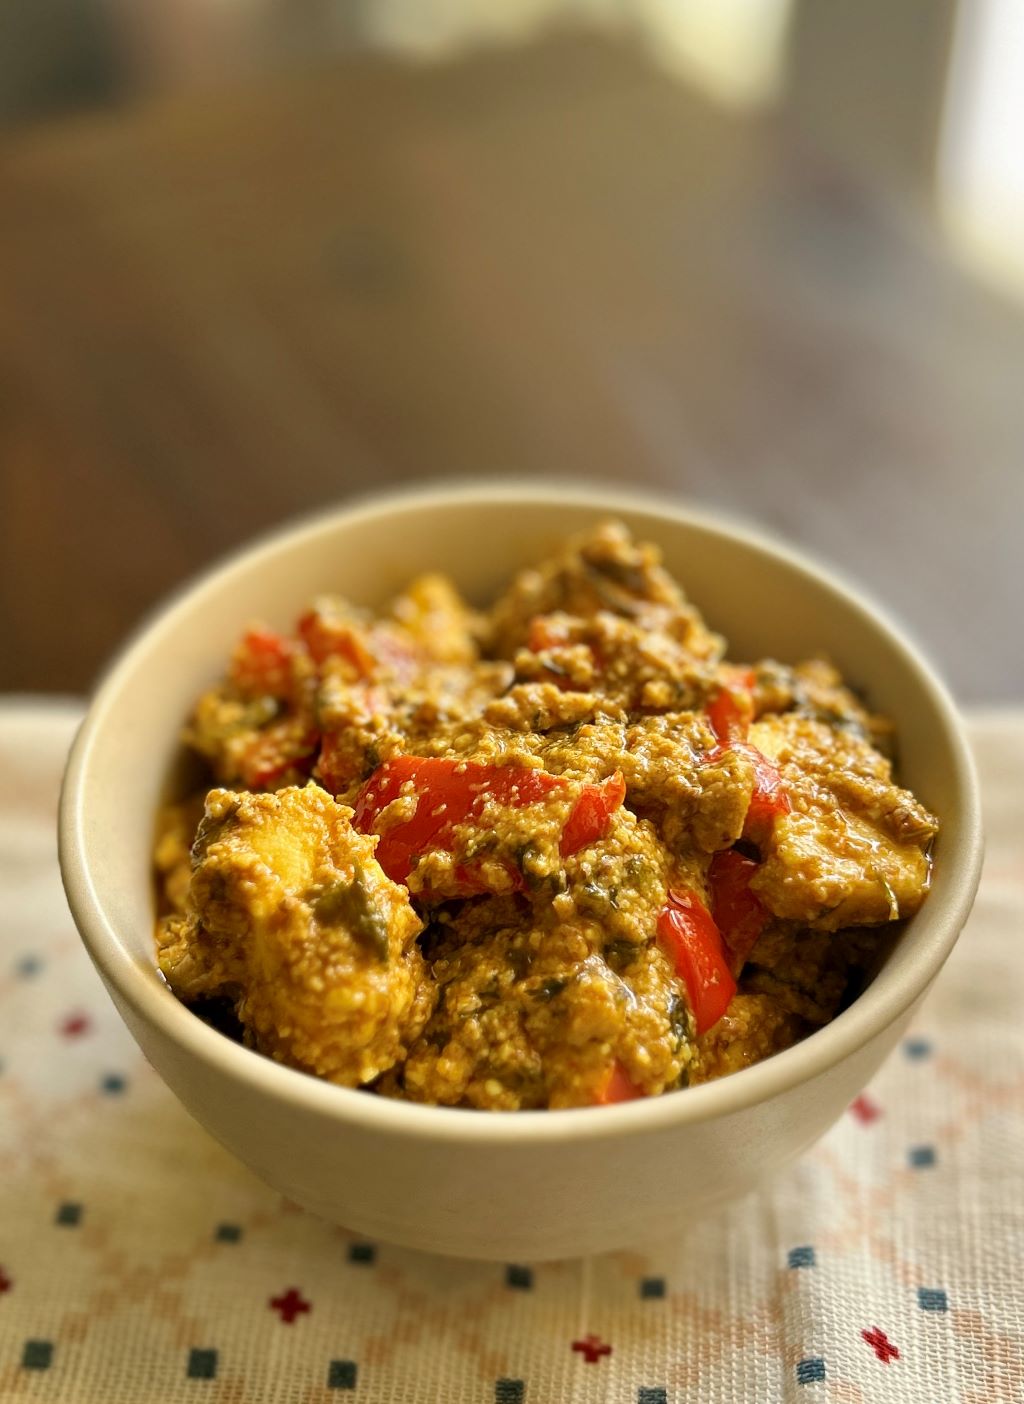
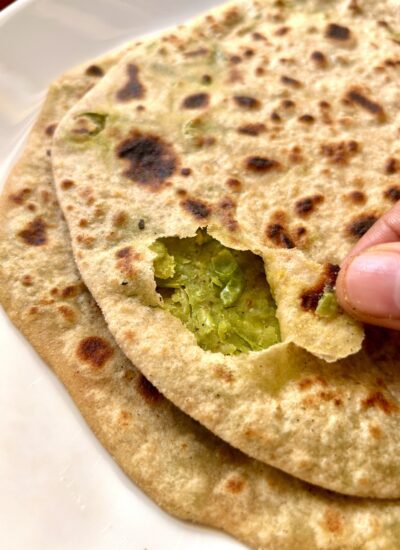
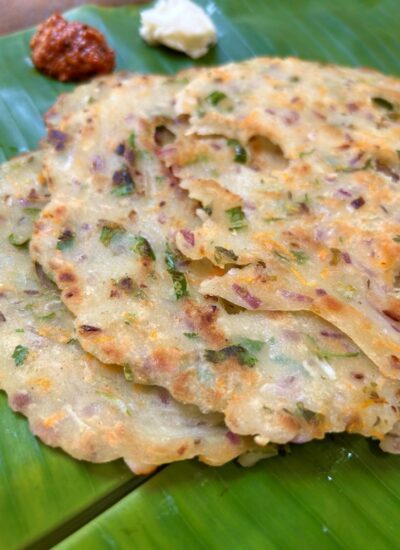
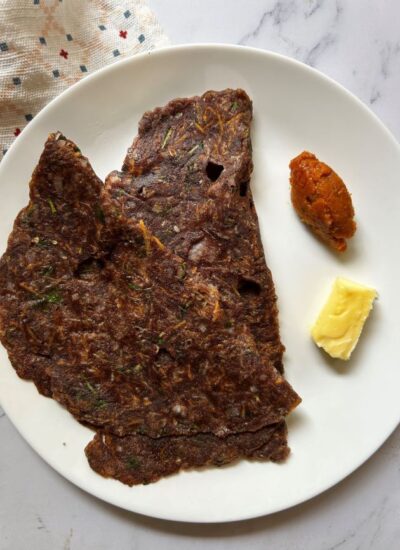
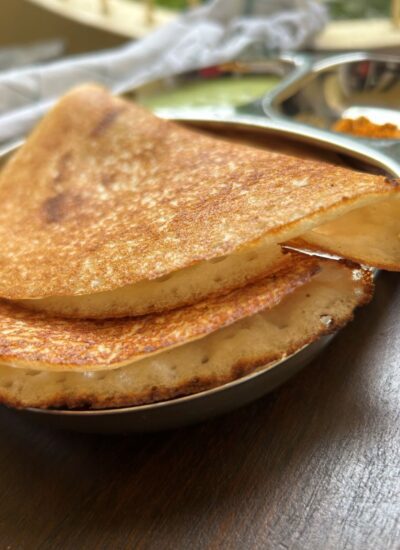
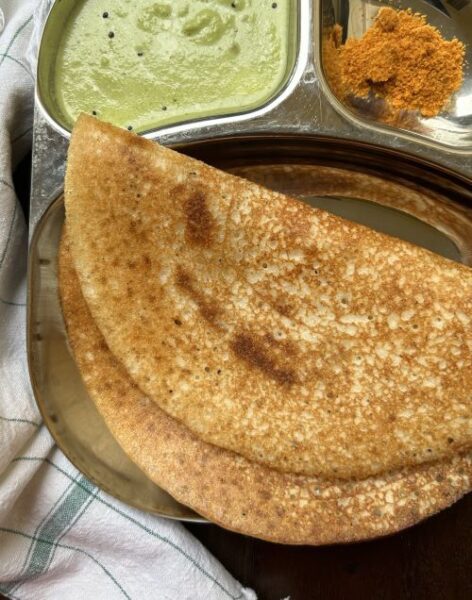
Avocado Paratha is a soft Indian flatbread made with wheat flour, avocados, coriander leaves and spices
Avocado Paratha is a soft and buttery flatbread recipe made with wheat flour, avocados, coriander leaves, onions and spices.
The avocado replaces or supplements the usual dairy/fat, giving a soft, tender texture and a subtle fresh flavour.
It’s perfect for breakfast, brunch or a light meal served hot with chutney, yogurt or salad.
This easy avocado paratha or avocado roti is an excellent inclusion in your lunch box roster.
Ingredients for Avocado Paratha
To make the dough, you will need
Wheat Flour – For this recipe, you will need 2 cups of atta or roughly 350-400g, which will yield eight parathas
Avocado – 2 small ones or 1 large piece will do. Make sure to choose fully ripe avocados that are soft so that you can smash them without any effort. The best way to ensure that an avocado is ripe is to press it gently; if it doesn’t yield easily, it means you have to wait another day or two. I always prefer to buy avocados that I know I am going to use the same day or the next; it keeps me from needing to guess their ripeness.
Lemon – you will need the juice of one whole lemon to keep the avocados from browning.
Coriander leaves – a handful
Onion – 1 small piece finely chopped
Jeera powder – 1 tsp
Green chillies – 1 or 2 small ones, finely chopped
Salt – 1/2 tsp
Ghee – 2 tbsp, for cooking
How to make Avocado Paratha
Cut the avocado in half, remove the seed and scoop out the avocado into a large bowl. Squeeze the juice of one whole lime to prevent browning and help the avocado retain its gorgeous green colour. To the same bowl, add 2 cups of atta (whole wheat flour). Sprinkle in 1/4 tsp salt and mix with your fingers.
Now, you can add any herbs and spices of your choice – I’ve used onions, coriander leaves and jeera powder. You need to remember that avocado on its own does not have any particular taste, so choosing the right flavour is essential.
Start bringing the ingredients together to make the dough. You will notice that the avocado is sufficient to bring the dough together. If you feel the dough is too dry, you can sprinkle some water. But from my experience, the dough will not require water at all.
Allow the dough to rest for at least 20 minutes. (I would recommend no more than two hours, because you might notice some browning after a while – this is why it is important to add lots of lime juice to the avocado before kneading the dough.)
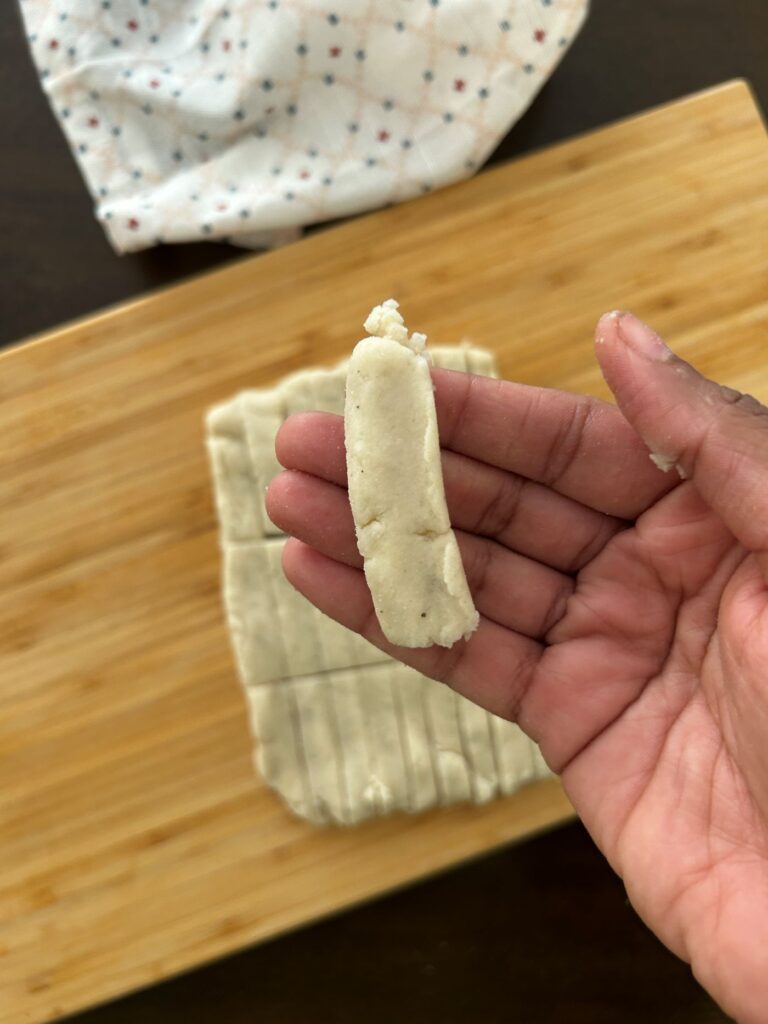
Portion the dough into equal-sized balls. Flatten the avocado paratha ball onto a plate of flour and do the same to the other side.
Roll the dough gently with the rolling pin, constantly dusting it with flour so that the paratha does not stick to the surface. Roll out all the parathas and keep them ready.
Place a tawa on medium flame and place the first paratha. When you notice small bubbles on the surface, flip to the other side and apply ghee. After a minute, flip back, and cook the paratha on both sides until you can see that the paratha is cooked.
Serving Suggestions
You can serve avocado paratha with curd and mangopickle.
Shelf Life and Storage
You can make the dough and store it in an airtight container for up to a day. Once the parathas are made, you can store them in a hot case for up to half a day. These parathas store well in lunch boxes too.
If you are looking for more Paratha Recipes, please click here to find the recipe you are looking for.
Please do follow me on Instagram and Facebook and do subscribe to my channel on YouTube. Thank you so much!
Recipe
Avocado Paratha
A soft Indian flatbread made with wheat flour, avocados, coriander leaves and spices
Keerai Molagootal is a classic Palakkad spinach lentil dish made with leafy greens, tur dal and a coconut masala paste.
This Keerai Molagootal is a staple of Palakkad Iyer cuisine—a gentle, home-style lentil and spinach curry that embodies the culinary cross-section of Kerala and Tamil Brahmin traditions. This dish is made with creamy tur dal, tender blanched spinach (or keerai), and a freshly ground masala built on sweet coconut and warming spices.
As a signature recipe from the Palakkad district of Kerala, it offers a subtle, no-onion, no-garlic (sattvic) flavour profile.
For an authentic experience, Keerai Molagootal is typically paired with a sharp, tangy accompaniment like Puli Inji or Puli Kaachal
I make this dish regularly on Sundays when I have the time to process the spinach and grind the masala.
A Note on the Name: The term Molagu in Malayalam means pepper. Historically, pepper was the primary heat source for this dish. Over time, as red chillies became common across the subcontinent, they gradually replaced pepper, defining the dish we know today.
Ingredients for Keerai molagootal
Spinach is the main flavour of this dish. You can use normal Palak or any local keerai. I use Dantu soppu or green amaranthus leaves also along with spinach.
Tur dal – for a family of 3, you will need 1/2 a cup of uncooked tur dal that will become almost 1 cup of cooked dal.
For the masala – you need grated coconut, red chillies, pepper, jeera and split urad dal. The urad dal helps in thickening the lentil curry, while the rest of the ingredients form the base flavour for the dish.
For the porichu kottal (tadka)- coconut oil, mustard seeds and dried red chillies. (I usually don’t temper red chillies since I’ve not seen my mum do it, but there are many who temper them along with the mustard seeds)
How to make Palakkad-style keerai molagootal?
I have to say that keerai molagootal does take a little of your time to prepare, which is why I usually reserve it for Sundays when there isn’t a rush.
Soak tur dal for 30 minutes, wash the dal and pressure cook for 3-4 whistles. The dal should have a mushy texture so that it blends well in the dish.
While the dal is cooking, you can wash the spinach or any leafy greens of your choice thoroughly three times until the water runs clear. Place a pot of water on the stove and bring it to a rolling boil. Add the washed leaves to the water and blanch them. Remove the greens once you see they’ve changed to a darker shade and they go limp in the water. Add the blanched leaves to a pot of cold water or even an ice bath to stop the cooking process/
Once the greens are cool, grind to a smooth paste.
To make the base masala – place a pan on medium heat, add urad dal, red chillies, pepper and jeera. Once the urad dal is brown, turn off the heat and let it cool down. To this pan, add the grated coconut and let the coconut roast in the residual heat.
Grind these ingredients in the small mixer jar into a smooth paste.
Making the molagootal
Place a pot or a deep vessel on a low-medium flame. Add a teaspoon of coconut oil and to that add mustard seeds, asafoetida and split urad dal. You can also add round red chillies. Once the mustard seeds stop sputtering, add the coconut paste along with some water. Let this simmer on a low flame for 4- 5 minutes.
Next, add the cooked and mashed tur dal and the spinach puree. Add 1/2-3/4 tsp salt and mix well.
Turn off the heat once you bring the molagootal to a gentle simmer.
Serving suggestions
You can serve Keerai Molagootal with Puli Inji, Nelikka Arachukalakki and Kerala Pappadam to amke a classic palakkad style meal.
Shelf Life and Storage
Keerai molagootal will stay on the shelf for a day, but its best to put it in the fridge right away after cooling if you are going to eat it later. As it contains coconut, it might spoil if left out for a long time.
If you are looking for more Curry Recipes, please click here to find the recipe you are looking for.
Please do follow me on Instagram and Facebook and do subscribe to my channel on YouTube. Thank you so much!
Recipe
Keerai Molagootal
Keerai Molagootal is a classic Palakkad spinach lentil dish made with leafy greens, tur dal and a coconut masala paste.
Pluck the leaves of the spinach. Wash them thoroughly in water until the water runs clear.
Place a pot of water on the stove and bring it to a rolling boil. Add the washed spinach to the water and allow it to blanch. You know the spinach is ready when the colour of the spinach darkens and the leaves wilt.
Remove the leaves with tongs or a slotted spoon and put it in an ice bath or a bowl of cold water immediately. Let it cool.
Once the spinach is cool, grind to a smooth paste.
Cooking the dal
Soak Tur dal for 20 minutes (or even over night), wash and place in the pressure cooker with 2 inches of water above the dal.
Pressure cook for 3-4 whistles. The texture of the dal should be soft and mushy. This will help in blending it well with the dal.
Once the pressure cooker has cooled, remove from the cooker and give the tur dal a mash and bring it to a mushy texture.
Making the masala
Place a pan on medium heat. Add red chillies, pepper, jeera, split urad dal and red chillies and toast them until the dal turns brown. This should take 5 minutes.
Turn off the pan and add the grated coconut. Let it roast in the residual heat.
Add these ingredients to the mixer jar and grind to a smooth paste with some water.
Making the Keera Molagootal
Place a large pot or a deep vessel on medium heat. Add a teaspoon on coconut oil and to that add mustard seeds and split urad dal.
Once the mustard seeds stop sputtering, add the coconut masala along with some water. Let this simmer for a few minutes – 4-5 minutes; until the raw smell of the masala goes away.
Add the cooked dal and the pureed spinach to this along with ½ tsp of salt and mix well. Do a taste test and ensure the salt levels are ok.
Let the Molagootal come to a slow boil. Turn off the heat.
Serve Keerai Molagootal with Puli Inji and Pappadam.
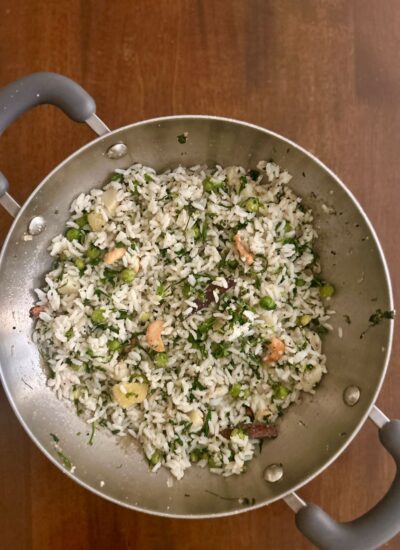
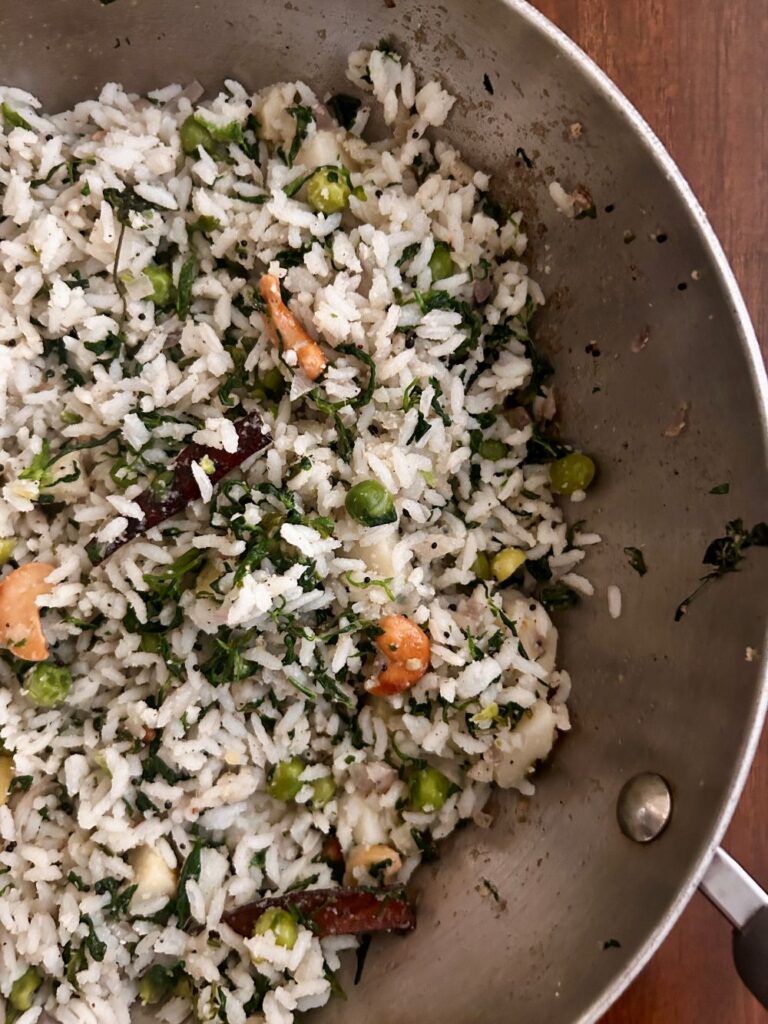
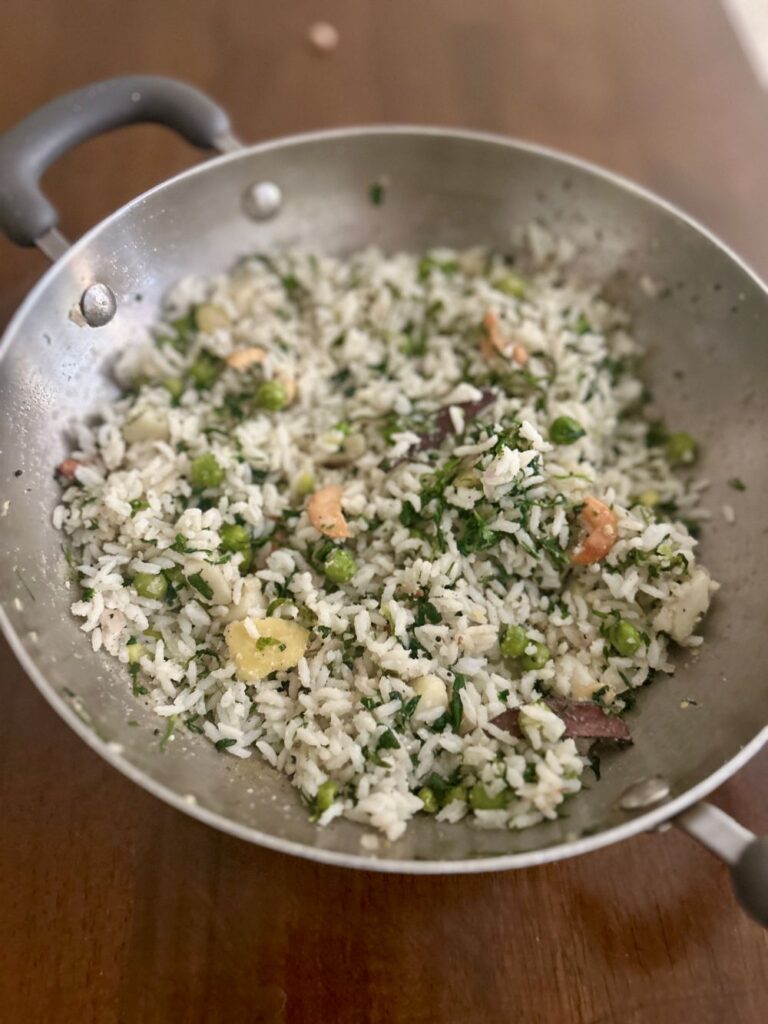
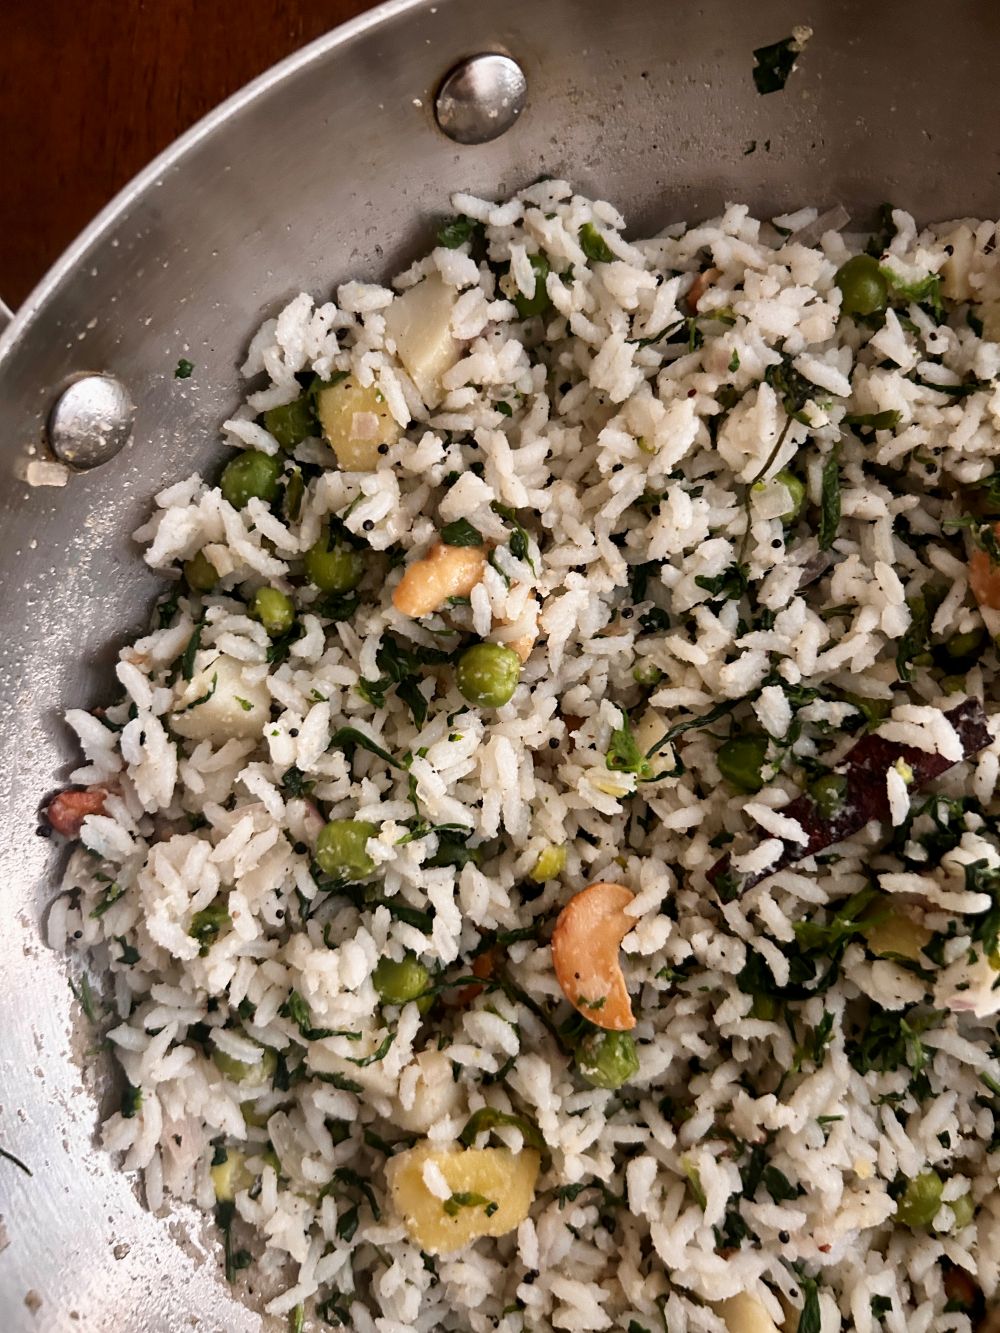
Methi Rice is a flavourful rice dish prepared with methi leaves, vegetables, and rice.
Methi Rice is a dish prepared with methi or fenugreek leaves, vegetables, coconut and rice.
This recipe of methi rice is a Karnataka version prepared with a base masala of coconut, green chilli, ginger and garlic. Several rice-based dishes in Karnataka have this combination of masala to flavour the methi pulao.
This methi rice goes very well with any form of raita along with papad or chips.
This dish also goes by the name of Methi Pulao, methi leaves rice.
Ingredients for Methi Rice Recipe
Fresh Methi Leaves – 1 big bunch. Always pick a bunch that has all green leaves, avoid buying the ones with the yellow leaves.
Vegetables – Potatoes and peas – This is a classic combination of methi, potatoes and peas.
Rice – I like to use Sona masoori rice, but you can also use basmati rice.
Whole Spices – bay leaf, cloves, star anise
Coconut, green chilli, ginger and garlic – these 4 form the base masala for the rice. If you do not have grated coconut, you can always use chunks. Before you add the other ingredients to the masala, pulse grind the coconut chunks to a grated texture to avoid coconut balls in the masala.
Cooking oil – I almost always use groundnut oil, but gingelly (sesame) oil will taste great as well.
Spices – Mustard seeds
How to make methi rice?
The main arduous task in making this rice will have to be plucking the leaves and washing it. This will take roughly 30 minutes. Wash the leaves thoroughly, allow them to partially dry and chop into small pieces.
Wash your rice and add water in 1:2 ratio and pressure cook the rice. Once the pressure cooker has cooled, remove the rice and spread the rice on a plate to let it cool down.
Into a small pressure cooker, add frozen peas, a potato (peeled) diced into two along with 1/2 tsp salt. Pressure cook for 3 whistles and let the pressure come down naturally. If you are boiling the vegetables on the stove, you can first add diced potatoes along with salt into boiling water and allow it to simmer until cooked. Add the frozen peas when the potatoes are almost cooked, and cook them for another 2-3 minutes. Remove the potatoes and peas from the boiling water and let it cool down.
To the small mixer jar, add grated coconut, green chilli, ginger and garlic. Grind it into a smooth paste.
Place a kadai on medium heat, pour in 2 tbsp of cooking oil. Next, add the whole spices to the oil. Let the spices release their flavour into the oil. Next, add cashew nuts and roast until soft.
Now, add the coconut masala that you’ve prepared and let it cook down until all the moisture is gone. Do this slowly on a low flame, allowing the oil to come out once the moisture is gone.
Next, add the chopped methi leaves along with 1/4 tsp salt. The leaves will wilt in less than a minute.
Finally, add the cooked rice and mix thoroughly. Adjust salt levels.
Serving Suggestions
Methi rice goes very well with onion raita and potato chips. This is the combination that I love to make every single time. Tomato ratia along with papad is also another good combination. But always make sure to serve it with a curd-based side dish.
Shelf Life and Storage
Methi rice is an excellent tiffin box item for both kids and adults. It tastes great even when cold. Since it has coconut, it’s best to consume it at the mealtime that you intended it for. If you make it ahead of time, allow the rice to cool down and store it in the fridge so that you can reheat it later. Reheat only once.
If you are looking for more Rice Recipes, please click here to find the recipe you are looking for.
Please do follow me on Instagram and Facebook and do subscribe to my channel on YouTube. Thank you so much!
Recipe
Methi Rice
Methi Rice is a flavourful rice dish prepared with methi leaves, vegetables, and rice.
Pluck the methi leaves, wash them thoroughly and chop into small pieces.
In a separate pot or pressure cooker, boil potatoes and peas with a little salt, let it cool down and chop the potatoes into small cubes.
Make the masala paste of coconut, ginger, garlic and green chillies in a mixer into a smooth paste.
To a pan, add oil – the whole spices, mustard seeds and cashew nuts. Let the cashew turn golden,
Next, add the onions and saute until soft. To this, add the ground coconut paste and let it cook until all the moisture evapourates and the oil comes out.
You can now add the chopped methi leaves along with a 1/4 tsp salt and stir until the methi leaves cook down.
Add the potatoes and peas and mix well. Sprinkle in some pepper if you want more heat.
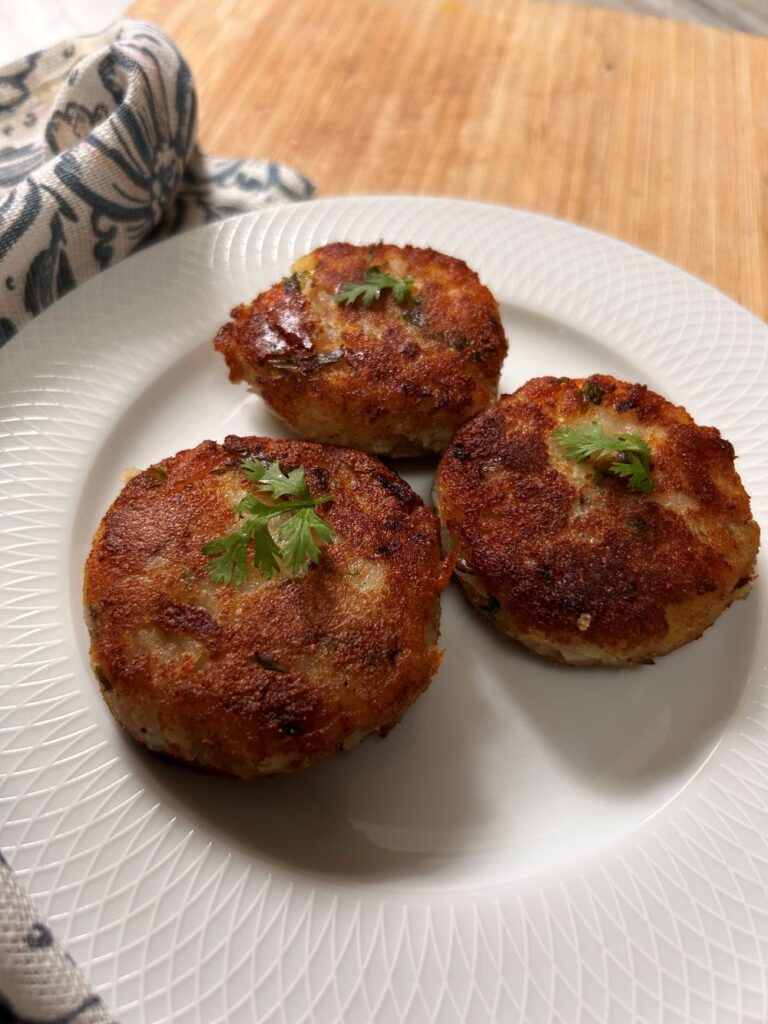
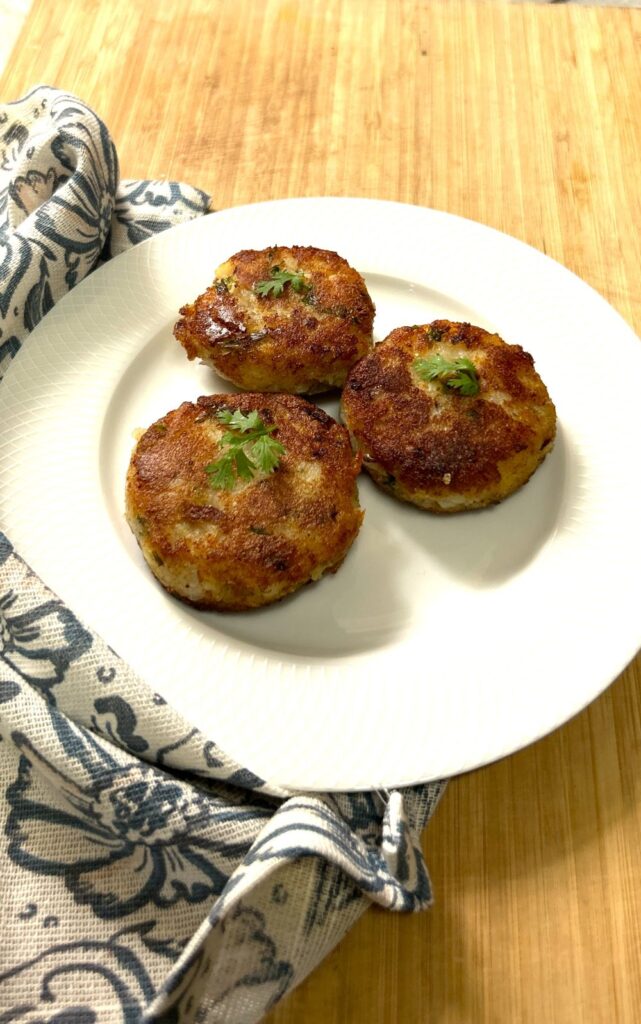
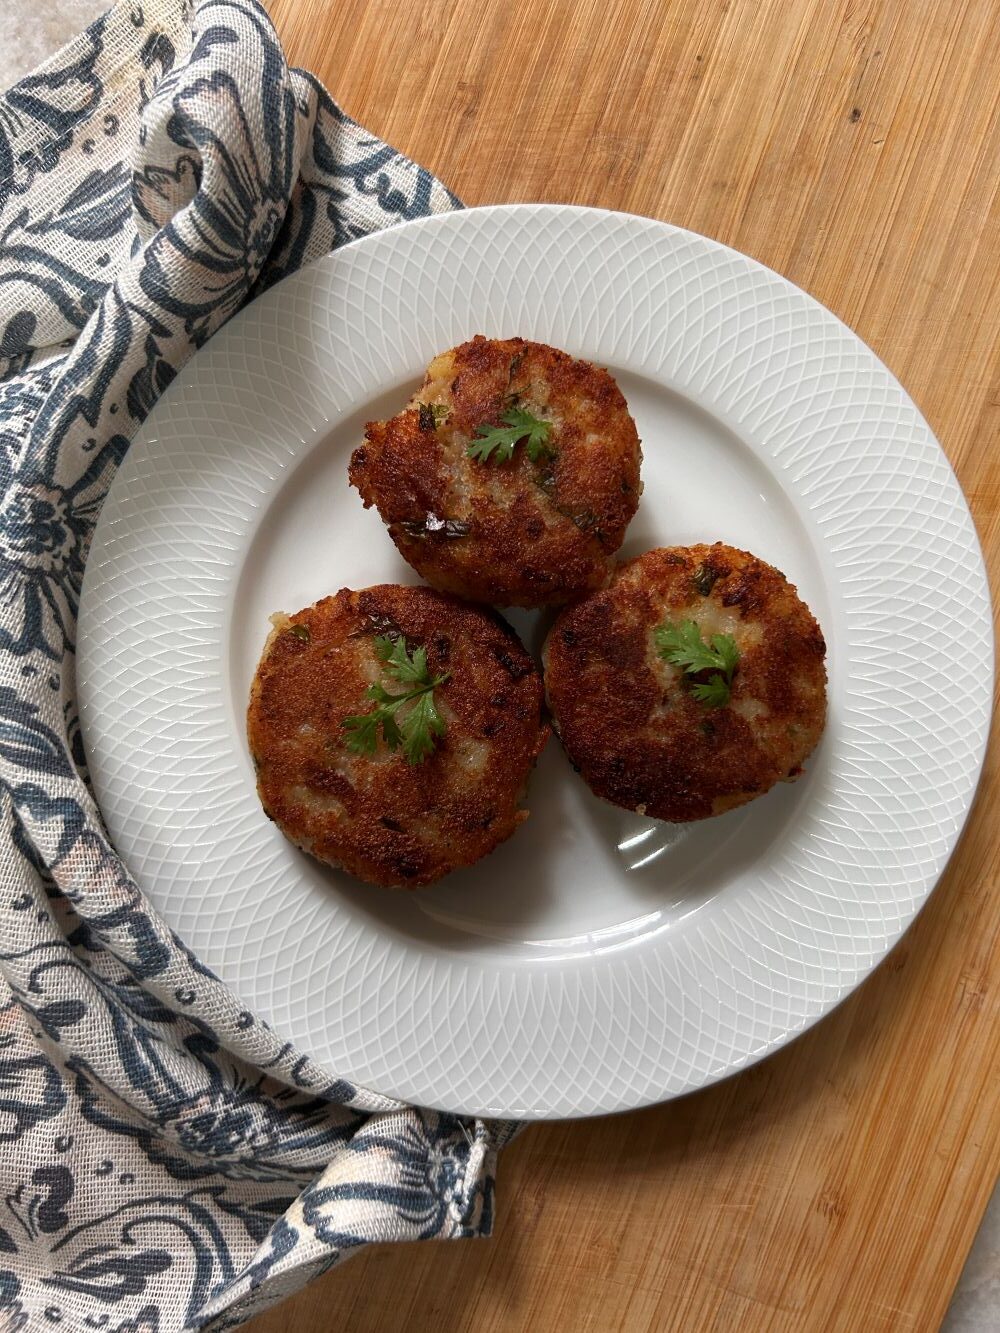
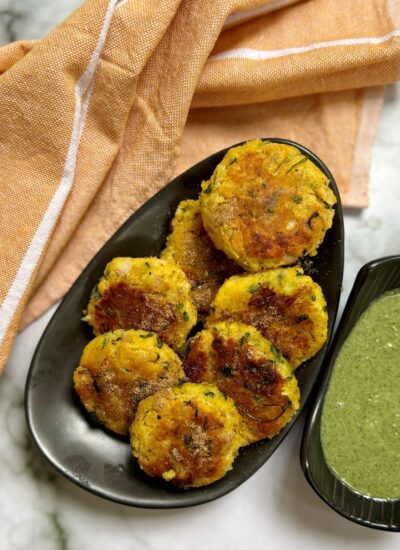
Aloo Tikki – an Indian cutlet made with spiced mashed potatoes and fried to a golden crisp!
Aloo Tikki is a popular North Indian street food made with mashed potatoes, spices, and herbs, shallow-fried until crisp and golden.
It is a popular chaat dish usually topped with diced onions, coriander along with tamarind chutney and green chutney and garnished with sev.
They also go by the name of Aloo Cutlets or Potato cutlets.
You can make the patties and put them in the freezer for up to a month and make fresh Aloo cutlets whenever you want.
Ingredients for Aloo Cutlet
Potatoes – You will need 3-4 medium-sized potatoes or 3 large potatoes to make 6 cutlets.
Breadcrumbs -you can either buy them from the market or make them at home in an air fryer. Just place 2-3 pieces of bread in an air fryer at 180C for 5 minutes. Once done, crush the bread into crumbs.
Spices and Herbs – Coriander leaves, green chilli, Garlic powder, Salt and Pepper. You can even add onion powder, turmeric, red chilli powder depending on the flavour you want in your tikki.
Cooking oil – I mostly use groundnut oil for cooking and frying. But you can use any oil that you like.
How to make Aloo Tikki or Aloo Cutlet at home?
Start off with washing your potatoes, cutting them in half and pressure cooking them for 3 whistles. Once the pressure is down, remove the cooked potatoes from the cooker and peel the skin.
When the potato is warm, mash into a smooth texture. You can now add the breadcrumbs, coriander leaves, green chillies, garlic powder, salt and pepper. Garlic powder is optional, but if you have it, please do add since it gives a lovely flavour.
Mix it really well and make sure that there is no moisture in the potato mash. If the potato mash still feels wet, add more breadcrumbs to remove the moisture. This step is important because the breadcrumbs bind the whole mixture together. If the tikkis have moisture in them, they tend to break apart when you shallow/deep-fry them.
Make equal-sized balls with the potato mixture. Flatten the balls and shape them like tikkis or cutlets. (Press the potato ball and give it a disc shape). Place them all on a plate and place it in the fridge for a minimum of 30 minutes, but overnight would be best.
You can either choose to deep-fry or shallow-fry the tikkis. If you are going to shallow fry, place a flat tawa or pan on medium heat and add enough oil to cover the base of the pan – less than 1/2 an inch.
Place the cooled tikkis into the oil slowly, giving them enough space in between to cook. Pour oil from the sides of the pan onto the tikki in order to get an even golden texture. Shallow fry for 3 minutes on each side on a low flame until both sides are golden brown.
Remove from the oil and place it on a kitchen towel for the excess oil to drain.
Serving Suggestions
You can serve Aloo Tikki with Imli chutney and Green Chutney along with a garnish of onions and coriander leaves to serve an Aloo Tikki Chaat.
You can also make it a cool Dahi Aloo Tikki with sweetened curd or Channa Aloo Tikki with a flavourful channa masala.
Storage and Shelf Life
These tikkis can stay on the shelf for more than half a day since they are shallow/deep fried. You can store them in the fridge for up to a couple of days.
You can prep the Aloo tikki mash, shape them and place them on a plate. Put them in the freezer for an hour, and from the plate remove and store them in a food grade zip-lock bag. You can store them in the freezer for up to a month.
If you are looking for more Chaat Recipes, please click here to find the recipe you are looking for.
Please do follow me on Instagram and Facebook and do subscribe to my channel on YouTube. Thank you so much!
Recipe for Aloo Tikki
Aloo Tikki
Aloo Tikki is a cutlet made with potatoes and spices, served with a mint or tamarind chutney
Wash potatoes and dice them into 4 quarters. Place them in a small pressure cooker with about ½ inch of water at the bottom. Let the cooker release 2 whistles, lower the flame and let it simmer for 5 minutes. Turn off the heat and allow the pressure to release naturally.
Once the pressure cooker is cool, remove the potatoes from the cooker and peel the skin.
Add the peeled potatoes into a large bowl and sprinkle in the breadcrumbs and all the spices and herbs. Give it all a good mix. The texture of the potato mash should be dry. If you feel the potatoes are moist, add more bread crumbs.
Roll the spiced potato mash into equal sized balls. Flatten them to make them look like round cutlets. Place them on a plate and cover it with another plate. Keep it in the fridge for a minimum of 30 minutes. The best option would be to leave them in the fridge overnight.
Place a tawa on low-medium flame and add some oil. Once the oil is warm, place the aloo patties or tikkis on the warm oil. They will sizzle, so be careful.
Shallow fry them until one side turns brown. Flip and cook them on the other side too. When you do the flip, if the Aloo tikki falls apart, it means that there is too much moisture in the tikki and you will need to add more breadcrumbs to the rest of the mixture. (You can redo the rest of the tikkis with extra breadcrumbs and keep them in the fridge again – else you will have disintegrated tikkis)
With a spoon, pour some hot oil to the sides of the tikkis by scooping oil from the sides of the pan.
Once the tikkis are golden brown on both sides, remove them from the heat and place them on a plate covered in kitchen napkins to help absorb the excess oil.
Serve Aloo Tikkis hot with a side of Mint Chutney and Imli Chutney
Coriander Upma is a semolina (Rava) porridge with South Indian spices, coriander leaves, chillies and vegetables – perfect for breakfast, snack, or even a light dinner.
I love Upma- I can eat it any time of the day. But I am sure there are a lot of you will disagree with this statement. I know a lot of them who hate it from the core of the being – yes, that’s a bit of an exaggeration, but that is the feeling you get from them. Perhaps they hated it because they probably ate a poorly made Upma the first time. The not well made texture could either have been how lumpy it was, how dry it was or how liquidy it was. Each of us prefers one texture over another, so this is probably the major determinant in the love for upma too.
Corainder Upma
Coriander Upma is a South Indian dish prepared with rava (semolina), coriander, and green chillies, among other ingredients.
This upma has a fresh flavour rendered from the coriander-chilli paste used as the base for flavouring it.
I’ve made this upma for breakfast and dinner and sometimes packed it in the lunch box as well.
Coriander Upma is just a variation of the normal rava upma with the addition of a coriander-chilli paste.
A small history of Rava Upma
Rava is a byproduct of the milling process of wheat. During the Second World War, the South Indian population had a shortage of rice in their homes as rice was being routed to the war effort. To encourage South Indians, who are mainly rice eaters, to eat wheat was quite an ask. Newspapers and other printed media encouraged home cooks to use wheat in the form of a finely ground but coarse texture that somewhat resembled rice. Home cooks were taught how to make it with flavors that were recognizable in the South.
Upma was always part of South-Indian menu but coarsely ground rice was used – Arisi Upma or Thari Akki upppittu. This new ingredient – Rava or semolina was used as an alternative in making the same dish.
Ingredients to make Coriander Upma
Rava – If you buy your groceries from a local corner shop, you get two varieties of it. The first is the local Rava or Bombay Rava or sooji which has a finer texture and white in color that you can use for Upma. The other is Bansi Rava or chiroti rava that have a brown tinge to it and slightly bigger grain than the local rava. Both ravas can be used to make Upma but the texture most of us are used to at home is the local rava that has slightly smaller grain.
Water – I mention water because there are a couple of replacements you can use to enhance the flavor of upma.
Vegetable Stock
Tomato Puree
Oil/ Ghee
I use gingelly oil for almost all cooking at home. In place of gingelly oil, you could use sunflower oil, groundnut oil, or even ghee for a rich flavor.
Coriander and Green Chillies – These two ingredients are the main flavouring agents in this dish. They add a fresh and zesty flavour to an otherwise bland dish.
Khara baath literally translates to “Spicy baath”. This is a variation of Upma quite popular at home.
Tomato Upma
This is the version made at most homes with a couple of finely chopped tomatoes. Add them after the onions and saute them until soft and mushy. Continue as per the recipe.
Note to beginners
For those who are making it for the first time, a simple upma recipe should consist of the least number of ingredients – Rava, hot water, oil, mustard seeds, onions, green chillies, curry leaves, and salt. It is a no-frills version with less ingredients but will still taste great.
Just gather all your ingredients and follow the steps as given in the recipe box below.
How to make Coriander Upma?
Coriander upma is just another variety of the normal upma we make at home. The only step you need to do in preparation is to make a paste of coriander leaves and green chillies. These two ingredients give the upma the vibrant green colour.
Please see the recipe box below for the full recipe.
Shelf Life and Storage
Coriander Upma can stay on the shelf/ table for half a day. In the wintertime, it will be fine if kept outside. In the summer, you might want to put it in the fridge.
You can make and store it in the fridge for up to 2 days. After that, it might not taste that great but it wouldn’t have gone bad per se.
Recipe
Coriander Upma
A savoury rava porridge – makes for a brilliant breakfast, evening snack or light dinner
The first step is to make the coriander and chilli paste. Take the smallest jar of the mixer, add 2 small green chillies along with a whole handful of coriander leaves along with the thin stems. Grind it to a smooth-ish paste.
Cut all the vegetables, curry leaves and cashew nuts and keep them handy next to you.
I prefer to use hot water. So I always have a liter of water ready next to me while making upma.
How to make Upma
Place a pan on medium flame, add the cooking oil. Once the oil is warm, add the mustard seeds.
Once the seeds start sputtering, add chana dal and cashews. (I add a lot of cashews cos my kid loves it – this is completely optional)
Once the dal and cashew nuts are toasted in the oil, add curry leaves, ginger and green chilies. Reduce the flame to low and stir them.
Next, add the finely chopped onion in the pan, and saute it until the onions are translucent (cooked).
Add the diced vegetables to the pan now; they will cook fast – maybe just 2 minutes. (This is an optional step – you can skip this if you are not planning to add any vegetable)
Once the vegetables are cooked, add the rava and give it all a good mix. Roast the rava along with the oil and the onions for at least 4-5 minutes so that the oil absorbs well into the rava.
Now, add the coriander-chilli paste and mix well with the rava.
Add hot water slowly from the sides of the pan, while stirring to ensure that rava does not turn into clumps. (It will mostly not happen, because of having sautéed the rava in oil)
You will see that Upma has started to come together, all that needs to happen is for the rava to cook. The cooking will take place rather quickly so, do make sure to keep stirring until all the water gets used up.
If you feel that the rava has not cooked but all the water is used up, you can add some more hot water. Rava usually tends to absorb any amount of water.
Once you see the rava cooked, switch off the flame. Close the lid of the pan and let it steam-cook for another 10 minutes.
After ten minutes, squeeze in lemon juice and give it all a good mix.
Serve the delicious plate of Coriander Upma with Coconut chutney or you can eat it as is. You could also add a teaspoon of ghee on top – now that is heaven!
Keyword Breakfast, Upma
If you are looking for more Tiffin Recipes, please click here to find the recipe you are looking for.
Please do follow me on Instagram and Facebook and do subscribe to my channel on YouTube. Thank you so much!
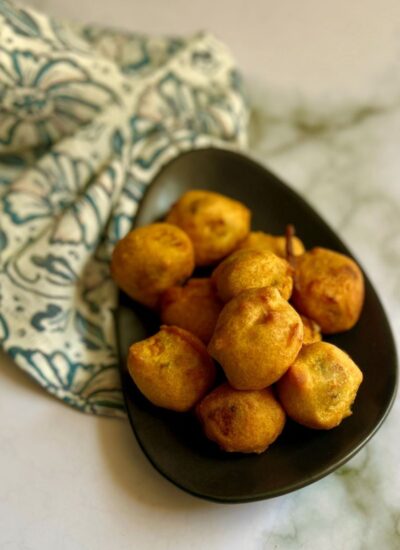
Potato Bajji or Aloo Pakoras are potatoes coated in gram flour batter and deep fried to a crispy perfection.
Aloo Pakora
Aloo Pakora or Aloo Bajji is a crispy potato fritter made with sliced potatoes coated in a gram flour batter and spice powders.
The words pakora, pakoda, bajji or bhajiya are used interchangeably by people from the South or North of India.
Depending on the region you are from, the spices and additions to the batter vary, but the basic recipe of sliced potatoes in besan batter deep fried to a crisp remains the same.
Ingredients for Aloo Bajji
The first ingredient is, of course, potatoes!!
The ingredients for the batter are besan / kadalamaavu and riceflour. Rice flour helps get that crispy texture in the bajjis. You can also use cornstarch if you don’t have rice flour.
One medium-sized potato will give you an average of 10 bajjis. So, for one potato, you can use 3 tablespoons of gram flour and 1 tablespoon of rice flour.
The next part is the seasonings. I am going to give you an exhaustive list of spices and herbs that you can use while preparing the batter. You can choose a few ingredients from this list and add them to your besan batter.
Spice Powders
Turmeric powder
Red chilli powder
Garam Masala powder
Coriander powder
Jeera powder
Saunff / Fennel powder
Asafoetida powder
Amchur powder (dried mango powder)
Whole Spices
Carom seeds/ Ajwain seeds (crushed)
Coriander seeds (crushed)
Fennel seeds (crushed)
Pepper (crushed)
Herbs
Coriander leaves, finely chopped
Mint leaves, finely chopped
Green chillies, finely chopped
Ginger, grated
Garlic, grated
If you like a crispy bajji, you can add a pinch of baking soda as well. If you skip the baking soda, the bajjis can still be crispy when you deep fry them for a long time on a low-medium flame.
How to make Aloo Pakora at home?
The first step is to mix the ingredients for the batter.
To a bowl, add the gram flour, rice flour and salt. Mix them well. Add the spices that you want in it – i usually add turmeric powder, Kashmiri red chilli powder and asafoetida. These are the spices i grew up with. Sometimes when I have them, I also add some ginger garlic paste, coriander leaves and fennel seeds. Add some water and make the batter. It should thick enough to coat the vegetables but thin enough to not feel like you are only eating batter and not the potato – do you know what I mean?
The next step is to wash the potatoes, peel and slice them into small discs. You can also use a mandolin slicer and get them in equal thickness. Toss the potato slices in the batter, and now let’s get the oil ready.
Place a kadai on a low-medium flame and add the oil. I mostly use groundnut oil, but you can use any oil of your choice. You know the oil is warm when you drop a small blob of batter and the batter immediately comes up. If that blob is still at the bottom, it means that the oil needs a little more heating. Let the flame always be at medium flame.
Once the oil is hot, pick a piece of the sliced potato and coat it with batter. Make sure to coat both sides before dropping it in the oil. You can add about 4 pieces at a time so as to not crowd the oil and allow breathing room for the pakora to fry.
Flip the aloo bajjji over and fry on both sides until they look golden and crispy. For one round of bajji making it should take roughly 4-5 minutes.
Bajjis store very well and last for a day in any temperature outside since it is deep fried. You can make large quantities of Aloo Pakoras and serve at a later time.
If you are looking for more Potato Recipes, please click here to find the recipe you are looking for.
Please do subscribe to my channel on YouTube. Thank you so much!
Recipe
Aloo Pakora | Potato Bajji
Potato Bajji or Aloo Pakoras are potatoes coated in gram flour batter and deep fried to a crispy perfection.
Peel the potatoes and cut them into thin slices. Not too thin or too thick. Make sure to cut them all in the same size to ensure they cook evenly.
Once they are sliced, add them to a bowl of water and keep aside.
To make the bajji batter, add all the ingredients listed in the "for the batter section" – besan, rice flour, salt, turmeric powder, red chilli powder, asafoetida powder. Mix all the ingredients well with the help of a whisk.
Add water little by little to make a smooth batter. The batter should not be too thin. If it gets too thin, it will not stick to the surface of the potatoes. If the batter it too thick, you will get very "doughy" bajjis that won't taste great. Do a little taste test to ensure the salt and spice levels are to your liking.
Place a kadai on a medium flame and add the oil. I always take as small a kadai and as minimum oil as possible to avoid oil wastage.
Once the oil is warm, take a tablespoon of this warm oil and mix it into the batter. This step will help crisp up the bajjis.
To check if the oil is ready, do a drop test.Dip two fingers into the batter and slowly drop the batter into the oil – if the batter sticks to the bottom, the oil is not ready. Let it warm up for some more time. If the batter slowly comes up, the oil is ready. If the flame is on high, reduce the flame to a place between high and medium. If the batter comes up too quickly, it means the oil has overheated and you have to reduce the flame to low right away. Let the smoking stop and then you can begin making the pakoras.
Take a slice of potato and dip it in the batter on both sides. Slowly drop it into the oil. Fry all the potatoes in small batches without overcrowding the oil. This will help the bajjis cook through well. Once the bubbling stops on one side, with the help of a slotted spoon, turn the bajjis over to the other side to cook.
Once the bajjis have a nice golden colour, remove from the oil and place it on a plate lined with kitchen tissue. Continue this process until all the potato slices have been used.
Serve your hot Potato Bajjis with coconut chutney or eat it plain along with a hot cup of chai.
Keyword Evening Snacks, Potato recipes, Tea Time Snack
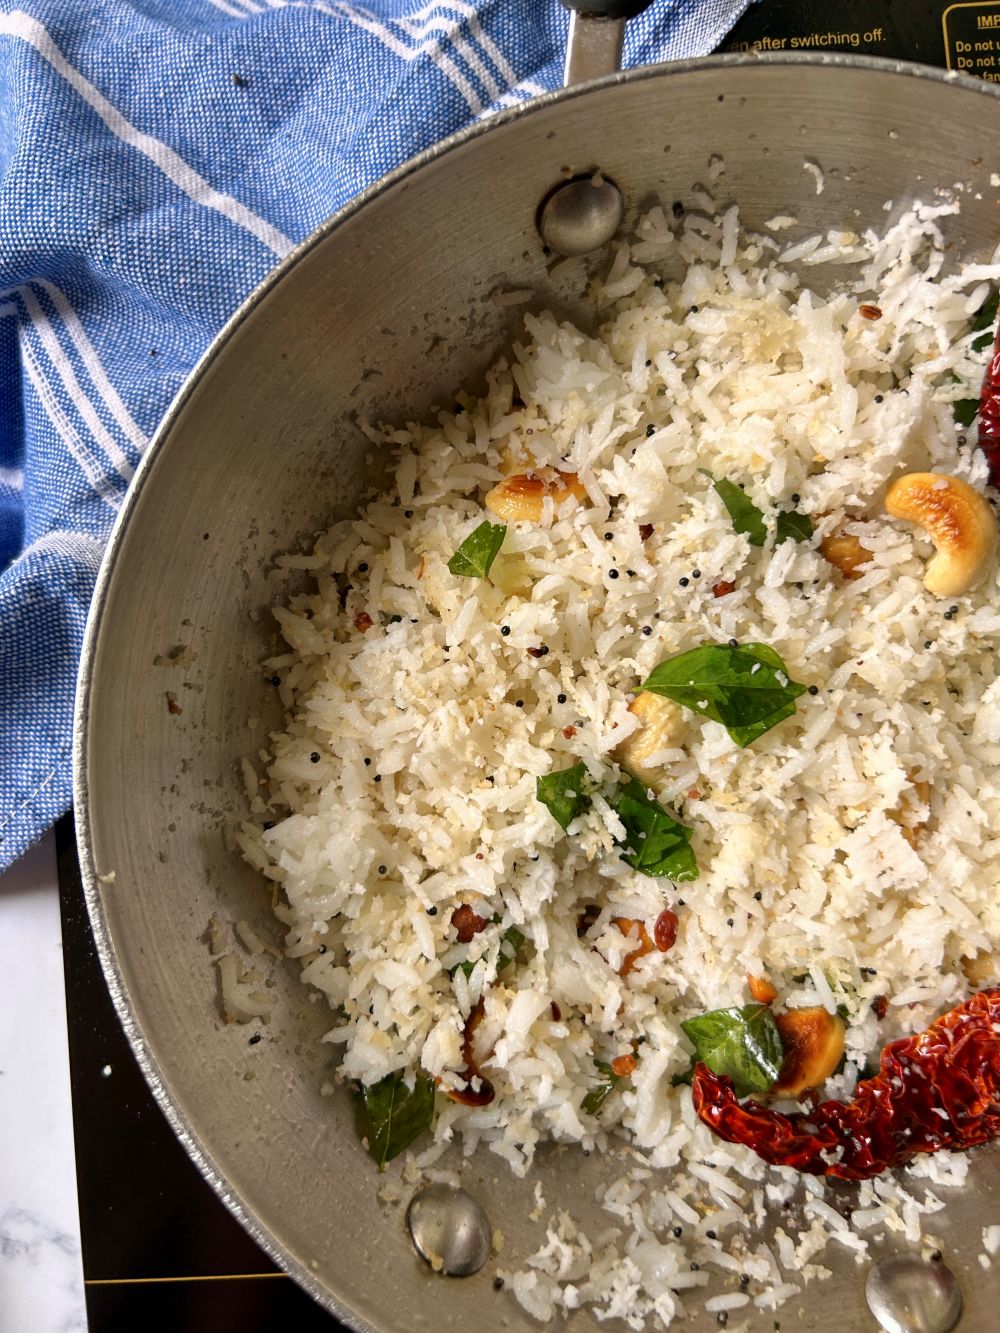
Coconut rice is a South Indian rice dish prepared with rice, coconut and a few spices. It has a nutty, sweet and fruity flavour from the coconut and a slight heat from the spices.
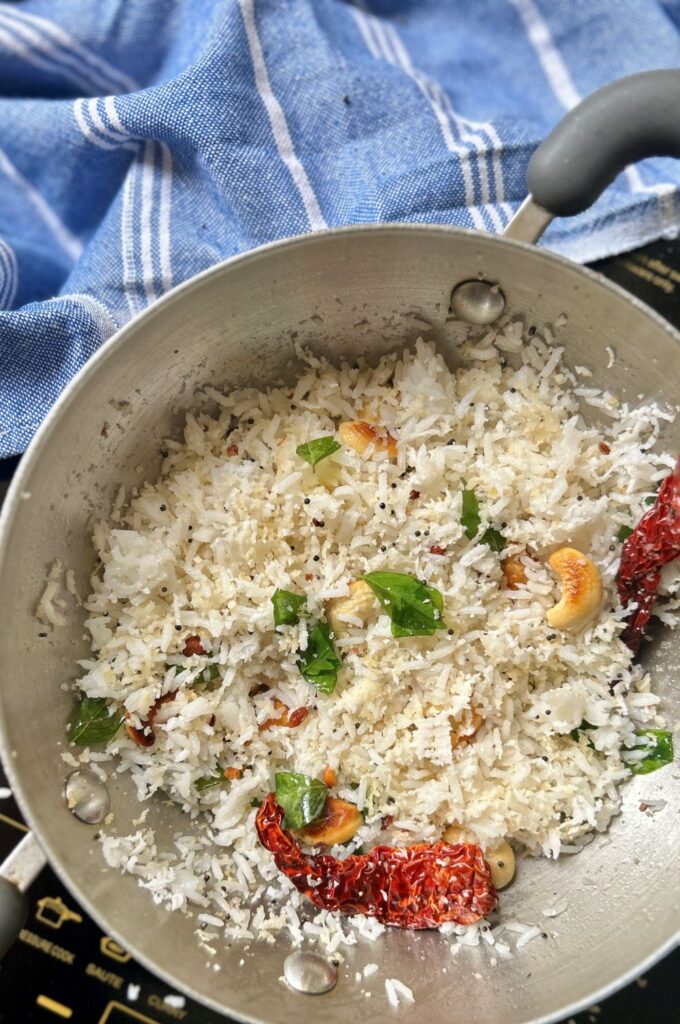
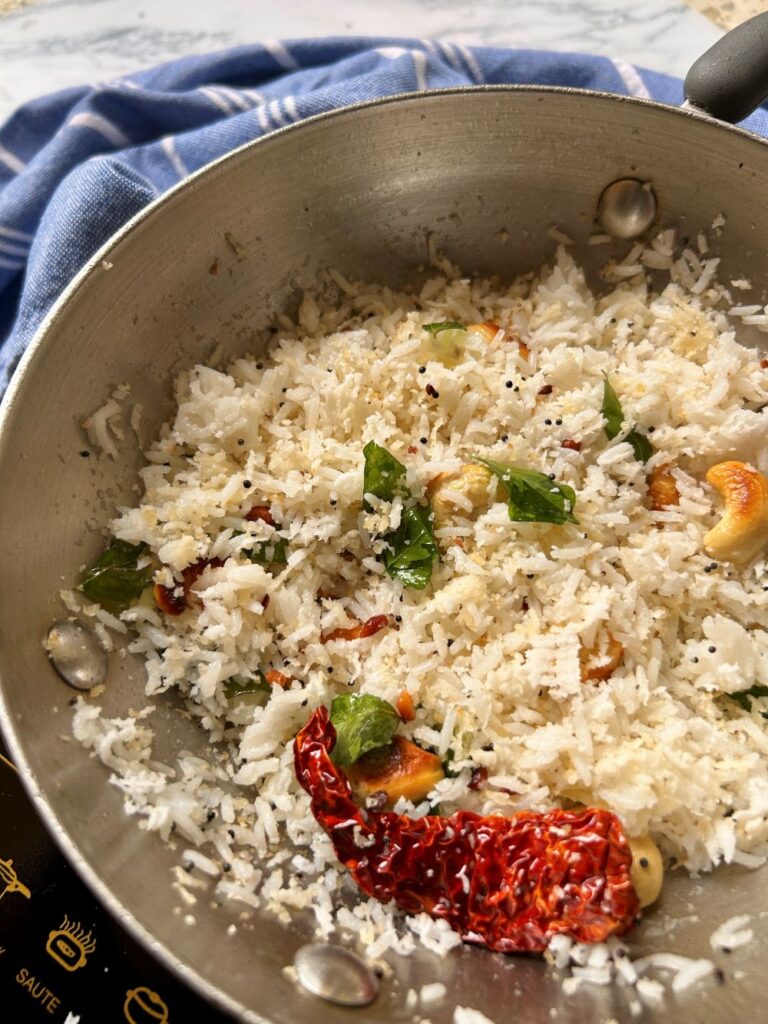
Coconut rice is a classic South Indian rice dish prepared with rice, grated coconut and a few spices. It tastes slightly sweet and nutty from the coconut and mildly warm from the use of red chillies and pepper.
Coconut rice also goes by the name of thenga sadam in Tamil or kai anna in Kannada.
I make coconut rice for lunch boxes as it stays well in the box well without going bad. but if you stay in a warm, humid climate, its best to avoid.
Ingredients for Coconut Rice
Grated coconut – 1 cup – you will use half of it for frying and half of it as garnish.
Cooked rice – I have used sona masoori rice and 1 cup (200g) measure of raw rice. This rice will expand once it cooks.
Spices and dals – mustard seeds, urad dal and channa dal – 1/2 tsp each.
Cashew nuts – 8-10 pieces
Curry leaves and red chillies – 1 sprig and 2 -3 pieces.
Oil – 1 tbsp
How to make Coconut Rice or Thenga Sadam?
The first step is to prep the two main ingredients – rice and coconut. It is really preferred that you use grated coconut. If you don’t have grated coconut, you can prepare it in the mixer jar. Take chunks of coconut and add them to the mixer jar. Using the pulse mode on the mixer, press 3-4 times to get the grated coconut texture.
Pressure cook rice in 1:2 ratio where for every cup of rice, you need 2 cups of water. First, wash the rice thoroughly until the water runs clear. Add the rice to a container and add 2 cups of water. Place this container in a pressure cooker and let 3 whistles pass. Turn off the cooker and let the pressure release naturally.
Once the pressure comes down, spread the cooked rice on a large plate to allow it to cool down. Cooling down will ensure that the rice doesn’t clump up.
To make the coconut rice, place a large kadai on a medium-high flame. Add oil and let it warm up. Once the oil is warm, add mustard seeds, urad dal, channa and cashew nuts and roast until slightly brown. (if using). Next, add the red chillies, curry leaves and toast it for 10 seconds.
Next, add half of the quantity of the grated coconut on a low flame until the coconut browns a bit. Next, add the cooked rice and mix well. You can now turn off the flame.
Add the seasonings – salt and pepper. Finally, add the rest of the grated coconut.
Take your time and mix thoroughly and adjust salt and pepper levels if required.
Serving Suggestions
You can serve thenga sadam with curd or any side dish that has a sour taste – kathrikka kozhambu
Storage and Shelf Life
Thenga sadam is best consumed within the same day, because coconut does tend to spoil quicker. But if you want to make it ahead of time, put it in the fridge and consume all of it once you reheat it. If you live in a warm and humid climate, best to make it for lunch and finish it all.
If you are looking for more Rice Recipes, please click here to find the recipe you are looking for.
Please do follow me on Instagram and Facebook and do subscribe to my channel on YouTube. Thank you so much!
Coconut Rice
Coconut rice is a South Indian rice dish prepared with rice, coconut and a few spices. It has a nutty, sweet and fruity flavour from the coconut and a slight heat from the spices.
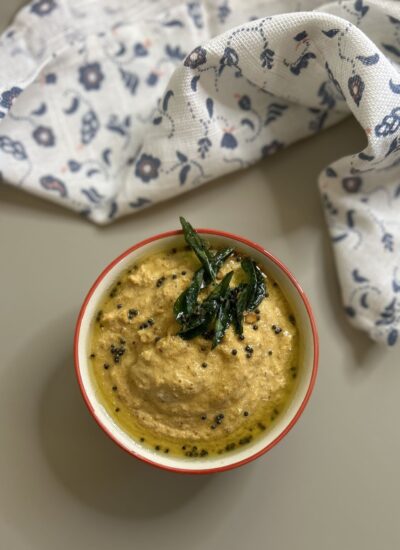
Coriander Chutney is a South Indian chutney made with coriander, tomatoes and a few spices. This is a special recipe since it outlines how you can recreate the taste of Murugan Idli coriander chutney in your house.
This coriander chutney is one that I have recreated from the many memories of eating at the Tamil Nadu’s famous Murugan Idli Shop. It’s a simple enough recipe, made within 20 minutes for your dosas or idlis at breakfast.
The chutney has coriander leaves and stems, tomatoes, channa dal, urad dal and dried red chillies as the principal ingredients.
While we all love our coconut chutneys, eating with a side of coriander is another joy by itself.
Pair this chutney with Idli, Dosa or even chapati for your breakfast or tiffin.
Ingredients for Coriander Chutney
The main ingredient is coriander. For this recipe, I’ve used 100g, a medium-sized bunch.
Tomato – I’ve used 2 small tomatoes.
Channa Dal, Urad Dal and methi seeds – one teaspoon each of channa dal and urad dal and 1/2 a teaspoon of methi seeds.
Dried Red Chillies – In this recipe I’ve used 4, but you can increase or decrease according to your taste.
Turmeric powder – 1/4 teaspoon
Tadka – 1 tsp oil, 1 tsp mustard seeds, 1 tsp urad dal and 1/2 tsp asafoetida powder.
How to make Murugan Idli Style Coriander Chutney
Cut out the roots of the coriander leaves and wash the leaves and stems thoroughly. Remove the thick stems, but retain the thin or slender stems for the chutney. Give it a rough chop.
Wash and dice the tomatoes into large chunks. Remove the stalks from the dried red chillies.
Place a pan on low- medium flame, pour in a teaspoon of oil. Now you can add the urad dal, channa dal, methi seeds and dried red chillies. Saute them until the dals turn slightly brown.
Now, add the tomatoes and let them cook for a couple of minutes. They don’t need to become mushy. To help quicken cooking, add 1/4 tsp of turmeric powder and salt.
Finally, add the coriander leaves and stems and give it a good mix. They will cook fast; in less than a minute. Turn off the heat and allow it to cool down.
Once the coriander and tomatoes are cool, add them to a mixer and grind to a smooth chutney-like texture. Add a little water if you want to adjust the concentration of the chutney according to how you like it.
Scoop out the chutney into a bowl and prepare to make the tadka.
Place the tadka pan on low-medium heat. Add a teaspoon of oil. Once the oil is warm, add the mustard seeds and urad dal. When the mustard seeds sputter, turn off the heat and sprinkle in the asafoetida powder.
Pour this tadka over the chutney and give it a good mix. Adjust the chutney for salt.
Serving Suggestions
Serve coriander chutney with dosa, idli or chapati for breakfast, lunch or dinner.
Storage and Shelf Life
This chutney stores well in the fridge for up to 4 days. But once you take it out of the fridge, try to finish it all in one go.
Store the chutney in a dry container for up to 4 days.
Coriander Chutney
If you are looking for more Chutney Recipes, please click here to find the recipe you are looking for.
Please do follow me on Instagram and Facebook and do subscribe to my channel on YouTube. Thank you so much!
Coriander Chutney – Murugan Idli Shop Style
Coriander Chutney is a South Indian chutney made with coriander, tomatoes and a few spices.
Aloo Paratha is an Indian flatbread recipe made with spiced potatoes, served with Indian pickle and curd
Aloo Paratha is a North Indian flatbread made with wheat flour and has a stuffing of spiced potatoes.
It’s consumed as a breakfast dish in the north of India, but it can also be a lunch or a dinner idea.
The spices used in the potato stuffing vary from state to state depending on the spices popular in that region.
People commonly serve it with white butter on top of the hot paratha, pickle on the side, and a cup of curd.
Ingredients for Aloo Paratha
Wheat Flour – We use wheat flour to make bread or roti. For the dough, the combination of wheat flour to water is 2:1. So for every 2 cups of wheat flour, you will be 1 cup of water to make the dough.
For the spiced potato filling
Potatoes – 3 or 4 medium to large sized.
Spices – turmeric powder, fennel powder and salt. – 1 teaspoon each
Coriander leaves – handful, finely chopped
Green chillies – 1-2, finely chopped
Onion – a small one diced, but this is optional.
How to make the most delicious aloo paratha?
Making the potato stuffing
Wash your potatoes thoroughly and cut them into halves. Place them in a small pressure cooker with 1/2 cup of water at the bottom. Close the lid and place the pressure valve. Allow for 2 whistles to pass and then simmer to the lowest flame. Let us cook on this low flame for 5 minutes. Turn off the cooker and allow the pressure to come down naturally.
Once the pressure of the cooker has come down, open the lid and remove the potatoes from the cooker. Peel the skin once you are able to handle the heat of the potatoes. Add the peeled potatoes to a bowl and mash them.
You can now add the spices – turmeric powder, fennel powder, salt, coriander leaves and green chillies. Give all the ingredients a good mix. Your potato stuffing is ready.
Portion them out and roll them into equal sized ball and keep aside.
Kneading the dough
Meanwhile, let’s prepare the dough. Take 2 cups of wheat flour in the large bowl. Add 1/2 tsp of salt and mix it well through the flour. Add a little water and start bringing the flour together with the water. Slowly add the rest of the water until the dough starts coming together. You’ll be tempted to add all the water at once, but I would suggest that you don’t – it will become one giant sticky mess.
Knead the dough until there are no cracks, and it is a smooth ball. Cover the dough and keep aside to rest for at least 30 minutes.
(Kneading the dough will take time. The longer you take the knead the dough, the softer your parathas will be. It’s worth the effort)
Rolling out the parathas
Take a small ball of dough – larger than a lemon but smaller than a tennis ball. Roll the dough between your palms until it’s a smooth ball. Dip the ball and flatten it on a plate of flour on both sides.
Start rolling out the dough. Once it reaches about 6-7 inches wide, take one ball of potato stuffing and place it inside the dough. Close the potato filling by stretching the edges of the dough and bringing them together on top until the filling is covered and encased in the dough. Pinch off any excess dough and keep aside.
Flatten this dough and dip it in flour once again on both sides. Gently roll out the dough all thin as you can. Keep sprinkling dough when you find dough sticking when rolling out.
Do this for the rest of the dough and potato fillings.
Cooking the parathas
Place a griddle on heat and allow it to warm up. Once the pan is hot, lower the flame and place on the rolled out aloo parathas. Flip the paratha after 20-30 seconds. You should see a few brown spots. Add a teaspoon of ghee to the top of the paratha that has the brown spots.
Flip the paratha again and you’ll see the aloo paratha smoke up – that’s the ghee that creates the smoking effect.
Smear some more ghee on the other side and flip it again so that both sides are smothered in ghee and cooked thoroughly. Once you see dark brown spots, it’s time to take it off the griddle.
Repeat the process for the rest of the rolled out parathas.
Serving Suggestions
The best accompaniment to aloo paratha is pickle, butter and curd.
Storage and Shelf Life
You can store aloo paratha is a casserole to keep it warm. It’s best to wrap it in a white muslin cloth so that it can absorb excess moisture.
Aloo paratha makes for a brilliant lunch box dish. It tastes great even when it’s cold. The more ghee you add, the longer the shelf life of the aloo paratha.
Aloo Paratha
If you are looking for more Paratha Recipes, please click here to find the recipe you are looking for.
Please do follow me on Instagram and Facebook and do subscribe to my channel on YouTube. Thank you so much!
Recipe
Aloo Paratha
Aloo Paratha is an Indian flatbread recipe made with spiced potatoes, served with Indian pickle and curd
Wash the potatoes and dice them in 4 chunks. Place them in a pressure cooker with half a cup of water and a teaspoon of salt.Pressure cook the potatoes for 3 whistles, lower the flame and allow to cook for another 2 minutes. Turn off the heat and allow the pressure to release naturally.
Meanwhile, take wheat flour or atta in a large basin. Sprinkle ½ tsp salt and mix it in the flour.
Add water gradually and bring the dough together. Knead the dough until you have a smooth dough. This process will take 7-10 minutes to complete. The longer you knead, the smoother and crack free your paratha will be.
Cover the dough and let it rest for the minimum of 30 minutes.
Making the potato stuffing
Remove the potatoes from the cooker and peel them. Add them to a bowl and mash until they are smooth.
Now, add the spices and herbs – fennels seeds, turmeric powder, coriander leaves, green chillies and salt. Mix the potato well with the ingredients you've added just now. Do a taste test to make sure the salt levels are up to your liking.
Roll the potato mixture into equal sized balls. They should be bigger than a lemon (limes) and smaller than a tennis ball. Keep aside. Now let's get the dough ready and roll out the parathas.
Rolling out the parathas and cooking them
With the rested dough, make 10 equal sized balls and keep aside.
Flatten the ball into a plate of wheat flour and coat on both sides. Roll it out until it's the size of a normal coaster.
Take one of the potato balls and place it in the center of the flattened dough. Close the dough over the potato stuffing and pinch it shut. You can remove any excess dough.
Flatten it again into the plate of flour on both sides and now, roll it as thin as possible. Repeat this process for the rest of the dough and potato balls.
Place a griddle or tawa on low-medium heat. Place a rolled out paratha on it and cook until you the edges cooked. Flip the paratha and wait until you see brown spots. Smear some ghee on top of this surface and wait for the other side to cook.
Flip once again and smear ghee. You will see smoke rise from the bottom part of the paratha. That is normal, and it happens because of the ghee. (If you don't see brown spots on this side, flip it back to ensure that the paratha is cooked. )
You can now flip again and allow it cook for another 10 seconds. Take the aloo paratha off the flame and into a casserole lined with muslin cloth.
Repeat the process for other rolled out parathas.Your Aloo Parathas are ready! Aloo parathas pairs very well with pickle, curd and just plain butter.
Imli chutney is a sweet and tangy blend of tamarind and dates, perfect for adding a burst of flavour to your chaats.
Imli Chutney is a sweet and sour condiment made with tamarind, dates, jaggery, and a few other spices. It is syrupy thanks to dates and jaggery in the recipe.
It also goes by the name of imli ki meethi chutney tamarind chutney or puli chutney.
The recipe involved combining the key ingredients of tamarind, dates and jaggery, cooking it down to a syrupy texture and then infusing it with spices to add that extra zing.
This chutney used primarily as a condiment to add to Indian street food, often known as chaats. A samosa, or a dahi puri, a Pani puri – all uses this tamarind chutney as an agent to add a tangy and sweet taste to a dish is almost always a tad spicy.
You can prepare this tamarind chutney in bulk and store it for a long time in the fridge.
Ingredients for Imli chutney
Tamarind, Dates and Jaggery – I take an equal quantity of these three ingredients. In this recipe, I’ve taken 100g each.
Fennel seeds, Cumin seeds and pepper powder – These three spices add that extra zing to the chutney. We can take 1 tsp each or the fennel and cumin seeds and 4-5 pieces of peppercorn.
Red chili powder, Asafoetida powder, black salt and table salt – In small quantities, these spice powders really jazz up the chutney in ways that take it to a restaurant style taste!
Other ingredients – Oil
How to make Imli chutney with dates?
To make tamarind chutney start off with de-seeding both the dates and the tamarind. If they are already de-seeded, it is one less thing for you to do. Take 100g of both the dates and tamarind after the de-seeding. Put them in a small pressure cooker. Now, add 100g of tamarind as well. Add about a cup of water and close the lid. Let our 2 whistles and let it simmer for a 3 minutes. Turn off the cooker and let it cool down. This is the easiest way to make imli chutney from my experience.
But, you can also do this in a pan on a flame, but it will take time. If you have 20-25 minutes to stand and allow the dates and tamarind to break down, you can go with the saucepan method. You know that the sauce it ready when you no longer smell the raw tamarind from the mixture and the dates have disintegrated inside the pan.
Meanwhile, place a small pan on medium flame. Let’s roast the whole spices. To the warmed up pan, add the fennel seeds, cumin seeds and peppercorns. Saute them on a low-medium flame until they turn fragrant. This should take around 2-3 minutes. Turn off the heat and allow the spices to cool down.
Once they are cool, add them to a mortar and grind them into a smooth powder. You can also use your spice grinder once the spices are cool. Keep the powder aside.
Once the dates and tamarind mixture are cool, add the contents of the pressure cooker to a mixer. Blend the mixture to a smooth puree like texture. The next step is the tedious part.
Pass the mixture through a sieve and remove all the fibrous elements from the tamarind. However clean a tamarind might be, you will always have the fibre leftover, since this fibre is what holds the tamarind fruit together. This process might take roughly 10-15 minutes.
Once that is done, finally add the right spices and seasonings to your Imli Chutney.
To do this, place a pan on medium flame and pour 2 tsp of oil. Lower the heat to the lowest setting. To this oil, add the Kashmiri red chilli powder, asafoetida powder and swirl it around in the pan to cook them. Now add the imli chutney puree to the pan. It will sizzle, so be careful with your hands.
Add 2 tsps of the prepared fennel-cumin-pepper spice powder along with black salt and table salt. Mix all the ingredients together and do a taste test. If you need more seasoning, adjust them.
Allow the chutney to come to a slight boil and turn off the heat. Let the chutney cool down.
Your Imli Chutney with dates is ready for use!
Serving Suggestions
Serve Imli chutney along with your Samosa, Kachori or use it as a condiment for Bhel Puri, Aloo Tikki chaat, Masala Puri, Pani Puri or Dahi Papdi Chaat.
Storage and Shelf Life
Once the mixture has cooled down, store it in a clean and dry glass jar in the fridge. You can use it for up to 3 months or more if you have taken it out too many times.
I always make a thick consistency of the chutney and take a tablespoon at a time and dilute it to use for my chaats.
Imli Chutney
If you are looking for more Chutney Recipes, please click here to find the recipe you are looking for.
Please do follow me on Instagram and Facebook and do subscribe to my channel on YouTube. Thank you so much!
Recipe
Imli Chutney
Imli chutney is a sweet and tangy blend of tamarind and dates, perfect for adding a burst of flavour to your chaats.
De seed the dates and the tamarind. Measure out equal quantities of dates, tamarind and jaggery. For this recipe, I've used 100g of each.
Add them all to a small pressure cooker along with a cup of water. Close the lid and allow 2 whistles to pass. Lower the flame and let it simmer for another 3-4 minutes. Let the pressure in the cooker release naturally.
Getting the spices ready
Place a pan on low- medium heat. Add the fennel seeds, cumin seeds and peppercorns. Roast them in a low flame until they become aromatic. This should take roughly two minutes. Turn off the heat and allow the spices to cool down.
Once they are cool, add them to a mortar and grind them into a fine powder. You could also grind with the help of a spice grinder. Your imli chutney powder is ready.
Bringing it all together
Once the dates-tamarind mixture has cooled, add them to a mixer jar along with the water. Grind them into a smooth paste.
Pour the mixture through a sieve and remove any strands of fibre that might be left after grinding. This is an important step, since it will give you a smooth texture of imli chutney.
Place a saucepan on a medium flame and add 2 teaspoons of oil. Lower the flame, and add in the red chilli powder and asafoetida powder. Roast the spice powders on a low flame.
Now, add the dates-tamarind puree and mix it all well. Add the black salt and table salt. Once the mixture comes to a slow boil, turn off the heat and add the dry ginger powder. Allow the imli chutney to cool down.
Transfer the Tamarind chutney to a clean glass bottle and use it for up to 3 months.
Cream of Broccoli Soup is a comforting, velvety blend of fresh broccoli, sautéed onions, and garlic—simple to make, yet rich in flavor.
Cream of Broccoli Soup
This cream of broccoli soup is my go to comfort food – it’s quick, wholesome and utterly satisfying! Ready in under 30 minutes, it’s the kind of recipe you’ll want to make again and again.
The creamy texture comes from a simple roux made with milk and flour, just like the base for white sauce pasta.
I pair this soup with a crunchy cheese sandwich and it becomes the perfect cozy meal!
Ingredients for Cream of Broccoli Soup
You will need one entire head of broccoli, just the florets and not the stems. You can keep the stems for a stir fry or pop it in a bag to put it away in the freezer to make a veggie stock.
One medium-sized onion and 4-5 cloves of garlic for the base of the soup.
For the roux, you will need 1 tablespoon of butter, 1 tsp of olive oil, 1 tablespoon of flour and 1/2 to 3/4 cup of milk.
Salt and pepper for seasoning
You can also have fresh cream on hand for final garnish.
How to make Cream of Broccoli Soup?
The first step is to process the broccoli. Cut the florets of the broccoli and put them in warm water. Leave it aside for five minutes. This will help remove any bugs or dirt stuck between the broccoli florets. This step will also partially blanch the broccoli.
Meanwhile, dice the onion and garlic and keep them aside. If the milk is in the fridge, bring it out and let it come to room temperature.
Place a small pot on a low to medium heat. Add a teaspoon of olive oil (you can use any oil of your choice). Add the onions and garlic, sauteing them until they are slightly brown. This will take 3-5 minutes.
Scoop out the blanched broccoli florets from the warm water and add it to the onions and garlic. Pour a bit of warm water and allow the florets to cook completely. Turn off the heat and allow them to cool down.
To a mixer, add the contents of the pot along with the water. If you feel that the mixture is still hot, add a couple of ice cubes. Grind the broccoli until it becomes a smooth paste.
Next step is to make a roux. It’s just a fancy French word to make a paste with butter and flour. This paste will give the soup the body it needs – or help it have that thick texture.
Place the same soup pot on low-medium heat, add a large tablespoon on butter. Add one tablespoon on flour and mix vigorously. You must make sure that the flour doesn’t go fully brown. It can be a light tan shade. To this, add milk and mix slowly. Gradually add the milk, continuously mixing until it’s all used.
Reduce the heat to the lowest setting while allowing the milk and flour to blend well. The sauce will thicken in a couple of minutes, so do not step away from the stove.
To this, add the broccoli puree. Mix well and adjust salt and pepper levels You can even add a sprinkle of cumin powder, but that’s up to you.
Let the broccoli soup simmer for a few more minutes. Once you see small bubbles, turn off the heat and if using add a tablespoon on cream.
Your Cream of Broccoli Soup is ready to be served along with a sandwich of your choice.
Shelf Life and Storage
Soup is a dish best served warm. You can make this soup, allow it to cool completely, add it to a Ziploc bag, and freeze it for later consumption.
If you intend to finish the soup the same day, reheat it not more than once.
If you are looking for more Appetizer Recipes, please click here to find the recipe you are looking for.
Please do follow me on Instagram and Facebook and do subscribe to my channel on YouTube. Thank you so much!
Recipe
Cream of Broccoli Soup
Cream of Broccoli Soup is a comforting, velvety blend of fresh broccoli, sautéed onions, and garlic—simple to make, yet rich in flavor.
Rinse the broccoli and cut out the florets. You can keep the stems aside for a stir fry or to add it to make veg stock. Dunk the florets in a bowl of warm-hot water. This will help remove any bugs or dust.
Dice an onion and prep the garlic too.
Place a soup pot on low-medium flame. Add a tsp of olive oil and add the onions and garlic. Roast them until they are slightly brown. Scoop of the florets of broccoli and add them to the pot. Pour in half a cup of water or veg stock.
Once the broccoli is sufficiently cooked, turn off the heat. Let it cool down.
Add them to a blender and make a smooth puree from the broccoli, onions, and garlic.
In the same soup pot, add one tbsp of butter. To make the roux, add one tablespoon on flour and whisk them both vigourously and cook the flour. Do not let it brown too much.
Add milk bit by bit to the roux, while mixing the ingredients continuously. Keep stirring until the mixture becomes slightly thick. Now the base is ready.
Pour the broccoli pure to the base mixture. Season with salt, pepper and cumin powder. Do a taste test and ensure it's to your liking.
Let the cream of broccoli soup simmer. Once you see small bubbles, that's when you turn off the heat.
Beetroot Keerai Poriyal is a South Indian side dish prepared with the greens of beetroot – finely chopped and cooked with minimal spices
Beetroot Keerai Poriyal
Beetroot Keerai or beetroot greens are the leaves and stems of the beetroot plant. Upon harvesting beetroot, farmers cut off and sell the greens and stems separately from the beetroot. Since they are leaves, their shelf life is not too long. So it’s unlikely you’ll find beetroot keerai in normal markets regularly since it’s available only during beetroot harvest.
This side dish of poriyal is a simple dish that gets prepared in south Indian households when these greens become available. The dish has basic spices such as mustard seeds, urad dal and turmeric powder.
The dish will have an earthy taste rendered from the greens and stems. You can pair this dish up with rasam rice or sambar rice or even with chapathis.
I bought 2 bunches of beetroot keerai when we went to Ooty recently. I haven’t found it in Bangalore anywhere but I will update this blog with the information if I ever find any.
Ingredients to make Beetroot Keerai Poriyal
One large bunch of roughly 300g of beetroot keerai should be sufficient for a family of 3. Since greens wilt fast and reduces to 1/4 its size once cooked.
The other ingredients are basic spices – cooking oil (gingelly oil), mustard seeds, split urad dal, turmeric powder and asafoetida powder.
As a garnish, I always like to add grated coconut ground up with a green chilli.
How to make Beetroot Keerai Poriyal?
Washing the greens is the biggest task in making any keerai poriyal. It’s best to always wash greens at least 3 times. You can also put it in a large bowl and fill it up with water. The sediment will settle at the bottom. I have one of those IKEA salad spinners that is extremely helpful in washing greens. Since I have a small one, I have to do the washing in batches.
The first step you can start off with is cutting the thick stems from the leaves. Wash them thoroughly separately. Allow them to dry for a while.
Cut the stems into small pieces and keep it aside. You can then cut the leaves. An easy way to cut them all is to stack equal sized leaves and roll them into a bundle. Cut the bundle vertically and then horizontally. This method of cutting has helped to maintain the pieces of keerai of the same size.
Place a large kadai on a low-medium flame. Add one teaspoon of gingelly oil. Once the oil is warm, add the mustard seeds and split urad dal. Allow the mustard seeds to pop.
You can then add the stems. Since they take a little longer to cook, it’s best to first cook them and follow it up with the cut greens.
To the stems, add turmeric powder, asafoetida powder and salt. Saute for two minutes and you will notice they will have gone soft. Check a piece of stem to see if it’s done. If not, continue to saute for another minute.
Once done, add the leaves. Sprinkle in a pinch of salt on top of the leaves – this will aid in the greens cooking faster. As you stir the green along with the rest of the ingredients, you will observe it wilt in under 30 seconds.
Keep stirring until the colour changes to a darker green. That’s when the greens are done. Turn off the heat. At this stage, the keerai poriyal is done, but I like to add a bit of coconut garnish. If you are keep read along.
Take a few pieces of coconut or two tablespoons of grated coconut in a mixer. Add 1 or 2 small green chillies to the mixer as well. Pulse grind the coconut until you have a coarse texture.
Add this coconut garnish to the poriyal and mix well.
Your Beetroot Keerai Poriyal is ready to be served. You can eat this dish as a side with rasam rice, sambar rice or curd rice.
Storage and Shelf Life
You can rinse the greens and stems separately, allow them to dry and store the greens in a plastic bag. The cooked greens will stay edible for the day but it is best to consume it within 2-3 hours of cooking, since it contains coconut. If you aren’t using coconut, it can stay on the shelf for a 4-5 hours. In summer, it’s best to consume it immediately or put it in the fridge after an hour or two.
If you are looking for more Curry Recipes, please click here to find the recipe you are looking for.
Please do follow me on Instagram and Facebook and do subscribe to my channel on YouTube. Thank you so much!
Recipe
Beetroot Keerai Poriyal
Beetroot Keerai Poriyal is a South Indian side dish prepared with the greens of beetroot – finely chopped and cooked with minimal spices
The first step is to cut the stems away from the leaves. Wash both the stems and leaves thoroughly either under running water or in a bowl until you see no sediment at the bottom of the bowl. Allow the greens to dry a little bit; you can even keep it under the fan.
Chop the stems into small pieces and transfer them to a plate. Next, chop the leaves into small and equal size pieces. You can stack a few leaves, roll the bundle and chop them up to get even sized pieces.
Place a large kadai on a low-medium flame. Add 1 tsp of gingelly oil. Once the oil is warm, add the mustard seeds and split urad dal. Allow the mustard seeds to pop. Add the dried red chillies and toast them in the oil for a bit.
Next add in the chopped beetroot greens stems. This will take a slightly longer time to cook as compared the leaves.
Add the turmeric powder, asafoetida powder and ¼ tsp salt. Allow the stems to cook for a two minutes. Pick a piece of the stem to check is its cooked enough. It should have only a little crunch.
Next add the chopped beetroot greens. Add ¼ tsp salt and mix all the ingredients well. You will see the greens wilt as you cook it down in a low-medium flame.
Withing the next minute or two the greens will completely wilt and change to a dark green colour. Turn off the stove.
This is an extra step, but i like the taste of coconut and green chillies in keerai curries. I take a tablespoon of grated coconut (or chunks) and add it to a mixer along with a small green chilli. Pulse grind until you have a coarse mixture.
Add this coconut garnish to the beetroot greens and mix well. Your Beetroot Keerai Poriyal is ready!
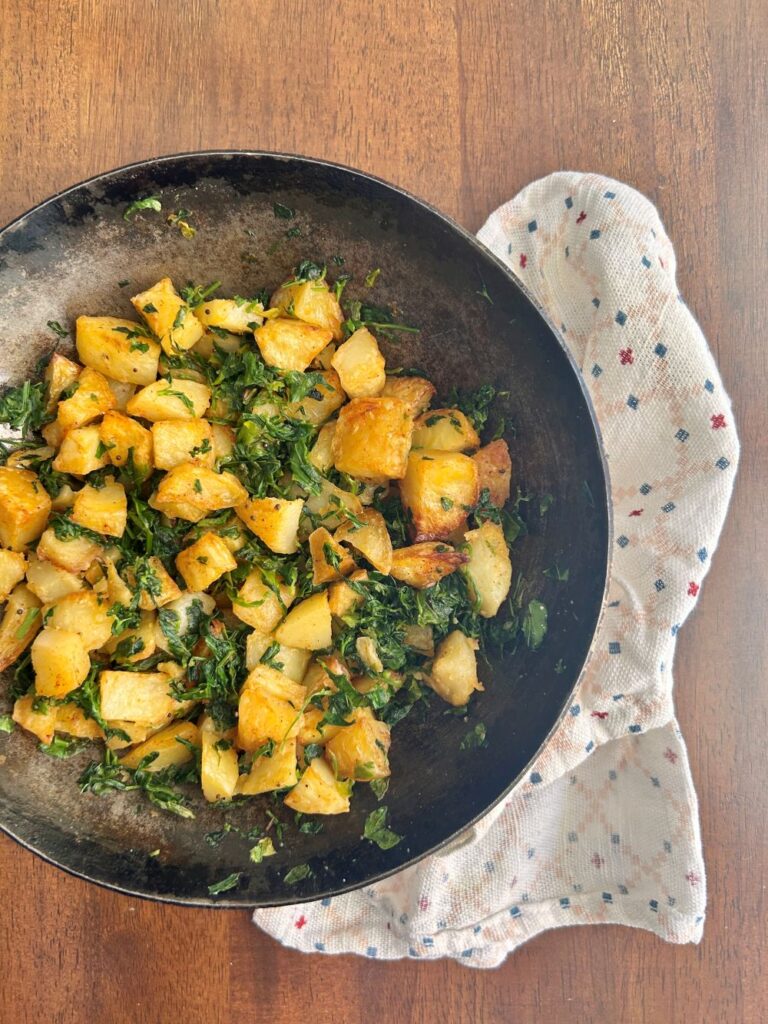
Aloo Methi is a classic North Indian vegetable side dish prepared with potatoes, methi leaves and spices.
What is Aloo Methi?
Aloo methi is an Indian side dish made with potatoes and fenugreek leaves, cooked with a few basic spices. The dish hails comes from northern India, especially Punjab, where it’s a common home dish.
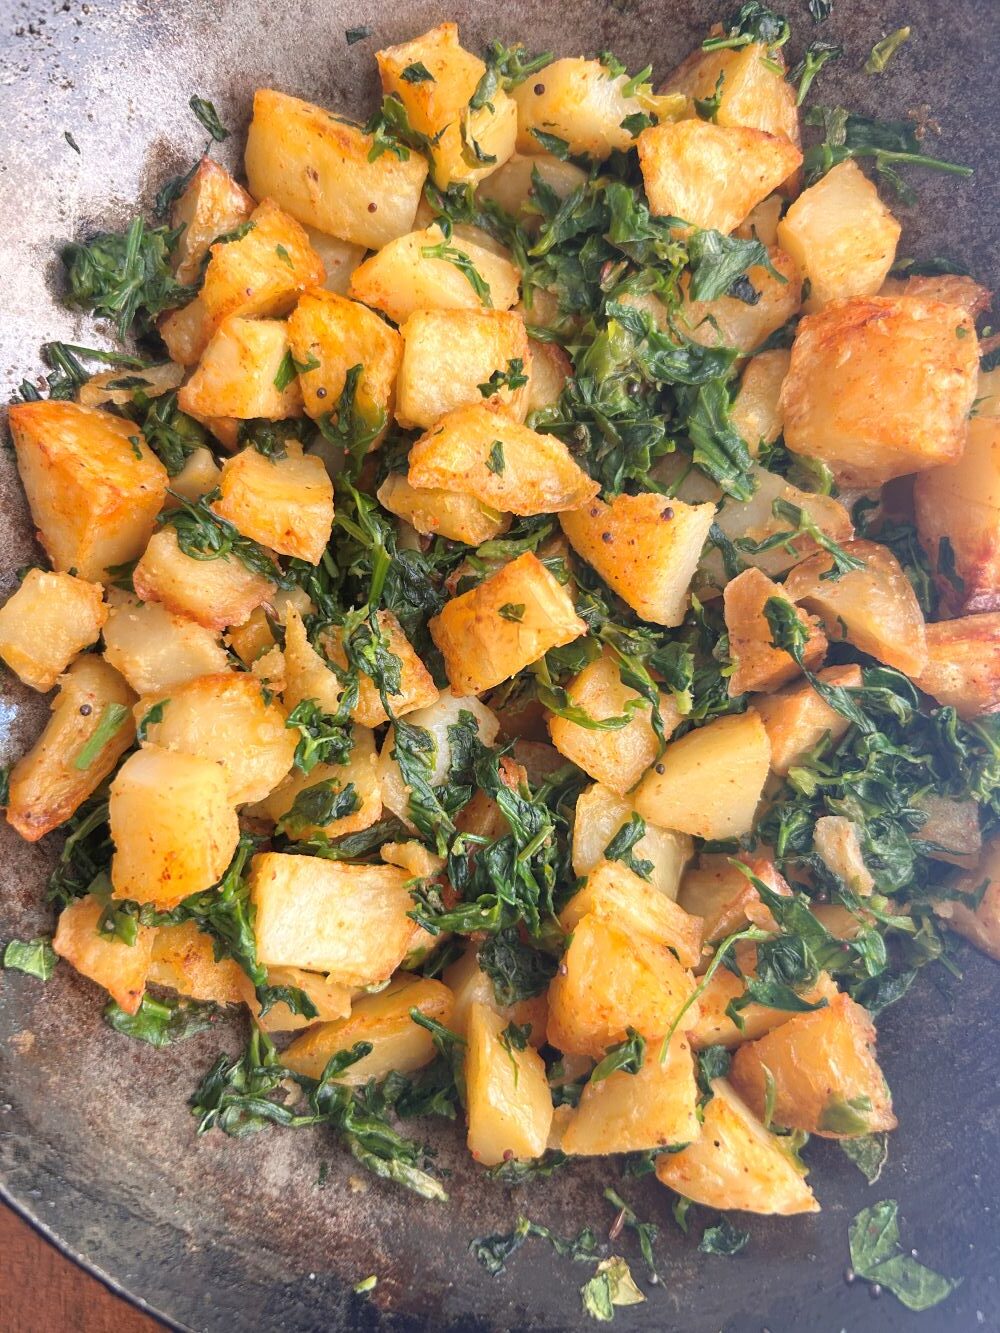
The potatoes are soft with the crispy outer texture, and the methi adds a slight bitter taste with a hint of spice. In India, it’s especially popular during the winter months when fresh methi leaves are at their peak, filling markets with their vibrant green bunches.
You can serve Aloo Methi with roti, rice, or curd rice for a full meal.
Ingredients for Aloo Methi
Methi leaves provide the main flavour to the dish, bringing in that all familiar bitter taste. You can use up to a bunch which is roughly 200 gms in weight.
Potatoes – I use 3-4 medium-large sized potatoes for my family of three.
Spices used – Since we will be using methi as the flavour bomb, we can use only mustard seeds and jeera seeds for the tempering/tadka.
I also like a bit of spice to come through – so I almost always use turmeric powder and a little of red chilli powder.
How to make a simple Aloo Methi sabzi?
The first step is to pluck the methi leaves. This activity takes the longest time. It is an activity I do when I have the TV on in the background; it almost takes the “bitterness” of the task away. Once you’ve got the leaves ready, rinse them thoroughly until the water runs clear. You don’t want any sandy residue on the leaves.
While you are plucking the leaves, you can wash and pressure cook the potatoes. For my family, I use 3-4 medium-large sized potatoes. Cut the potatoes into quarters and place it in the pressure cooker with 1/2 a cup water in it. Close the lid and allow 3 whistles out. You can then reduce the flame to low and allow the potatoes to cook for another five minutes. Turn off after 5 minutes.
Once the pressure in the cooker has released, remove the cooked potatoes and allow them to cool down. Peel the skin and dice them into smaller chunks.
Place a pan on a low-medium flame, add 2 tsp of cooking oil. I love to use gingelly oil for any potato dish but I suppose in the North of India, mustard oil or groundnut oil might be the traditional oil used. You can choose an oil that is familiar to your palette.
Once the oil is warm, add the mustard seeds and jeera. Let them sputter. You can then add the cooked and diced potatoes in the oil and saute for a minute.
Next, add the spice powders – turmeric powder, red chilli powder and salt. Mix them all and let the potatoes roast for a minimum of 10 minutes.
While the potatoes are roasting, chop the methi leaves and keep them ready.
Add the chopped methi leaves to the potatoes and mix well. They will shrink right in front of your eyes, leaving you to wonder where all the leaves you have painstakingly plucked are. But that’s how greens work, you know that! Turn off the flame and adjust salt levels according to your taste.
Once the methi have wilted, the Aloo Methi sabzi is ready to be served!
Storage and Shelf Life
Aloo Methi is best eaten when hot along with hot rotis or curd rice, just how we like it in our house! It is best not to store it in the fridge as it might increase the bitterness in the methi, as per my experience.
Aloo Methi
If you are looking for more Potato Recipes, please click here to find the recipe you are looking for.
Please do follow me on Instagram and Facebook and do subscribe to my channel on YouTube. Thank you so much!
Recipe
Aloo Methi – Potatoes with fenugreek leaves
Aloo Methi is an Indian Potato dish made with fresh fenugreek leaves and spices
Pluck all the methi leaves and give it a wash. Rinse it 2-3 times until the water runs clear.
Wash the potatoes and slice them into quarters. Place them in a small pressure cooker with 1/2 cup water at the bottom of the cooker. Close the lid and let 3 whistles out. Reduce the flame to low flame and let the potatoes cook for another 5 mins in the low flame. Turn off the flame and allow the pressure in the cooker to come down naturally.
Once the potatoes are ready, take them out and peel the skin. They should fall off easily. Dice them into smaller pieces and keep aside.
Place a kadai on medium flame and add 2 tsp of cooking oil. Once the oil is warm, add the mustard seeds and jeera. Let them sputter. Reduce the flame now.
Add the diced and cooked potatoes and stir them in with the spices. Add turmeric powder, red chilli powder and salt. Mix all the ingredients until the spices have coated well on to the potatoes.
Keep the flame on low and allow the potatoes to crisp up. This process will take roughly ten minutes. The longer you allow it to roast, the crispier the potatoes will be.
Meanwhile, chop the washed and partly dry methi leaves.
Once you have the desired crispiness in the potatoes, add the methi leaves and give it a mix. You will notice that methi leaves will begin to cook immediately and shrink.
Sprinkle a little salt and the methi leaves will cook faster. Once the leaves are wilter, you can turn off the flame.
Aloo Methi is ready to be served as a side dish along with rasam rice, roti or curd rice.
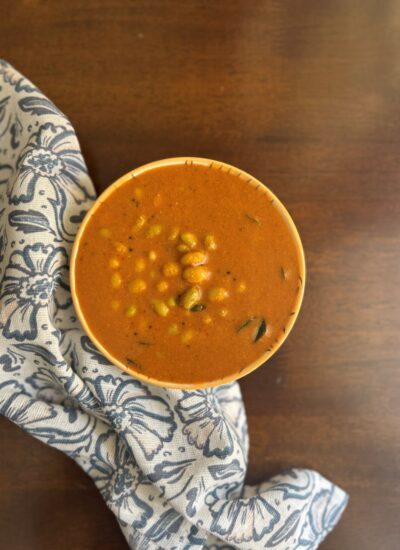
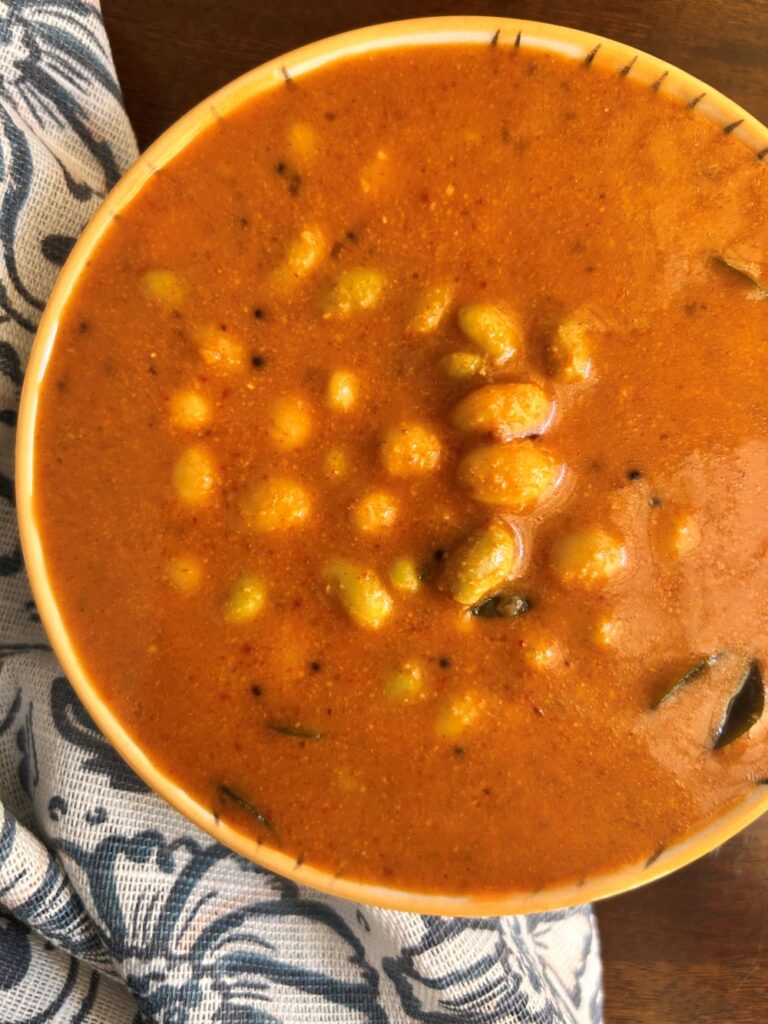
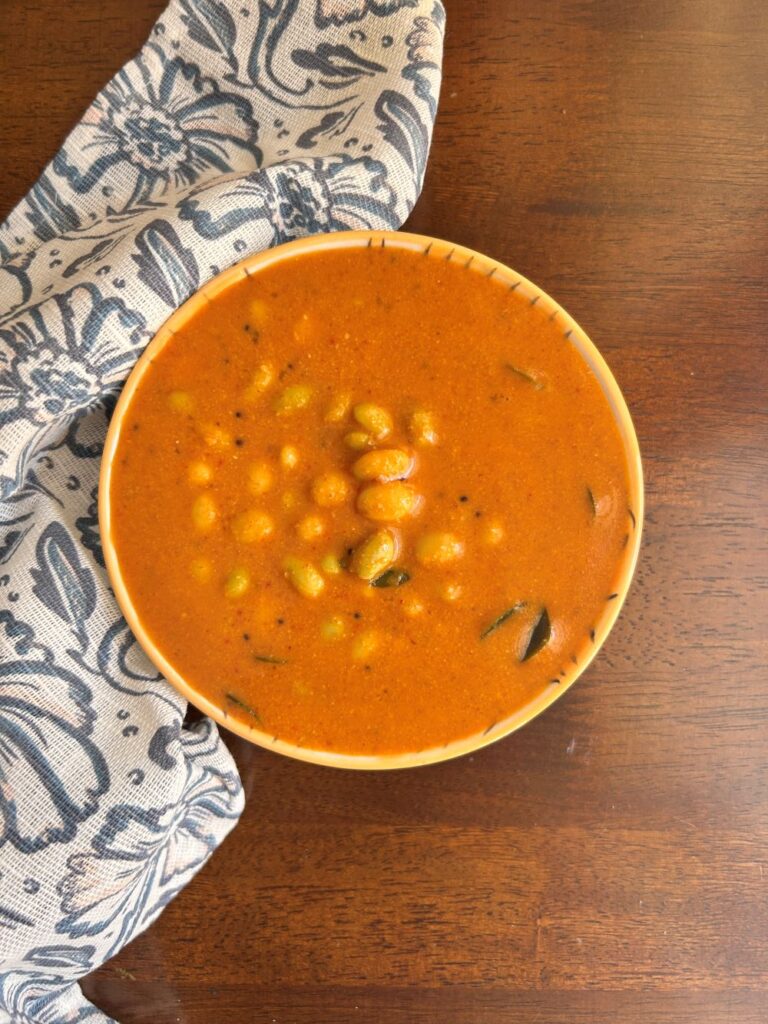
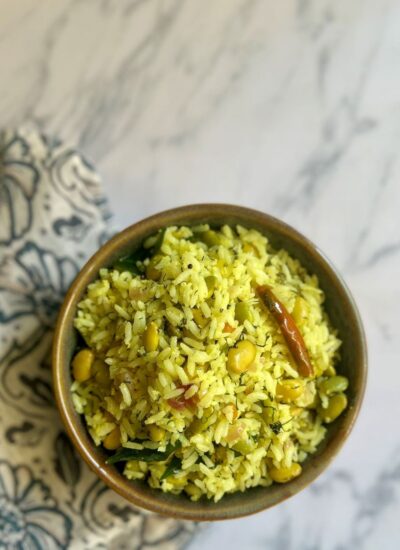
Avarekalu Saaru or Avrekalu Huli is a winter delicacy made with cooked hyacinth beans in a delicious gravy made from coconut, coriander and red chillies.
Avarekalu Saaru is a cherished delicacy from Karnataka, made with tender hyacinth beans, coconut, and tomatoes. The foundation of this flavorful dish, whether it’s called saaru or avrekalu huli, is a rich blend of coconut and aromatic spices like cumin (jeera), fenugreek (methi), coriander seeds and dried red chilies, which together create a unique and aromatic base for the curry.
This dish is known by different names in various households—some refer to it as avarekalu saaru, while others call it avarekalu huli. The term huli is often used due to the inclusion of tamarind or tomato as a souring agent, lending a tangy flavor to the dish. On the other hand, it is called saaru because of its thinner, more broth-like consistency, in contrast to the thicker, richer texture of huli.
Ingredients for Avarekalu Saaru
What is the difference between Avarekalu and Hithkiddu Avarekalu?
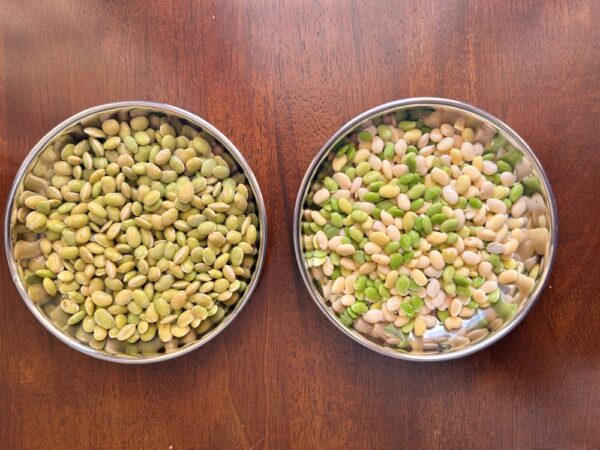
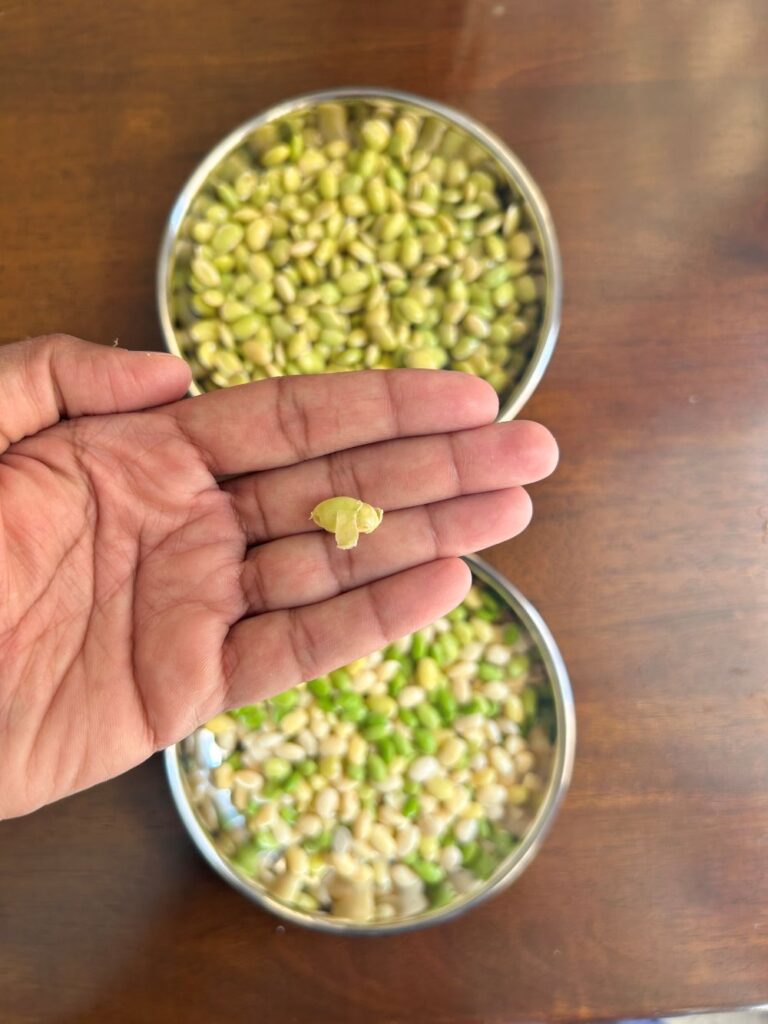
When you shell the pods, you get Avarekalu. These beans have a skin on top of them which adds a lot of fibre. When you remove the skin, it’s called Hithkiddu (hith-kidh-dhu) Avarekalu. I am told by my aunts that removing the skin help with digesting the bean better. You also have less to chew. They also cook faster without the skin. Both beans taste great and work well in this recipe.
Difference between Avarekalu and Hithkiddhu AvarekaluThe skin peeled off gives hithkiddu avarekaliu
How to make Avarekalu Saaru | Avarekalu Huli
The first step is to cook the avarekalu. I prefer to buy shelled avarekalu since it saves all the time. Avareklau stores well in the fridge for up to a week.
Take 1 cup (180-200g) of the beans, rinse it and add it to a small pressure cooker. Add about 1/2 cup of water, a pinch of turmeric and a pinch of salt.
Close the lid and let the pressure cooker release 2 whistles. Turn off the flame and let the steam come down naturally.
While the pressure cooker is settling, you can prepare the masala.
Place a small pan on low-medium flame. Add the methi seeds, coriander seeds and jeera. Roast until the spices get aromatic. Transfer the ingredients to a plate. Next, add the dried red chillies to the pan and roast it until crisp. Turn off the heat and transfer to the same plate. Allow it to cool down.
Add the cooled ingredients to the mixer jar along with grated coconut and a tomato. Nati tomato has a more sour taste as compared to hybrid tomatoes. If you are using a hybrid tomato, add a piece of tamarind too. This is optional.
To this, you can also add some of the cooked avarekalu to give the gravy some ‘body’/thickness. Grind all the ingredients to a smooth paste with a little water.
Place a kadai or pot on low to medium heat. Add a teaspoon of oil and allow it to warm up. Add mustard seeds and curry leaves. Once the curry leaves calm down, add the prepared avaraekalu masala to the pot. Add a little water to make sure that the gravy is not too thick. Add 1/2 tsp salt and mix well. Check for salt levels.
Allow this masala to simmer on a low flame for 7-8 minutes. Stir it in between so that the masala doesn’t settle in the bottom. Once the raw smell of the spices goes away, you can add the cooked avarekalu along with the water and give a mix.
While adding the water along with the avarekalu, ensure to not add too much water. The gravy might get too thin.
Allow the Avareklau Saru to simmer for a couple of minutes and turn off the heat.
Serving Suggestions
Serve avarekalu saaru along with hot rice and ghee, or you can even eat this dish with dosa or chapathi.
Storage and Shelf Life
Avarekalu saaru can be stored in the fridge for up to 2 days int he fridge. After that, reheat only once and consume it all.
If you live in a city with warm temperature, it’s best to put it in the fridge after 3-4 hours. It might go bad since any dish made with coconut tends to go bad with exposure to heat.
Avarekalu Saaru
If you are looking for more Curry Recipes, please click here to find the recipe you are looking for.
Please do follow me on Instagram and Facebook and do subscribe to my channel on YouTube. Thank you so much!
Recipe for Avarekalu Huli
Avarekalu Saaru | Avarekalu Huli
Avarekalu Saaru or Avrekalu Huli is a winter delicacy made with cooked hyacinth beans in a delicious gravy made from coconut, coriander and red chillies.
The first step is to cook the avarekalu. Add the shelled beans into a container with water and add a pinch of turmeric powder. Place it in a pressure cooker with an inch of water in it. Close the lid and allow for 2-3 whistles. You do not need more than that to cook avarekalu.
While the pressure of the cooker is coming down, prepare the base masala.
Place a small pan on low-medium heat, and add the coriander seeds, methi seeds and jeera. Roast until you get the aroma of the spices. Once done, transfer it to a plate.Now add the dried red chillies and roast them until crisp. Turn off the heat and transfer the chillies to the same plate. Allow the ingredients to cool down.
Once cooled, add the roasted ingredients to a mixer jar. Now add the grated coconut, tomato and tamarind (if using) as well. Now, take out the cooked avarekalu from the cooker and add 2-3 tbsp of the cooked avarekalu to the mixer jar. This will help thicken the masala while grinding. Grind all the ingredients to a smooth paste. Add some water if the masala gets too dry. The ground masala must be a thick paste.
Now, place a deep pan or pot on a low or medium flame. Add a tablespoon of groundnut oil. Once the oil is hot, add mustards seeds and let it sputter.Next, add the curry leaves and saute for a few seconds.
You can now add the coconut masala to the pan. Add half a cup of water. Give it a mix.
If you are eating it with rice, you will need a relatively thinner gravy texture. So adjust the water accordingly. If you are eating the saaru with chapathi or dosa, you can keep the gravy slightly thicker. Add ½ tsp salt and mix well. Allow the gravy to simmer on a low flame for 7-8 minutes. Keep stirring in between to ensure the gravy does not stick to the bottom.
Once the raw smell of the spices goes away, add only the cooked Avarekalu to the gravy. If you see that the gravy has thickened, you can add the water that the beans have cooked in.
Allow it to simmer for a two – three minutes and turn off the heat. Your Avarekalu saaru is ready to be eaten with rice, roti or dosa.
Vegetable Pulav is an Indian rice dish made with a fragrant masala of mint leaves, coconut, green chillies and spices.
Vegetable Pulav is an Indian rice dish prepared for lunch or dinner and makes a great dish to pack in lunch boxes.
I call this restaurant style because the taste is close to the ones that we have eaten at our local eateries/ darshinis. These restaurants serve this version of pulav during lunch along with raita and papad. Restaurant style vegetable pulav is usually spicy but in this recipe, I’ve adjusted the proportions to make it palatable for those who prefer moderate spice.
This recipe is a South Indian and specifically Karnataka style pulav which contains grated coconut, mint and coriander leaves and spices to make the paste.
Ingredients for Vegetable Pulav
Basmati Rice – I prefer using basmati rice, but you can also opt for any common rice like sona masoori or kolam rice. When it comes to rice to water measurement for this recipe, it doesn’t matter what rice you use; the ratio of 1:2 works best. For every cup of rice you use, you need 2 cups of water. A typical cup measures about 180-200g of uncooked rice.
The main flavour comes from the ground masala and the ingredients for the masala are.
Grated coconut – Its best to use grated coconut since it will get easier to grind it along with the rest of the ingredients. Using pieces of coconut is an option, but it may result in small coconut chunks in the masala.
Mint leaves and coriander leaves – You will need a handful of both herbs to make its flavourful.
Onion – I use one small onion to make the flavours better.
Ginger and Garlic – I use fresh ginger and garlic, but if you don’t have it, you can substitute it with ginger garlic paste.
Spices – Green cardamom, cloves and pepper, fennel seeds, bay leaf and star anise.
Vegetables – You can add as many vegetables as you want to this pulav. Here are a few suggestions:-
Carrots, potatoes, beans, corn, cauliflower, mushroom and peas. You can do a combination of these vegetables amounting to about 1.5 cups. I have also added double beans to the pulav.
If you want to use any variety of beans like chickpeas or double beans, make sure you soak them overnight or at least for 4-5 hours before using it. Once you’ve soaked, drain the water and rinse the beans before adding it along with the vegetables.
How to make restaurant style Vegetable Pulav
Prep Work
Rinse the rice thoroughly until the water is clear. Allow it to soak in water for at least 20 minutes.
Next, you need to clean and pluck the mint and coriander leaves for masala. Once done, add it to a mixer jar.
You can also clean, peel and cut all the vegetables you want to use for the pulav.
Peel and cut an onion into thin slices.
Put the kettle on with 2 cups of water or you can bowl the water on the stove and keep aside. Instead of using cold water, use this for cooking the pulav. In place of water you can even use vegetable stock which will make for an even more flavourful pulav.
Making the Pulav Masala
Add all the ingredients required for the pulao masala into the mixer jar – Mint leaves, coriander leaves, one small onion, cardamom, cloves, peppercorns, fennel seeds, grated coconut, green chillies, ginger and garlic.
Grind it into a smooth paste with a little water. You should aim to get a thick paste.
Last steps to make vegetable pulav
Place a small pressure cooker on a medium flame. Add one tablespoon of ghee or cooking oil. If you are feeling like it, add both.
Once the oil is warm, add the dry spices – bay leaf and star anise roasting them in the oil for a few seconds.
Next, add the thinly sliced onions to the ghee. Sauté the onions in the ghee until they are slightly browned.
Now add the pulav masala to the pressure cooker and lower the flame. Allow the masala to cook in the ghee for a few minutes while roasting it.
After the raw smell of the onions, garlic and ginger go away, you can now add the rice. Drain the water and just add the rice. Mix all the ingredients together and add 3/4 tsp. salt.
Now 2 cups of warm water to the pressure cooker. The water level in the cooker should not be more than the level of the rice and vegetables – if you want to avoid a mushy texture. Remember, there’s water in the vegetables and the pulav masala as well.
Close the lid of the pressure cooker and allow for 2 whistles to pass. Turn off the flame and allow the pressure to release naturally. Your Vegetable pulav is ready!
Serving suggestions
You can serve pulav with Onion Raita, cucumber raita or even plan curd. Serve with a side of salad and papad as well.
Storage and Shelf Life
Vegetable Pulav makes for a good tiffin box dish. It tastes good even when it is cold, which makes it ideal to pack for lunch boxes. You can leave it out on the counter during the day in cool weather like Bangalore, but if the weather is warm, it’s better to leave in the fridge and warm it up to eat later.
You can store Pulav in the fridge for up to two days. Once you’ve taken it out and reheated its best to eat it all. Do not reheat once again.
Vegetable Pulav Restaurant Style
If you are looking for more Rice Recipes, please click here to find the recipe you are looking for.
Please do follow me on Instagram and Facebook and do subscribe to my channel on YouTube. Thank you so much!
Recipe for Vegetable Pulao Restaurant Style
Vegetable Pulav Restaurant Style
Vegetable Pulav is an Indian rice dish made with a fragrant masala of mint leaves, coconut, green chillies and spices.
The first step is to wash the basmati rice and allow it to soak in the water for about 20 minutes. You can then prep the other ingredients.
Pluck the mint leaves, wash them thoroughly, and keep aside.Break a coconut and cut out a few pieces. I prefer to grate the coconut since it's easier to grind. Chop all the vegetables that you are going to use. Finely chop the onions into thin slices and keep aside.
Take all the ingredients mentioned in the "For the Pulav Masala" and grind it into a fine paste with a little water. Keep aside.
Place a medium-sized pressure cooker on a medium flame. Add 1 tablespoon of ghee. Add the bay leaf and star anise – roast the spices in the ghee. Tip the thinly sliced onions to the ghee and saute for a few minutes.
Once the onions are slightly brown, add the Masala Paste that you've made. Add a bit of water so that it doesn't stick to the bottom of the pan.
Cook the masala for a couple of minutes while continuously stirring it. Now add all the vegetables that you've prepped for the pulav. Add ½-¾ tsp salt and mix well.
Drain the rice from the water it has been soaking in. Add it to the cooker.
For every cup of rice, you need two cups of water. Add 2 cups of warm/hot water to the cooker. Mix all the ingredients, check if you need to add more salt and close the pressure cooker.
Allow for two whistles to pass. Turn off the flame and let the pulav cook in the residual heat.
After 10 minutes or when the pressure has released from the cooker, open the lid. Your Vegetable Pulav is ready! Eat this delicious pulav with raita or curd.
Keyword Kids Lunch Box, Lunch Recipes, Rice based Recipes, Tiffin
Black Chana Sundal is a South Indian snack or tiffin dish served along with coffee/tea made with boiled black chana and seasonings
Sundal is a steamed chickpea snack with South Indian flavours of mustard seeds, curry leaves, and grated coconut.
This variety of channa goes by the name of Konda Kadalai in Tamil and Kala Channa in Hindi.
You can choose any type of peas like white chickpeas, dried green peas, dried white peas or rajma to make sundal.
Sundal is the most popular dish that one serves at any Navarathri Golu function. Each day, a different variety of sundal is prepared and given to guests who visit as a snack along with coffee or tea.
Ingredients for Black Chana Sundal
The main ingredient for this sundal is Black channa.
The other ingredients are for flavour as a tadka – mustard seeds, split urad dal, curry leaves, asafoetida powder and green chillies.
You will also need a pinch of baking soda to aid the channa cook into a soft texture.
I also use grated coconut to add a fresh flavour to the dish.
How to make Black Chana Sundal?
Soak the dried chana in water overnight. Add the required quantity of channa to a bowl and give it a quick rinse. Add lots of water – at least two inches of water above the soaked channa. They expand a lot and sometimes, if you do not add enough water, some chickpeas might not have enough water to bloom. A lot of water is definitely the way to go. Let them soak in the water overnight or at least for 7-8 hours.
The next morning, you drain the channa and rinse them a couple of times. This step is crucial. If you end up using the soaking water to cook the channa, your stomach might not agree with it. So it’s important that you rinse the soaked channa and use fresh water to cook it in the pressure cooker.
Once rinsed, you can add the dried chickpeas to a bowl, fill it up with water and place it in a large pressure cooker. If you are using a small pressure cooker, you can directly add the washed chickpeas to it, along with enough water to cover it.
Next, add a pinch of baking soda and salt. The soda will aid in the cooking process and yield a soft texture in the mouth when chewing.
Pressure cook for 5-6 whistles on a high flame and lower the flame and allow it to boil for another 5 minutes. Turn off the flame and allow the pressure to release naturally.
Check if the channa sundal is cooked well by pressing a couple of pieces of them. If they aren’t cooked, put it back in the pressure cooker and cook for 2 more whistles OR low flame for 3-4 minutes. You need the texture of the channa to be smooth when you press them between your fingers, not al dente.
Tempering the Black Chana Sundal
Scoop out the cooked channa into a bowl and season it with a little salt.
Place a tadka pan on low-medium flame and add one tablespoon of cooking oil. Once the oil is warm, add mustard seeds and allow it to sputter. Next, add the split urad dal and curry leaves. Finally, add the asafoetida powder and turn off the flame.
Add this tadka to the bowl of cooked channa and give all the ingredients a good mix.
This is an optional step, but if you want to add an extra zing to the channa sundal, you can take a handful of grated coconut along with a green chilli and pulse them in the mixer a couple of times. Use this coconut mixture as a garnish for this konda kadala sundal and you will get a mild spice to the dish without it being overwhelming. Garnish with some lemon juice and mix the ingredients until well combined.
If you want to keep it simple, garnish it with freshly grated coconut and a generous squeeze of lemon juice. – This is a simpler step for the beginners.
You can also jazz up the salad by adding grated carrots, pomegranate seeds and fried cashew nuts as well.
Storage and Shelf Life
Konda Kadali Sundal has a good shelf life – on the counter it will last for more than half the day. But if you add grated coconut, it’s best to eat it at the earliest. If you live in a warm place, it is best to put it in the fridge.
You can store Channa sundal in the fridge for up to 2 days. Try not to reheat it several times.
Black Chana Sundal
If you are looking for more Sundal Recipes, please click here to find the recipe you are looking for.
Please do follow me on Instagram and Facebook and do subscribe to my channel on YouTube. Thank you so much!
Recipe for Black Chana Sundal
Black Chana Sundal
Black Chana Sundal is a South Indian snack or tiffin dish served along with coffee/tea made with boiled black chana and seasonings
1cupBlack Chanasoaked overnight and pressure cooked
For the tempering
1tbspCooking oilgroundnut oil
1tspMustard Seeds
1tspSplit White Urad Dal
2sprigCurry Leaves
½tspAsafoetida powder
For the Garnish
2tbspGrated Coconut
1Green Chillislit
½Lemonjuice of half a lime
Instructions
Take a cup of dried black channa in a container and give it a rise. Fill the container with water 3-4 inches above the white channa. Let it soak overnight.
The next morning, drain the water and give the channa a thorough rinse. Add fresh water to the same container and place it in a pressure cooker with 2-3 inches of water at the base. Add ½ tsp of salt and a pinch of baking soda to the chana. This will aid in cooking the channa faster.(You can add the rinsed channa directly to the pressure cooker along with water submerging the channa)
Allow 5-6 whistles and then turn the flame to low, and allow to cook for another five minutes on that low flame. Turn off the cooker and allow the pressure to release gradually.
Remove the container from the cooker and drain the water into another container. You should press a couple of pieces of channa to ensure it's fully cooked.
Season the cooked black channa with 1/2 tsp of salt and adjust it accordingly.
Tempering and Garnishing the Kala Channa Sundal
Place a small tadka pan on low-medium heat. Once the pan is warm, add 1 tablespoon of cooking oil.
Once the oil is warm, add the mustard seeds and allow it to crackle. Next, add the split urad dal and allow it to turn slightly golden.
Now, add the curry leaves and let them crisp up.
Finally, add 1/2 tsp of asafoetida powder and turn off the flame.
Mix the tadka well and pour it over the cooked black channa. If you are using grated coconut and green chilli for the garnish, add both ingredients to a mixer and pulse grind it 2-3 times.
Use this coarse coconut mixture as the garnish, along with generously drizzled lemon juice on top.Mix all the ingredients well and serve this Black Chana Sundal as a healthy snack in the evenings.
Paruppu Thogayal is a chutney made with Tur dal, coconut and red chillies. It can be served as a side dish with rasam rice and curry.
Paruppu Thuvayal
Paruppu Thuvayal or Paruppu Thogayal is a chutney made with Tur dal as the main ingredient. It pairs fantastic with a simple lemon rasam and potato curry.
Thogayal is usually prepared with rasam since most rasam recipes do not use dal in them. So, to add some weight to the meal, people typically serve this dal chutney with rasam.
It is simple to make and does not take much time, making it a good recipe for beginners.
It is one of those dishes that does not appear on menus of restaurants or at weddings. Paruppu Thogayal has stayed close to the palettes of Tamil homes and still today makes an appearance only with rasam in my house.
You can also serve Paruppu Thogayal with Vatha Kuzkambu and rice or also eat it along with hot rice and ghee.
Ingredients for Paruppu Thogayal
The first and main ingredient is Tur Dal. It is the typical dal used, but I suppose you could also use masoor dal or chana dal for this recipe – it will taste equally great. South Indians use a lot or Tur dal in their day to day cooking.
Coconut – Fresh grated coconut is the best, but you can also use dessicate coconut if you do not have access to fresh coconut.
Dried Red Chillies – I mostly use Byadagi red chillies that have less heat and more colour. You can also use the Tamil Nadu red chillies that are round.
Pepper Corns – Pepper provides the heat required for the dish; you can use 7-8 peppercorns or more than that as per your heat tolerance.
For the tempering – Cooking oil (I prefer using gingelly or sesame oil), 1/2 tsp mustard seeds, 1 tsp split urad dal and 1 sprig curry leaves.
An optional ingredient is garlic. If you are planning to use it, you will need 5-6 of those small ones or 1 large pod (like the ones you get in the west).
How to make Paruppu Thogayal
Wash the tur dal thoroughly until the water runs clear. Soak the dal in water with an inch or two above the soaked dal, allowing room for it to expand. Let the dal soak for 30 minutes at least. Soaking dal helps digest it better. You can even add an extra step of roasting the dal before rinsing and soaking.
While the dal is soaking, get the other ingredients ready. Grate the coconut and keep aside.
Place a small pan on low- medium flame and dry roast the dried red chillies. This should take about a minute or 90 seconds. Don’t step away from the pan as they tend to roast quickly and you will taste the burnt flavour in the Paruppu thogayal.
Once the red chillies become crispy, transfer them to a plate. Next to the same pan, add the pepper and allow it to roast. The moment you see the pepper popping off the pan, turn off the flame and transfer the pepper to the plate.
If you are using garlic, you can roast the garlic for 1 minute until you see some colour on it. Or you can choose to use raw garlic too.
Once the dal has soaked enough, drain the water and give the dal a rinse. Add this to a mixer jar. To the same mixer, add the coconut, red chillies, pepper and garlic. Do not add any water, this should be a thick chutney.
Grind the paruppu thogayal to a semi coarse paste or a smooth paste depending on the texture you like. In our house, we keep the dal half ground just for the texture.
The final step is to add the tempering.
Place a tadka pan on a low to medium heat. Once the pan is warm, add the oil. Once the oil is warm, add the mustard seeds and allow it to sputter. Next, add the split urad dal and let it lightly brown. Now, add the curry leaves and asafoetida powder. Turn off the flame and add this tadka to the paruppu thogayal.
Add 1/2 tsp of salt and mix all the ingredients.
You can serve Paruppu Thogayal with rasam and rice or Vathakuzhambu and rice or with just hot rice and ghee.
Storage and Shelf Life
Paruppu Thogayal can be stored in the fridge for up to two days, after which it might taste funky. Since it contains coconut, make sure to consume it immediately after preparing it, especially in warm temperatures.
Paruppy Thogayal
If you are looking for more Chutney Recipes, please click here to find the recipe you are looking for.
Please do follow me on Instagram and Facebook and do subscribe to my channel on YouTube. Thank you so much!
Recipe
Paruppu Thogayal
Paruppu Thogayal is a chutney made with Tur dal, coconut and red chillies. It is served as a side dish along with rasam rice and curry.
Wash the Tur dal in water until the water runs clear. Soak the dal water with an inch of water above to allow the dal to expand. Let the dal soak for a minimum of 30 minutes. (Do not soak for more than 2 hours)
While the dal is soaking on a small pan, dry roast the red chillies first until it becomes crisp. It should take about a minute. Remove the red chillies and then add the pepper. Pepper will roast quickly. Once the pepper begins dancing on the pan, turn off the pan and allow them to cool down on a plate.
Once the soaking is complete, drain the water thoroughly and add it to a mixer jar. Add the grated coconut and the roasted red chilli and pepper.
Do not add any water, run the mixer until the thogayal is a thick yet slightly coarse paste. We like some texture to the thuvayal, but if you prefer, you can grind it to a smooth paste.
The last step is to temper the Paruppu Thuvayal.Place a tadka pan on a low-medium heat. Add 1 tbsp of oil and allow it to warm up.
Next, add the mustard seeds, split urad dal and allow them to sputter. You can now add the curry leaves and asafoetida powder. Turn off the flame and add this tadka to the Paruppu Thogayal
Add ½ tsp of salt and mix all the ingredients well.
Your Paruppu Thuvayal is ready to be served. Serve this with a simple rasam, rice and potato curry.
Keyword Chutney Recipes, Tamil Nadu Recipes, Traditional Recipes
Cabbage Thoran is a side dish made with cooked cabbage with a garnish of coconut, green chillies, and cumin.
Cabbage Thoran | Cabbage Curry
Cabbage Thoran is a South Indian, and specifically Kerala style, of preparing vegetables. All thorans start off with vegetables being steam cooked, followed by a garnish of ground up grated coconut-green chilli-jeera.
We make this dish almost every week with a different vegetable: carrots, beans, snake gourd, beetroot or even mix vegetables.
In this recipe, I have not used sliced onions because I grew up eating very little onions in dry curries like this – so it’s just practice. But you can add sliced onions; it will give a nice texture and sweetish taste.
Ingredients for Cabbage Curry
The main and first ingredient is cabbage. Depending on the size of your household, pick the size of the cabbage. I recently learnt that the cabbage is the flower part of the plant, so you are basically eating a flower. How cool is that?
Coconut Oil – I prefer to use coconut oil, but you use any cooking oil of your choice.
Other ingredients – mustard seeds, split urad dal and curry leaves.
Thoran mix – grated coconut, green chillies and jeera seeds
You can also use sliced onions for this dish.
How to make Cabbage Thoran?
Slicing the cabbage is the part that takes the longest time in making the dish. You can start off by removing any damages outer leaf and then rinsing off the top layer with water. Wipe the cabbage.
Slice the cabbage in half and you will notice the thick core at the center. Cut off the core and then stack the individual leaves (or petals). Cut them into thin strips. Do the same for the rest of the leaves. You can eat the core, but if you want uniformity in texture, you can just use the leaves and keep the core to make vegetable stock.
Cooking the cabbage thoran
Place a kadai on medium flame. Add some coconut oil or any oil of your choice. Once the oil is warm, add the mustard seeds and split urad dal. Let the mustard seeds sputter.
Next, add the curry leaves, and saute it for a couple of seconds. If you are using onions, add the at this stage and allow them to soften.
Then add the sliced cabbage. Sprinkle the turmeric powder, asafoetida powder, and salt. Mix all the ingredients well. Once you see that the turmeric has coated the cabbage well, sprinkle some water on top of the cabbage and cover the kadai with a lid. Turn the flame to the lowest setting.
Cabbage cooks very fast so do not move away from the stove. Check a few times, mix the cabbage and check for doneness. If you think the cabbage has cooked, increase the heat and allow for any of the excess moisture to evaporate. Turn off the heat.
IN a small mixer jar, add the grated coconut, green chillies and jeera. Grind them in pulse mode 2-3 times without water. You want to see a coarse texture and not a mushy texture like a chutney.
Take this garnish and add it to the cooked cabbage. Mix well and your curry is ready.
Serve Cabbage Thoran as a side dish with Rasam rice and Beans Paruppusli. You can serve this cabbage delicacy on festive occasions or during an Onam Sadhya.
Storage and Shelf Life
Cabbage curry is best eaten within 2-3 hours of it being made if left on the counter. The usage of coconut in it will make it go bad quickly in a tropical climate.
You can keep the vegetable in the fridge for up to 2 days, after which I suggest you toss it. Anything with fresh coconut in it is best not consumed after 2 days in the fridge.
Cabbage Thoran
If you are looking for more recipes for Vegetable Curries, please click here to find the recipe you are looking for.
Please do subscribe to my channel on YouTube. Thank you so much!
Recipe
Cabbage Thoran
Cabbage Thoran is a side dish made with cooked cabbage with a garnish of coconut, green chillies and cumin.
The first step is to wash and slice the cabbage into thin strips. The best way to get equal size strips of cabbage is to cut the cabbage down the center. Then cut off the central thick vein. Stack the leaves on top of each other and slice thinly. It will take some time to get it as thin, but keep at it.
Place a kadai on medium heat and add some coconut oil. Once the oil is warm, add the mustard seeds and split urad dal.
As the mustard seeds stop sputtering, add the curry leaves and stir for a minute.
Next, add the sliced cabbage. Sprinkle a teaspoon of turmeric powder, asafoetida powder and ½ tsp of salt. Stir until the cabbage is coated with turmeric.
Sprinkle some water on top of the cabbage, bring the flame to a low and close the lid of the kadai. The cabbage will steam cook and if you notice that the water levels are reducing, sprinkle some more water. Don't move away from the stove because cabbage should take less than 5 minutes to fully cook.
While the cabbage is cooking, you can get the final garnish ready. To a small mixer jar, add grated coconut, green chillies and jeera. Pulse grind 2-3 times and you have the final garnish ready.
Once the cabbage has cooked and there is no moisture left in the kadai, turn off the heat.Add the coconut-green chilli garnish and mix them all well.
Tomato rice is a tangy rice based dish prepared with cooked rice, cooked tomatoes and tempering of South Indian spices.
Tomato Rice
Tomato rice is a rice-based dish, made with cooked rice, onions, tomatoes and nuts. Tomato rice makes an excellent dish for lunch box either for kids or adults.
It takes less than 30 minute to make, but if you have cooked and cooled rice ready, you can have the rice ready in 10 minutes.
Each household have their own recipe for tomato rice with the addition on various spice powders like coriander powder, jeera powder and even garam masala powder.
But I keep it simple with just tomato and onions, with salt and turmeric powder. If I have some thick Tomato Thokku ready in my fridge, I add a tablespoon of that for extra flavour.
Ingredients for Tomato Rice
Rice – you can use any rice for tomato rice. I’ve tried them with many Indian rice varieties and they’ve turned out great.
Tomatoes – I prefer to use the hybrid tomatoes for this recipe. I’ve used the naati tomatoes before and they become quite sour tasting when used. For this recipe, you need 2-3 large tomatoes, but if you are using naati tomatoes, you can limit it to two.
Onions – One medium-sized onion, finely chopped
Green Chilli – 1 or 2, slit lengthwise.
Peanuts or cashew nuts – I like adding them because it adds a nice crunch to the dish.
Cooking oil – I like using groundnut oil for this, but you can choose any.
The other ingredients are mustard seeds, two sprigs of curry leaves and salt.
You can also use any store-bought Tomato Thokku or homemade one to enhance the taste of the tomato rice.
To help you with adjusting the sourness, you can keep the jaggery powder of sugar handy as well.
How to make Tomato Rice
Cooking the rice
The first step is to prepare cooked and cooled rice. Start off by washing the rice until the water is clear. Add the washed rice to a small pressure cooker. For every measure or cup of rice, you will need to add 2 cups of water. If you add more water, say 3 cups, the rice will turn out mushy. You want rice that doesn’t stick – “uduruduru” as we say in Tamil or Kannada.
Pressure cook for 3 whistles on high flame and lower the flame and let it simmer for a minute. Turn off the heat. Once the pressure of the cooker comes down, remove the rice from the cooker and spread it out on a plate. This will help the rice cool down faster. You could also keep it under a fan or place it in the fridge for a few minutes.
[Another way to cook rice is in a large pressure cooker. Start by adding 1-2 inches of water at the bottom of the pressure cooker. Add the rinsed rice to a stainless steel container, add 2 cups of water and then place the container in the large pressure cooker. Place a plate on top of the rice and close the lid of the pressure cooker. Let 3 whistles go and switch off the cooker. Once the pressure comes down, spread the rice on a plate and keep it under the fan for cooling.
You can also cook rice in a rice cooker with the same measurement after washing the rice. The rice will be ready in 20 minutes. Remove the rice from the cooker and spread it on a plate and allow it to cool down.
Alternatively, you can cook rice the previous night and keep it in the fridge. Just make sure to fluff up the rice and make sure the grains are not sticking to each other before putting the container of rice in the fridge.
Prepping the other ingredients
As your rice is being cooled down, you can slice your onions, green chillies and wash the curry leaves.
Chop the tomatoes into small pieces, not a puree, but as small as you can. You can also use a manual chopper to get the finely diced texture.
You can also roast cashew nuts of peanuts with some ghee or oil in a small pan until they are golden brown. If you prefer to have a really crunchy texture of nuts when eating tomato rice, you can follow this step. Else you can add the nuts directly to the oil in the next steps.
Making the Tomato rice
Place a kadai on medium heat. Add 2 tablespoons of oil and let it warm up. Now add the mustard seeds and curry leaves to the oil. Let the seeds sputter.
If you haven’t already added the cashew nuts of peanuts, you can add them now and let it get to golden brown.
Next, add the green chillies and onions and saute them. Let the onions cook and become soft. At this stage, add the finely chopped tomatoes. To this, add the turmeric powder and start off with one tsp of salt.
Mix this well until the tomatoes go soft. It should take about 5 minutes for the tomatoes to cook down completely.
If you have some Tomato Thokku in your fridge, now would be the time to add one tablespoon of it. I love the flavour that the thokku brings about. If you don’t have the thokku, it’s perfectly fine. If you want a really spicy tomato rice, you can add some chilli powder, coriander powder and jeera powder. I’ve seen some recipes that add garam masala as well, buts it’s completely up to you.
Once the tomatoes have cooked, turn off the flame and add the cooked and cooled rice. Thoroughly mix all the ingredients until the tomato and onion masala coats all the rice.
Do a taste test of the tomato rice and adjust salt as required. If you feel the tomato rice it too tangy, you can sprinkle 1 tbsp of jaggery powder and adjust the sourness of the rice.
You can serve this delicious Tomato Rice with Cucumber Raita,Channa Salad and Papad.
Storage and Shelf Life
Tomato rice is a good dish for packing into lunch boxes for kids and office goers. They will not go bad unless the temperatures are really high in your city/town.
You can store tomato rice in the fridge for up to 3 days, after which it’s best to toss it. When you remove it from the fridge for reheating, do it just once and not reheat any more times after that.
Tomato Rice
If you are looking for more Rice Recipes, please click here to find the recipe you are looking for.
Please do subscribe to my channel on YouTube. Thank you so much!
Recipe
Tomato Rice
Tomato rice is a tangy rice based dish prepared with cooked rice, cooked tomatoes and tempering of South Indian spices.
The first step is to wash the rice. Rinse the rice until the water is clear. You can either add the rinsed rice to a small pressure cooker, pour in twice the quantity of water. Or you can add the rinsed rice to a vessel, add water and place this vessel inside a large pressure cooker. (For every cup of rice and add 2 cups of water. The cup measurement can be any cup of your choice.)
Let out 3 whistles and turn off the cooker. Let the pressure release naturally.
Once the pressure has released, remove the cooked rice and spread it out on a large plate to allow it to cool down.
While the rice is being cooled, you can prep the tomato onion masala.
Place a kadai on a medium flame and add 2 tsps of cooking oil. Once the oil is warm, add 1 tsp of mustard seeds, and peanuts / cashew nuts. Let the mustard seeds sputter and nuts be roasted.
Next, add the sliced green chillies, finely chopped onions and saute it for a minute until the onions go soft.
Once the onions are soft, add the tomatoes and some salt. Close the lid of the kadai and let the tomatoes cook. The tomatoes will cook in under five minutes.
If you are using tomato thokku, you can add it now and saute for a couple of minutes. The thokku adds an extra taste. After the tomatoes are cooked, you can turn off the heat.
Now, add the cooked and cooled rice to this tomato mixture. Take your time to mix all the ingredients well. Adjust the rice for salt levels. If you think the rice tastses a little too sour, you can sprinkle in some jaggery powder to neutralise the sourness.
Serve your delicious tomato rice with raita, channa sundal and papad.
Vangi bath is a healthy and delicious Karnataka dish made with cooked rice, brinjal with a special spice blend.
Jump to
What is Vangi Bath?
Vangi Bath is a rice-based dish made with cooked rice, brinjal, peanuts/cashew nuts and spiced with a special spice mix.
Vangi literally translates to “brinjal” or eggplant in Marathi. It might have its roots in Maharashtra, but somehow got popular down south in the state of Karnataka and Andhra Pradesh.
Vangi Bhaat is prepared during festivals or a get together as it is relatively simple to prepare. It makes a great lunch box / tiffin box dish and stays fresh through the day.
Ingredients for Vangi Bath
Brinjal, also known by the name of eggplant or aubergine in English, badanekai is Kannada, kathrikai in Tamil and vangi in Marathi – This is essential to vangi bath.
Rice – You can use any rice for this dish. I mostly use kolam rice at home but it will taste great in basmati rice too.
Spice Powder – The main flavour comes from this Vangi Bath Masala Powder recipe, so it’s essential that you keep this ready. You can also purchase this powder. I’ve tried MTR’s Vangi bath powder, and it’s good.
The other ingredients are – Cooking oil, mustard seeds, curry leaves, finely chopped onions and lemon juice.
To add a crunch element to the dish, you can add Peanuts or cashew nuts as well.
You can also garnish the brinjal rice with freshly grated coconut.
How to make Vangi Bath
The prep work
The first step is to cook the rice. Wash the rice thoroughly in a sieve or in a container. Add water in the ratio of 1:2 or 1:2.5 and cook the rice as you would in a pressure cooker or stove top. Once the rice is ready, tip the rice onto a large plate and allow it to cool down. Be sure to separate the clumps of rice so that the cooked grains aren’t sticking together.
While the rice is cooking, you can prep the vegetables. Chop the onions and wash the curry leaves and keep aside. Keep a bowl of water and add the chopped brinjal to the water to prevent discolouration.
Putting together the Vangi Baath
To a kadai, add two teaspoons of cooking oil. Once the oil is warm, add the mustard seeds and allow it to sputter. If you are using, at this stage you can add peanuts or cashew nuts. Toast them until they turn brown.
Next, add the curry leaves and onions. Saute the onions until they are soft. Now, add the chopped brinjal to the pan and allow it to cook for a few minutes while mixing it.
Add 2 tablespoons of vangi baath powder and 1 tsp salt and mix all the ingredients well. Allow the brinjal / vangi to cook. You know the brinjal is cooked when it changes colour.
At this stage, turn off the stove and add the cooked and cooled rice. Squeeze some lemon juice on top and garnish with some coriander leaves.
Take your time and mix the rice with the onions and brinjal. Make sure to coat every single grain of rice with the masala.
If using, finally garnish with some freshly grated coconut.
Serve Vangi Bath with cucumber raita and papad.
Storage and Shelf Life
Vangi bhaat makes for an excellent lunch box dish. You can keep it on the counter for a few hours, it will be ok. If you garnish with grated coconut, it is best to keep it in the fridge after a couple of hours.
You can make and store the rice for up to 2 days in the fridge. Once removed from the fridge, it is best to reheat it only once.
If you are looking for more Rice Recipes, please click here to find the recipe you are looking for.
Please do subscribe to my channel on YouTube. Thank you so much!
Recipe
Vangi Bath | Brinjal Rice
Vangi bath is a healthy and delicious Karnataka dish made with cooked rice, brinjal with a special spice blend.
Rinse the rice under water until clear. Add it to a container and fill 2 times the quantity of rice taken. If you have 1 cup of uncooked rice, you will need 2 cups of water (same measurement cup).
Pressure cook the rice for 3 whistles and turn off the cooker. Once the cooker's pressure has released, remove the rice from the container and spread it on a plate, so that it can cool down.
While the rice is being cooked / cooling down you can prep the vegetables. Peel the onion and dice it into small pieces. Wash the brinjal and cut them in to 1-inch cubes. Keep a bowl of water next to the cutting board to add the cut pieces. This is to avoid the brinjal pieces from discolouring.
Preparing the vangi bath
Place a kadai on medium heat. Add the cooking oil. Once the oil is warm, add the mustard seeds and allow it to sputter.
Next, add the peanuts/ cashewnuts. Saute them in the oil for 15-20 seconds.
Now, add the curry leaves and sliced onions. Saute the onions until they are soft.
Add the cut brinjals without the soaking water. This might sizzle a bit, so drain as much water as possible before adding the brinjal pieces to the kadai.
Mix all the ingredients well. Now add the vangi bath powder and cook the spice powders along with the brinjals and onions. Add 1 tsp salt too. Brinjal cooks fast so this should take less than 3-4 minutes.
Once the brinjal has cooked (light green brinjal would've turned into a dark green colour now) turn off the flame.
Add the cooked and cooled rice to the kadai. Squeeze the juice of one lemon on the rice along with half a teaspoon of salt.
Take your time and mix the Vangi Bath very well. The taste of the spices and seasonings should be coated well with all grains of the rice.
Once mixed, you can serve Vangi Bath along with Cucumber raita or plain curd.
Sweet Potato Cutlet is a healthy evening snack made with cooked sweet potatoes, spices and herbs, shallow fried to a crisp. You can serve it with some mint chutney or any chutney of your choice.
Sweet Potato Cutlet
Sweet Potato Cutlet is an excellent evening snack, or an appetizer made with cooked sweet potatoes & spices and fried to a golden crisp.
These make an excellent after-school snack that kids most definitely will love. You can even carry this as a 4PM snack in your dabbas to office.
The spices I’ve used are basic ones – salt, pepper, turmeric and red chilli, but you can jazz it up by adding any spices of your choice.
Ingredients for Sweet Potato Tikki
The main ingredient is, of course, Sweet Potato. We get sweet potatoes in Bangalore almost throughout the year, but the ones that you get in season are the best. (November-February). You can make this tikki with normal potatoes.
I have used basic spices – salt, pepper, turmeric and red chilli powder. But you can make it interesting by adding onion powder, garlic powder, paprika powder and even Italian spices.
One of the most important ingredient is the Cornstarch. This ingredient binds the cutlet and keeps the ingredients together when you are shallow frying or deep frying.
I have also used finely chopped onions and coriander leaves.
You will also need cooking oil for shallow frying the tikkis.
How to make Sweet Potato Cutlet
Clean the sweet potatoes and add them to a small pressure cooker with 1/2 cup of water at the bottom. Close the lid and pressure cook for 3-4 whistles. Allow the pressure to release naturally.
Once the pressure has released, remove them immediately. I have observed that if you leave potatoes inside the pressure cooker long after they have cooked, they can become mushy.
Cut off the edges of the sweet potato and peel the skin. Mash the potatoes and place them in a large bowl. (If you mash the potatoes long after they’ve cooled, it might be tough, so it’s best to mash them when warm)
Add all the spice powders, onions, coriander leaves and cornstarch. Start with 1/2 tsp salt and adjust accordingly later.
Mix all the ingredients to form a nice dough like texture. You must not have any moisture in the sweet potato cutlet mixture. If you notice that there is moisture, just add another 1/2 tsp of cornstarch.
Make equal sized balls from the tikki mixture. Flatten them and give them a shape of a tikki or cutlet. Keep them on a plate and place them in the freezer for a minimum of 30 minutes. You can even prepare a lot of them and freeze them to use for the next one week.
Place a shallow pan on a medium flame and add some oil, roughly 1/2 cup. Place the frozen tikkis one by one with enough space in between them. Fry them on a low to medium flame for about 2 minutes on each side. Fry them until golden brown.
Serve these delicious Sweet Potato Cutlets with Mint Chutney, ketchup of any spicy dip of your choice.
Storage and Shelf Life
Once you fry the tikkis, you can easily leave them out for up to 2 hours. But if you plan on packing it in the dabba, ensure that you store your food in a cool place. In Bangalore weather, you can leave it out for 4-5 hours.
The best thing is to make a large batch of tikkis and keep them in the freezer for up to 1 week.
Sweet Potato Cutlet
If you are looking for more Potato Recipes, please click here to find the recipe you are looking for.
Please do subscribe to my channel on YouTube. Thank you so much!
Recipe
Sweet Potato Cutlet
Sweet Potato Cutlet is a healthy evening snack made with cooked sweet potatoes, spices and herbs, shallow fried to a crisp. You can serve it with some mint chutney or any chutney of your choice.
Start off with cleaning the potatoes and add them to a small pressure cooker for 3-4 whistles. You can also boil the sweet potatoes in water for 10 minutes. (check for done-ness frequently).
Once the pressure is released, remove the potatoes from the cooker. It is best to remove the potatoes as soon as the pressure cooker is done since the potatoes tend to absorb water if you leave them longer.
Peel the skin, mash them well on a large container/plate.
Let's start the seasoning with salt, red chilli powder, turmeric powder and pepper. Next, add the corn starch and mix all the ingredients well.
You have to ensure that there is no moisture in the sweet potato cutlet mixture. If there is any moisture, they will fall apart when you fry them. If you think there is more moisture, add more cornstarch and mix again.
Make round balls of equal size and keep them aside. Take each ball and flatten them until they look like a cutlet or a tikki. Make all the cutlets and keep them on a plate.
Place the cutlets in the freezer for a minimum of 30 minutes before frying them.
Place a shallow pan on medium flame with oil coating the bottom. Add the cutlets one by one, giving them all enough space, depending on the size of the pan.
Fry on one side until golden and flip it to the other side to fry to a golden crisp.
Peanut Sundal is a South Indian snack or tiffin dish made with boiled peanuts and South Indian seasoningsserved along with coffee/tea.
Peanut Sundal or Verkadalai Sundal is a snack, appetizer or you can even classify it as a salad.
We make Peanut Sundal or Verkadalai Sundal with boiled peanuts or groundnuts and season it with a classic South Indian spice-medley of mustard seeds, curry leaves, and asafoetida.
I make this sundal often as it takes very little effort and I always have raw peanuts at home. You can make this healthy verkadalai sundal for Navarathri Golu to give as prasadam.
Ingredients for Peanut Sundal
The main ingredient is Peanuts or groundnuts. It goes by the name of Kadlekayi in Kannada, Verkadalai in Tamil, Mungfali in Hindi and Shengdane in Marathi.
The ingredients needed for the tadka are groundnut oil, mustard seeds, split urad dal, curry leaves and asafoetida powder.
Grated carrots, freshly grated coconut, green chillies, and lemon juice are the other ingredients for the garnish.
How to make peanut sundal?
The Prep Work
The first step is to soak the peanuts in water for a minimum of one hour or overnight. Soaking the nuts before cooking will help easily digest them.
Once the soaking period is done, drain the water and rinse the peanuts. Add fresh water until all the peanuts get covered in the water. Add 1/4 tsp of salt to the water and mix well.
If you are using a large pressure cooker, add 1 inch of water and place the bowl of peanuts inside and close it with a lid. If you are using a small pressure cooker, you can add the rinsed peanuts directly to the pressure cooker with sufficient water covering them.
Pressure cook the peanuts for 3-4 whistles and turn off the cooker. Let the pressure come down naturally. Drain the water and keep the peanuts in a large bowl. Add 1/2 tsp of salt and mix well.
Now, take a tadka pan and place it on a medium flame. Add one tsp groundnut oil; once the oil is warm, add mustard seeds and split urad dal. Let the mustard seeds sputter. Turn off the flame and add the curry leaves and asafoetida powder.
Pour this seasoning on top of the peanuts. Add the grated carrots and garnish with fresh coconut and lime juice.
Alternatively, you can take the fresh grated coconut along with 2 small green chillies in a small mixer jar. Pulse it a couple of times to get a coarse texture. Use this coconut-chilli mixture as a garnish on top of the sundal.
Serve this delicious Peanut Sundal as a side dish with Lemon Rice and curd for your lunch box.
Storage and Shelf Life
Peanut Sundal will store well on the counter for half a day in weather like Bangalore’s, but it’s best to keep it in the fridge if you are eating later.
If you have added coconut, it’s best to store it in the fridge before serving.
You can store peanut Sundal in the fridge for up to two days. It will lose freshness, but it is perfectly edible.
If you are going to garnish with lemon juice, it’s best to do it before serving. If you store this sundal in the fridge with the lemon juice, you might taste some bitter flavour when consuming it later.
Peanut Sundal
If you are looking for more Sundal Recipes, please click here to find the recipe you are looking for.
Please do subscribe to my channel on YouTube. Thank you so much!
Recipe
Peanut Sundal | Veru Kadala Sundal
Peanut Sundal is a South Indian snack or tiffin dish served along with coffee/tea made with boiled peanuts and seasonings
Soak raw peanuts in a bowl with 1 inch of water about the nuts. Let it soak for 1-2 hours or maybe overnight if you are making it the next morning. But a minimum of one hour soaking is sufficient.
Drain the water and add fresh water to the bowl of peanuts. Rinse the peanuts off under water. Add the rinsed peanuts to the bowl and add fresh water until it covers all the peanuts.
If you are using a large pressure cooker, add about an inch of water to the bottom of the cooker and place this bowl of peanuts inside with a lid on top. If you are using a small pressure cooker, directly added the soaked and rinsed peanuts to the cooker and add about 200ml water or as much as required to cover all the peanuts.
Allow for 3-4 whistles and turn off the cooker. Let the pressure release naturally. Meanwhile, peel and grate a carrot and keep aside.
After the pressure has released, remove the bowl of peanuts or, with the use of a sieve, remove the cooked peanuts from the pressure cooker. Add them to a bowl and season with salt. Mix well.
Place a tadka pan / small pan on a low-medium heat. Once the pan is warm, add a teaspoon of oil.
Once the oil is warm, add the mustard seeds and split urad dal. Toast it until the urad dal turns brown.
Turn off the heat and add the asafoetida powder and curry leaves. Let the curry leaves crisp up. Add this tadka to the bowl of cooked peanuts. If using, add the grated carrots too.
If you are short on time, you can skip this step, but I think this final garnish adds a nice zing to the dish. Take two tablespoons of grated coconut along with a green chilli in a mixer and pulse grind it for 3-4 times until the green chilli looks minced.
Add this grated coconut mixture as a garnish to the peanuts, and mix well. For the final garnish, just before serving, you can squeeze the juice of half a lemon on top.
Keyword After School Snacks, Healthy Evening Snacks, Navaratri Recipes, Sundal Recipes
Moong Sprouts Salad is a beautiful medley of sprouted green gram, cucumbers, grated carrots, a simple seasoning of mustard seeds and garnish of lime juice
Moong Sprouts Salad
Moong Sprouts salad is a crunchy and savoury salad made with spouts of moong dal or mung beans. They are easy to make and a great healthy side dish for any meal.
The sprouts are first slightly cooked, seasoned with mustard seeds and garnished with a variety of ingredients like grated carrots, cucumbers, pomegranates, roasted peanuts, coriander leaves, grated coconut and lime juice.
Moong sprouts also go by the name of sprouted mung beans, commonly in eastern Asia.
I make this salad once in two weeks as a side dish for a rice dish like Lemon Rice or tomato rice. You can make this sprout salad recipe with just a basic seasoning of salt, sugar, and lemon juice as well.
Ingredients for Moong Sprouts Salad
The main ingredient is green moong dal. I prefer to make sprouts at home and I quite enjoy watching it sprout. Read in the section below on how you can make sprouts at home.
If you are using ready-made sprouts, this salad will come together in 10 minutes.
Vegetables – Grated carrots, diced cucumber, finely sliced green chillies
Seasoning – Cooking oil, mustard seeds, split urad dal, salt and pepper.
If you want to keep it simple, you only need the green moong dal and ingredients for seasoning.
Steps to make Green moong sprouts salad
The first step is to make the sprouts, unless you are using sprouts that are readily available in the market.
How to make sprouts at home?
To make sprouted moong dal, start off by washing and soaking one cup or 200 g of sprouts in a medium-sized bowl. Add enough water so that there is at least 2 inches of water above the soaked dals. They will expand so, there needs to be enough space. You can soak this overnight.
Next morning, drain the water and give the moong dal a rinse under running water. Let there be some moisture left over from the rinsing process.
Place these washed beans in a thin cloth like a muslin cloth or a handkerchief. Get the opposite ends of the cloth together and tie them up. Place this little bag of unsprouted beans in a box with the lid open. Let it sit for 24 hours in a somewhat dark and cool place. I usually place it in the oven.
I have a box that has holes in the bottom, sides and top that allows for ventilation. It is brilliant for the sprouting process. This dabba is from 2 decades ago when my mother was using it. There is a free flow of air, but closed enough to allow for sprouting.
There are several boxes available online these days to make the process of sprouting easy, or you can just buy the sprouts that are available in local markets.
After a day, you’ll see small sprouts at the end of the beans. You can use these, but I like it when the sprouts are slightly longer, so I take the box out, give the beans another rinse and put it back in for another day. You’ll see longer sprouts that are much healthier.
Before using the sprouts, give them a rinse under running water.
You can now eat them raw or slightly cook them before consumings. I prefer to cook the sprouts for a bit by blanching them or sauteing them in the seasoning.
Place a small pan on low-medium heat. Add a teaspoon of oil and allow it to warm up. Next, add mustard seeds and allow them to sputter. Now add the moong sprouts to the pan and saute for a minute. The sprouts will start to wilt. At that stage, turn off the heat and transfer it to a large bowl.
Now, if you have time to prep all the other ingredients, you can add them now.
Almost always, I add grated carrots, diced cucumbers, finely chopped coriander leaves, finely chopped green chillies and pomegranate pearls. Give all the ingredients a good mix.
[You can even finely chopped onions, tomatoes and diced raw mango to the salad]
Just before serving, add 1/2 tsp salt, lemon juice and grated coconut. Mix them all well and enjoy!
You can enjoy this delicious Moong Bean Sprout Salad as a side dish with Rasam rice or Curd rice.
Storage and Shelf Life
You should eat these sprouts salad fresh and finish them on the same day. If you can’t finish it, it’s best to eat them the next day after removing from the fridge.
Moong Spouts Salad Make Potato
If you are looking for more Salad Recipes, please click here to find the recipe you are looking for.
Please do follow me on Instagram and Facebook and do subscribe to my channel on YouTube. Thank you so much!
Frequently Asked Questions
Can I eat raw moong sprouts?
Yes, you can eat raw moong sprouts. Just give them a rinse before eating.
Is moong salad good for health?
Yes, 100%. All good things in moderation.
Recipe
Moong Sprouts Salad
Moong Sprouts Salad is a beautiful medley of sprouted green gram, cucumbers, grated carrots, a simple seasoning of mustard seeds and garnish of lime juice
If you are sprouting the moong dal at home, this process takes 2 full days. But the active time spent on the sprouting it is less than 5 minutes.
Wash and soak the green moong dal in 2-3 inches of water above the dal in a medium-sized container. You can do this overnight for about 7-8 hours.The next morning, drain out the water and rinse the soaked dal for a few times.
Add these washed sprouts to a thin cloth, like a muslin cloth or a handkerchief. Knot the cloth by grabbing all four ends of the cloth. Keep this cloth with the rinsed moong dal in a steel box with the lid slightly open. I use a particular box that has small holes on top, sides and bottom and it does not even need the cloth. It's really convenient – see if you can get one of these boxes (see picture above).
Keep this in a dark and cool place for a day. I usually keep it in my oven. You can find a similar place in your kitchen as well.
Remove the box the next day and you will notice there are small sprouts already. At this stage, the sprouts are ready for use. I like longer sprouts, so what I do is to rinse out the sprouts once again and put it back in the cloth and box for one more day.
It's best to cook or blanch them once before consuming them, but you can eat them raw too. Just give it a rinse before eating.
Place a pan on medium heat and add a teaspoon of oil. Once the oil is warm, add mustard seeds and allow it to sputter. Add the moong sprouts and saute it in the heat for less than a minute. Turn off the heat.
To a large bowl, add all the ingredients, including the cooked moong sprouts. Finally, garnish with grated coconut, finely chopped coriander leaves and a drizzle of lemon juice.
Keyword Indian Salad, Moong Dal Recipes, Salad Recipes
Red Chutney for Masala dosa is a specialized chutney used in preparing Mysore Masala Dosa. This zesty chutney, made with shallots, garlic, red chillies, and channa dal, serves as a flavouring layer inside the dosa and chefs pair it with a potato mixture.
Red Chutney for Masala Dosa
Red Chutney for Masala dosa, as the name suggests, is a chutney that is prepared specifically for elevating the taste of masala dosa to a spicy one. People specifically use this chutney when making Mysore Masala dosa. Using this chutney inside the dosa is the only difference between masala dosa and Mysore masala dosa.
The red chutney’s bright red colour comes from the use of Byadagi red chillies and roasted chana dal. The use of Channa dal also renders this chutney thick, making it easy to spread on the inside of the dosa.
There are several ways that people make this chutney, but this recipe is one that I use every single time. I do not use coconut in the chutney as any chutney with coconut is not easily spreadable. I’ve also made chutney without the use of chana dal, but it gets a little too watery and softens the dosa.
I try to make masala dosa at least twice a month and I make extra so that we can smear it on plain dosa the next day.
Ingredients to make Mysore Masala Dosa Red Chutney
Dried Red Chillies – You can use any dried red chillies but byadagi chillies are the best. They have a nice colour as well as a little heat to them.
Channa dal – You will need 2 tablespoons of channa dal for this recipe. It usually lasts for one breakfast session and maybe a little left over for 1 or 2 dosas the next day.
Garlic – Garlic adds that special zing to the chutney, so the more you add, the more zing. But it’s best to not overdo it since you don’t want to be left with a garlicky taste in your mouth. I am using 6-7 cloves of garlic (the small ones that we get in India. If you have big bulbs of garlic, just one will suffice). I usually buy peeled garlic that’s readily available in local shops.
Onion – For this recipe, I’ve used one medium-sized onion. The onion, when lightly roasted, gives a slight sweet taste while retaining the pungency too. Alternatively, you can use sambar onions or shallots too. They give a slightly sweetish taste to the chutney.
Tamarind – A small piece, the size on a one rupee coin is enough. Soak the tamarind in some warm water for 5 minutes. You can then squeeze out the pulp and keep that ready. The tamarind brings a nice sour flavour to the chutney. You can also use ready-to-use tamarind extract, but make sure to only use 1/2 tsp of it since it might be really concentrated.
How to make Red Chutney for Masala Dosa?
The first step is to soak the tamarind is some warm water for five minutes. After five minutes, you can squeeze the pulp from the tamarind and keep it aside.
Peel and chop the onions, remove the skin from the garlic pods and keep them both aside.
You start off with toasting the red chillies on a low heat until it crisps up. This process should take about a minute or two. Transfer the red chillies on to a plate.
The next step is to add the channa dal and roast it until it’s a light golden colour. Once done, transfer to the same plate as the red chillies.
Add a drop of oil to the same pan and add the garlic and chopped onions. Toast it for a couple of minutes – doing this helps in removing some of the pungency from both these alliums. After you see a little colour on the onions, you can turn off the heat. Add it to the same plate as the other ingredients.
Once all the ingredients are cool, add them to the mixer jar along with salt and the tamarind extract. Blend till you have a smooth chutney.
You can use this Red Chutney for Masala dosa, plain dosa, Adai or even pesarattu as a way to elevate the taste.
Storage and Shelf Life
Red chutney for Masala dosa stays fresh in the fridge for 3-4 days. Once you remove it from the fridge, use all the chutney up. You can store the chutney in an airtight steel or glass container.
I, however, recommended making small quantities of this chutney and use it fresh for your Mysore masala dosas.
If you are looking for more Chutney Recipes, please click here to find the recipe you are looking for.
Please do follow me on Instagram and Facebook and do subscribe to my channel on YouTube. Thank you so much!
Recipe for Masala Dosa Chutney
Red Chutney for Mysore Masala Dosa
Red Chutney is a simple Channa dal and garlic based chutney used as a spread inside a Mysore masala dosa.
Soak the tamarind in some warm water, peel and dice the onions, and remove the skin from the cloves of garlic. After five minutes, squeeze the pulp from the tamarind and keep aside.
Place a pan on a low flame and add the Channa dal. Roast the Channa dal until golden brown. Transfer to a plate once done.
In the same pan, take 4-5 red chillies or more (if you wish) and roast until the chillies turn crispy. It makes it easier to grind when the red chillies are crispy. Transfer to the plate.
Next come the cloves of garlic. You can roast them for under a minute just to take away the hit of rawness from the garlic. Transfer to the plate.
Add the diced onions and roast them for about 30 seconds. You do not need to cook them all the way.
Once done, transfer to the plate and allow all ingredients to cool down. Then add the cooled ingredients to a mixer jar.
Grind them all together with 1/2 teaspoon of salt and the tamarind. Add very little water as you want to retain the thickness of the chutney. It becomes easy to spread the chutney in the dosa when it is thick. If the chutney is watery, the dosa will be damp and soft, thereby taking away the crispness.
Transfer to a clean container.Use this delicious red chutney as a spread inside your masala dosas or even plain dosas.
Aloo Poha is a popular Indian breakfast or evening snack dish prepared with poha, potatoes, and peanuts.
Aloo Poha
Aloo Poha is a breakfast/ tiffin dish made with the beaten rice, potatoes and peanuts. This dish also goes by the name of Kanda Batata Poha meaning onion potato poha.
The dish is popular in the north of India and has also been well adopted in the south, known as Aval Upma or Avlakki uppittu.
This poha with aloo recipe is one among many ways that the dish is prepared. You have poha recipes from various states in India of which the Indore Poha and Maharashtrian poha are the most popular.
The difference between Indori Poha and Maharashtrian Poha is that the onions are cooked in the Maharashtra version but added raw on top as a garnish in the Indori version.
Poha from Indore also has a garnish of pomegranate seeds and sev/bhujiya on top for that ultimate crunch. A popular breakfast combo in some North Indian states is Poha-Jalebi – I personally love the combination of sweet and savoury as a breakfast, very much similar to our Karnataka combo of Chow-Chow bath.
Ingredients for Aloo Poha
The main ingredient is Poha – also goes by the name of Aval in Tamil, Avalakki in Kannada and beaten rice in English. Poha is a pre cooked version of rice that has been around in our food culture for more than a millennium. It even finds mention in the puranas, and Jaggery Poha is one of Lord Krishna’s favorite foods. I am using about 1 cup which is approximately 160-180g.
What is Poha made of? – The answer is simple. Its just rice that is soaked, pre cooked and dried into difference thickness. The thicker varieties are used to make various day to day dishes while the thinly beaten one is used for making poha chivda. Poha is apparently healthier than cooked rice since the process of making it helps retain a lot of the minerals and vitamins.
Since this is a recipe for Aloo Poha, potatoes are a must. For this recipe, I am using one large potato. When using the potato for this recipe, dice them into small, equal sized cubes so that it cooks faster and evenly.
[If potato is your favourite vegetable, check out other potato recipes I have on my blog
For the crunch factor, I am using peanuts.
The other ingredients are – Cooking oil, Curry leaves, green chillies, one medium-sized onion, juice from one small lemon.
Grated coconut is an optional ingredient – it adds a sweet taste to the dish that I personally love.
How to make Aloo Pohe at home?
The first step is to soak the poha/ beaten rice for 10 minutes in water. This will help soften up the poha, which will be perfect for immediate use. Meanwhile, you can prep the other ingredients – finely chop the onion, dice the potatoes, slice the green chillies lengthwise and keep the curry leaves washed.
Drain the water from the poha by pouring it into a sieve. Allow it to sit in the sieve until all the water drains. The excess starch will also pass through, leaving you with just poha.
Place a kadai on a medium flame and add 2 tsp of cooking oil. I usually use groundnut oil to make aloo poha. Once the oil is warm, add mustard seeds to the oil. When the seeds begin crackling, add the peanuts and toast them to a crisp.
Once the peanuts are crisp, add the green chillies and curry leaves. Saute for a few minutes and then add the onions. At this stage, you can add 1/2 tsp of turmeric powder and give it a mix. Once the onions are soft, add the diced potatoes and mix well.
Add 1/2 tsp of salt and 2 tablespoons of water and close the lid of the kadai. Let the potatoes cook in the steam. Diced into small cubes, the potatoes will soften in just 4-5 minutes. With the help of a fork, slice the potato to see if it’s cooked. If it isn’t, sprinkle some more water and allow it to fully cook.
You can now add the poha and give it all a good mix. Adjust the salt levels and mix well. Sprinkle a little more water and cover the kadai. Bring the heat to the lowest setting and let the poha steam cook for a minute.
Turn off the heat and let the Aloo poha be for ten minutes. This process will help the poha absorb the oil, salt and spices.
After ten minutes, squeeze lemon juice into the poha and mix well. If you have grated coconut handy, you can sprinkle some on top as garnish. This will give the poha a sweet taste.
Mix the poha well and serve it warm as breakfast, or evening snacks. You can also pack it for lunch along with some curd.
Storage and Shelf Life
Aloo Poha is an excellent tiffin box dish for school kids and office goers. You can make Aloo poha the previous night and warm it up the next day for breakfast. I usually place the entire box (stainless steel) in a pressure cooker and give it one whistle to help warm it up. If you have a microwave, you can sprinkle some water on top of the poha, mix it well before placing it in the microwave for a minute. You have to make sure that the poha gets mixed well before eating.
Poha will be good in the fridge for up to two days.
Aloo Poha
If you are looking for more Tiffin Recipes, please click here to find the recipe you are looking for.
Please do follow me on Instagram and Facebook and do subscribe to my channel on YouTube. Thank you so much!
Recipe
Aloo Poha
Aloo Poha is a popular Indian breakfast or evening snack dish prepared with poha, potatoes, and peanuts.
The first step is to soak the poha / aval / beaten rice in cold water for 10-15 minutes. Soaking helps poha to get softer and easier to cook. This also helps remove impurities/dust from the poha. After soaking, drain the water with the help of a sieve and let the poha sit in the sieve until you are ready to add it to the main dish.
Place a pan on medium flame and allow it to warm up. Add the oil and allow it to get warm.
Next, add the mustard seeds and allow it to sputter. Add the peanuts and roast it until they are crisp.
Now add the sliced green chillies and curry leaves. Toast them for a bit in the oil and next add the chopped onions. Saute it until the onions get soft. To help the onions cook faster, add turmeric powder and ½ tsp of salt.
Once the onions are soft, add the diced potatoes and mix the ingredient well. Add about 2 tablespoons of water to help the potatoes to cook.
Cover the pan with a lid. The potatoes will take about 3-4 minutes to cook under the lid with the help of the steam from the water that we added. Use a fork or spoon to check if the potatoes have cooked. Now, bring the heat to the lowest setting.
Add the soaked and drained poha to the pan. Add another ½tsp of salt and mix all the ingredients well. The turmeric and oil should coat on all the poha.
Sprinkle some water on top of the poha and cover the pan with a lid. Let the poha steam cook for a minute or so. Turn off the flame and leave the poha to rest for 10 minutes.
After 10 minutes, you can squeeze the juice of one small lemon on to the Aloo Poha and garnish with grated coconut. Mix all the ingredients well.
Serve Aloo Poha with sev sprinkled on top or with a cup of curd.
Mani Kozhukattai is South Indian tiffin prepared with rice flour dumplings shaped in marble-sized balls and flavoured with spices.
Mani Kozkhukattai
Mani Kozhukattai is a small pearl-like rice dumplings snack made with rice flour that gets steam cooked and tempered with South Indian spices.
Mani Kozhakattai or also known as Ammini Kozhukattai, isn’t a popular enough dish to appear on menus of restaurants but only confined to the kitchens where most of us make fond memories.
This is a popular dish in many Tamil households and eaten as an evening snack along with chai or coffee. It’s a traditional snack made mostly in Tamil Nadu or Tamils living across India.
It is a slightly labourious process, but the effort is worth the result
Mani Kozhakatai is known to be Lord Ganesha’s favourite snack. This dish is one of the many items that are cooked and offered to God on Ganesh Chaturthi.
I have always loved tiffin and choose it over the main meals at any time of the day. The smells of childhood are treasures that no one can take away from you. Mani Kozahkatai is one such dish that I have cherished since my childhood. My mother made them as an evening snack and gave them to me, steaming from the cooker. This memory I will never forget.
Ingredients for Mani Kozhukattai
The main ingredient to make Kozhukattai is rice flour. The previous generations, that is, our mother’s generation, always made rice flour at home. However, with jobs and days packed with activities, making ingredients at home has become a novelty. I will write a separate post about how one can produce rice flour at home. I haven’t attempted it, but I want to at some point.
In stores, look for Idiyappam flour. Packets marked with rice flour should also work, but in my experience, idiyappam flour works much better.
The other ingredients you will need are Chutney powder or Idli Podi for the flavouring.
You will also need cooking oil, mustard seeds, curry leaves, dried red chillies and asafoetida powder for the tempering.
How to make Mani Kozhukattai
The first step in making Mani Kozhakatai is to make the rice paste. If you can master this step, the next few steps will be easy as pie.
The ratio of rice flour to hot water is 1:2. For every cup of rice flour that you measure out, you have to use 2 cups of boiling water.
Take a wide pan and add 2 cups of water. Bring this water to a boil, add a teaspoon of salt and a teaspoon of oil. Keep the flame on low and add the rice flour bit by bit while stirring continuously to prevent any lumps or flour pockets from forming.
When you see the flour has soaked up all the water, turn off the flame and continue mixing until the water and flour ultimately come together – this should take less than a minute.
Cover the pan with a lid and let the rice paste steam cook for another 5 minutes. Remove the lid and let the rice paste cool down.
When you feel that, you can touch the paste without burning your fingers, dip your fingers and palms in a bowl of cold water and knead the rice paste. This kneading process helps in making it into a smooth dough. You can use a little oil to help you with the process. Gingelly oil is the best and does add a lovely nutty taste to the dough.
Keep going until the rice paste is smooth and round dough ball.
Steaming the Mani Kozhukattai
Roll marble-sized balls with the rice paste and keep them aside. It would help if you did not roll the rice balls too tight as they might not get cooked in the centre. With one cup of rice flour, you should have twenty-five balls at the bare minimum.
Yes, this process is cumbersome, but these tiny balls are fun to eat. Gather the kids to make them, or even your friends – they will appreciate the labour that goes into it. You can even roll them into a different shape if you want. Mani in mani kozhakattai means “pearl”, but you are not obligated to stick to the shape.
I use an idli cooker for steaming the mani kozhakattai. Add an inch of water to the idli cooker and place it on the stove. Once the water is boiling, your idli cooker is ready for use. You can also use a vegetable steamer or any steaming device will do.
Place the rice balls on greased plates of an idli cooker stand.
You can now place the rice balls in the idli cooker. (The size of the balls determines the cooking time. The bigger the kozhakattai, the longer you will have to cook them.) Steam cook the Ammani Kozhakatais for 10-12 minutes.
You know they are ready when the surface of the kozhakattais looks glossy. Take the idli stand out of the cooker and let it cool down.
Tempering the Ammani Kozhukattai
This step of the preparation is the fun part. You can add any flavourings to your choice. Here are a few options that you can use as flavouring.
Simple Ammini Kozhakattai with a Classic South Indian combination of mustard leaves, curry leaves, green chillies and asafoetida
Kara Mani Kozhakattai with Lentil Powder – Urad dal, Channa dal, red chillies and coconut/copra
Sweet Ammini Kozhakatai with jaggery, coconut and sesame seeds
To begin the tempering process, place a kadai/ pan on a medium flame. Add a tablespoon of oil to the pan. Once the oil is warm, add the mustard seeds, urad dal, curry leaves and dried red chillies. Toss the spices in the oil until the urad dal turns brown.
At this stage, add the steamed rice dumplings, sprinkle salt and mix well. I ate this version of mani kozhukattai a lot of the time. It is a simpler version.
If you want to make it more interesting, you can add 2 tablespoons of chutney powder or idli powder to the pan and toss them all together. This makes for a spicy and zesty evening snack. Turn off the heat and drizzle some lemon juice and garnish with finely chopped coriander leaves.
If you are making a savoury version of the mani kozhakatai, any chutney can be served with it. You can try this Green Coconut Chutney that will go very well with it.
Storage and Shelf Life
This is a tiffin best eaten when hot out of the steamer or the pan. But I have eaten them cold, yet tastes great. I have refrigerated cold ammini kozhukattai and eaten it the next day and they are just ok since the chutney powder tends to clump in the fridge.
One way so store it would be to prepare the ammini kozhukattai and store them in the fridge for up to 2 days. You can take a portion of it and toss them in South Indian spices and the chutney podi.
Mani Kozhukattai
It’ll be great if you tag me on Instagram @ Make Potato when you make this recipe
Please do leave a rating and a comment if you can, on the recipe below – it will help me grow and reach more food lovers like you.
Recipe
Mani Kozhukattai
Mani Kozhukattai is a South Indian tiffin prepared with rice flour dumplings shaped in marble-sized balls and flavoured with spices.
In a wide pan, add two cups of water. Bring this water to a slow boil. Add a teaspoon of salt.
Once the water is in a slow boil, reduce the heat and add one cup of rice flour to the boiling water.
Stir slowly. It is alright to have a few lumps. Turn off the flame and mix until you see the contents of the pan are forming one large lump.
Close the pan with a lid and leave it aside for 5-10 minutes. During this time, the rice flour and water will combine and it will also cool down slightly.
On to a wide plate, apply a coat of oil and drop the rice flour mixture on the plate for kneading.
If you feel the mixture is too hot, wait for it to cool down further, but do not allow it to cool down completely.
Once you are able to touch the rice mixture, apply some oil on your palms and knead the dough until it’s a nice smooth ball.
The ball has to be without cracks so that when you steam cook; the mani kozhukattai gets cooked evenly.
Steam cooking the Mani Kozhukattais
Pinch out small balls to shape it into marble sized balls. Once the small kozhakuttais are ready, keep them covered until the steamer is set up. Covering keeps the kozhukattais from drying out before steam cooking.
Place the mani kozhukattais in the steamer and cook for 10-12 minutes. You know they are ready when they look glossy.
Just to be sure, take one out to test if they’ve been cooked well.
Tempering the Mani Kozhakattais
In a pan or kadai, add a tablespoon or two of oil and allow it to warm up. Add mustard seeds, split urad dal and allow it to crackle.
Add a sprig or two of curry leaves and a green chilli slit along the center.
Sauté for10-15 seconds and then add the steamed mani kozhakattais. Give it a mix and add salt if you feel its necessary.
If you have any sort of podi – chutney podi or dosa podi or idli podi, you can add them at this stage and mix them all well.
Squeeze a drizzle of lemon juice if you fancy it.
Serve it as it is or with a chutney of your choice. Enjoy!
Keyword Rice based Recipes, Tiffin
If you are looking for more Tiffin Recipes, please click here to find the recipe you are looking for.
Please do follow me on Instagram and Facebook and do subscribe to my channel on YouTube. Thank you so much!
Ragi Laddu is an Indian sweet made with finger millet, jaggery, ghee and nuts. It makes for a perfect afternoon snack or an after-school snack for kids.
Nachni Ladoo
Ragi Laddu is an Indian dessert or snack made with ragi flour or finger millet flour, jaggery powder, ghee and cardamom powder.
They make an excellent snack for kids and adults alike when you are in between meals and you want something healthy to pop into your mouth. I make these ragis Laddus to send them as a snack for my kid’s snack box during his bus ride back home.
Ragi laddus are available at shops these days, but it is predominantly a sweet/ snack made at home.
Ingredients for Ragi Laddu
Ragi flour – You can either use normal ragi flour or sprouted ragi flour. I use the sprouted ragi flour to make these laddus. They are more nutritious and suited for making the laddus.
Jaggery powder – You have so many brands making jaggery powder and I prefer to use them in most Indian desserts. They are much easier to use as compared to the block of jaggery, which required melting, skimming and straining of impurities.
If you like jaggery based desserts, you must check out this recipe of Vella Aval on my blog
Cardamom powder – I make this at home as I use them regularly, almost on a daily basis, to make chai. You can also make them by just dry roasting cardamom pods for a minute (the green pods with the black seeds, yes, the whole thing) with a teaspoon of rice. Once it’s cool, powder them in a mixer and store in a glass bottle. The rice helps with absorption of moisture and keeps the powder shelf stable for at least a month.
Ghee – If you are ghee is in the solid state, melt it on a low flame and keep it aside. For this recipe, where I am using 180g of ragi flour, I am using 4 tablespoons of ghee. You can use less or more. The more ghee you add, the more shelf stable it becomes.
Slivered / Chopped Nuts – I am using cashew nuts, badam and pistas in this recipe. You can add walnuts too. You can use a store-bought packet of slivered / chopped nuts too. Nuts are an optional ingredient; if you don’t have them, you can skip it.
How to make Ragi Laddu
The first step is to measure the ingredients and keep them ready in cups.
I like to roast and chop nuts at home, so I do them first since it takes time to chop them up. You can also use store-bought chopped nuts. Make sure to not include any dried fruits, as these may reduce the shelf life significantly.
Roasting the nuts
Place a small tadka pan on low heat and add 1/2 a teaspoon of ghee. Add the nuts and roast them for a minute. Turn off the heat and scoop the roasted nuts out of the pan with a spoon and place them on a cutting board.
Once the nuts are cool, with a sharp knife, chop them as fine as possible. Try not to make them into a powder. You will still want the crunchy texture when you bite into the laddu.
Keep them aside.
Making the ragi laddu mixture
Place a medium-sized pan on low to medium heat. Add 3 tablespoons of ghee. Once the ghee is warm, add the ragi flour. Stir the ragi flour well into the ghee and roast for a minute.
Use a spatula to move the ragi flour back and forth in the pan. After a minute of roasting, add the cardamom powder and jaggery powder.
Mix them well so that they are a homogenous mixture. You have to make sure to not have pockets of jaggery powder in your laddu mixture.
When you see that the jaggery has started melting a little, you can turn the flame to low and keep stirring. If you feel the mixture is too dry, add one more tablespoon of ghee.
Take a small quantity of the ragi laddu mixture in your hand and try to make a ball. If the mixture sticks together, that’s when you know the ragi laddoo mixture is ready. If it does not stick, add a little more ghee until you are able to get that texture.
Turn off the heat and allow it to cool down a little bit. Add the roasted and chopped nuts into this ragi laddoo mixture and mix well.
Once you can handle the heat of the mixture, take a spot of ghee and rub them on both your palms.
Take a small quantity of the mixture and start rolling them into small laddus. I prefer them small as they make a wonderful small snack. When I roll them into small balls, they are easier to store as well as see more quantity. (as shown in the picture). You can choose how big/small you want them.
Roll the rest of the mixture into laddus and keep them on a plate to cool down.
Storage and Shelf Life
Once you have rolled all the laddus, let them be left out on a plate for at least 3- minutes before storing them. It is best to allow ragi laddos to cool down and come to room temperature before storing them in an air-tight box.
Ragi Laddoos store well in an air-tight container on the shelf for up to a week. If you have added a lot of ghee, you can store it up to two weeks too.
You can also store them in the fridge for up to a month.
Ragi Laddu
It will be great if you tag me on Instagram @Make Potato, when you make this recipe.
Please do leave a rating and a comment if you can, on the recipe below–it will help me grow and reach more food lovers like you.
Recipe
Ragi Laddu | Nachni Ladoo
Ragi Laddu is an Indian sweet made with finger millet, jaggery, ghee and nuts. It makes for a perfect afternoon snack or after-school snack for kids.
Place a small tadka pan and add ½ tsp of ghee. Add the assorted nuts to the ghee and roast it on a low flame to help it crisp up.
Turn off the flame and place the nuts on a cutting board. Once the nuts have cooled down, chop the nuts into small pieces.
Now, place a larger pan on a low to medium flame. Add three tablespoons of ghee, followed by the ragi flour and roast it for a minute on a very low flame. Keep moving the spatula back and forth to ensure that the ragi flour does not burn.
Next, add the cardamom powder and powdered jaggery. Give it all good mix until they are well combined. The jaggery will melt a little bit and at this stage you can switch off the heat. When you take a small bit of the ragi mixture and scrunch it up in your palm, all the ingredients should stick to each other.
Add the chopped nuts and mix well.
Once the ragi and jaggery mixture has cooled down to a temperature that you can handle, take a drop of ghee and rub it on you both your palms.
Take a small quantity of the ragi laddu mixture and start rolling it into small laddus.
I like to make small ladoos since they prove to be a great snack in between, but you can roll them into any size you want.
Once all the ragi ladoo mixture is used up, allow them to cool down before storing it in an air tight container.
Keyword After School Snacks, Dessert, Indian Sweets
If you are looking for more Indian Sweets Recipes, please click here to find the recipe you are looking for.
Please do follow me on Instagram and Facebook and do subscribe to my channel on YouTube. Thank you so much!
Lemon rice is a tangy rice based dish prepared with cooked rice, lemon juice and tempering of South Indian spices.
Lemon Rice
Lemon rice is a rice-based dish from the south India and goes by several names – Chitranna or Nimbehannu Chitranna in Kannada, Elumachai Sadam in Tamil, Nimmakaya Pulihora in Telugu.
It is a very tiffin box friendly dish for both kids and office goers. You can put it together in 15 minutes if you have cooked rice ready.
You can eat chitranna for lunch or dinner, or like some households, it’s served for breakfast too. A lot of hole-in-the-wall restaurants serve chitranna and chutney combo as a breakfast dish.
We usually carry lemon rice for day trips, as it holds very well through the day. It is one of the most popular travel foods either for road or train journeys.
Lemon rice is an excellent dish to make when you are thinking “how to use leftover rice”.
Ingredients for Lemon Rice
The first ingredients is rice. You can use any rice but I almost always use sona masoori rice and sometimes basmati rice (as shown in the pictures). One cup (180-200g) of uncooked rice will expand enough for a family of 2 or 3 (a child) for a meal.
The ingredients for creating the base are – cooking oil, mustard seeds, channa dal, curry leaves, green chillies and onions.
I usually use a combination of peanuts and cashew nuts for the crunch factor.
And of course we cannot forget the one of most important ingredients in lemon rice – The lemon!
How to make lemon rice at home?
The first step it to cook the rice. Start off with rinsing a cup of rice until the water gets clear. When the water is clear, the rice grains will cook evenly and prevent clumping.
The ratio of rice to water for short grain rice like sona masoori is 1:2. So, for every cup of rice, you need 2 cups of water. One cup is roughly 180-200 grams. (You can use the same cup measure of water as well). In this recipe (and photo), I’ve used basmati rice, but the measurement remains the same. The only difference is that basmati rice cooks faster than sona masoori rice.
Pressure cook the rice for 3-4 whistles and allow the pressure to release naturally. Open the lid of the cooker and scoop out the rice and spread it on a large plate for it to cool down. If you are in a hurry, you can even keep it under the fan to cool it down quicker while you are spreading it back and forth with a spoon.
[You can also cook rice, cool it down and store it in the fridge for use the next day. This will save you the trouble of making the rice in the morning.]
Making the lemon rice
Now, while the rice is under the fan, getting cooled, you can place a Kadai on a medium heat. Once the pan is hot, add 2 tablespoons of cooking oil. I like to use gingelly oil but you are free to use any oil that you use for daily cooking.
Once the oil is warm, add the mustard seeds, and allow it to sputter. Now add the channa dal and peanuts and cashew nuts. Let them roast in the oil for a few seconds.
[If you wish to, you can skip adding the peanuts and cashew nuts at this stage. You can separately roast them in a small pan with a drop of oil and season it with salt. You can also roast them in an air fryer for 2-3 minutes at 160C. Leave them out for a bit for them to cool down and get crunchy.]
Next, add the curry leaves and slit green chillies. I am using a small chilli which packs a lot of heat. If you want lesser heat, you can use just one green chilli. Saute them for a few seconds and then add the finely chopped onions.
To this, add the turmeric powder and asafoetida powder. Give it all a mix and saute the onions until they are soft. At this stage, turn off the heat.
Add the cooled rice to the Kadai and one teaspoon of salt. Now, mix all the ingredients well until the turmeric and the oil coat the grains of rice.
Juice a whole lime/lemon on top of the rice and give it a further mix until well combined.
[It’s best to avoid adding lemon juice over hot rice as it changes the lemony taste to a bitter one. You might also lose a few nutrients when you add lemon juice to a kadai of hot food. ]
Do a little taste test to check if the salt and lemon are to your liking. If you want to reduce the heat from the chillies, adding more lemon will help it.
As a final garnish, if you wish to, you can add a handful of grated coconut.
Serving Suggestion: You can eat lemon rice with a side of onion raita, a cup of curd, pickle or even with coconut chutney.
Storage and Shelf Life
Lemon rice stores very well on the kitchen counter for a few hours. But if you live in a warm climate, it’s best to store it in the fridge, especially if you’ve added grated coconut.
This dish makes for the best tiffin box item both for kids and office goers. On days that you want to keep lunch light, chitranna must be your go to dish.
It stores well in the fridge for up to 2 days, but once it’s out of the fridge, you can heat it up and eat it up during the same meal.
Lemon Rice
It’ll be great if you tag me on Instagram @ Make Potato when you make this recipe
Please do leave a rating and a comment if you can, on the recipe below – it will help me grow and reach more food lovers like you.
Recipe
Lemon Rice | Chitranna
Lemon rice is a tangy rice based dish prepared with cooked rice, lemon juice and tempering of South Indian spices.
The first step is the wash the rice until the water runs clear. Add the washed rice to a cooker and add twice the amount of water. Pressure cook for 2 whistles and turn the flame to a low and allow it to cook for two minutes. Turn off the cooker and allow the pressure to release naturally.
Once the cooker pressure has released, remove the stopper from the cooker and remove the rice and spread the cooked rice grains on a large plate for it to cool down. Allow the rice to cool down completely before using it for the lemon rice.
Place a kadai on medium heat. Once the kadai is warm, add the oil.
Once the oil is warm, add mustard seeds, channa dal and cashew nuts / groundnuts. Lower the heat and roast the nuts on a low heat.
Next, you can add the curry leaves and sliced green chillies. Toast them in the oil for a few seconds.
Now, add the onion, turmeric powder, asafoetida powder and saute the onions until the onions are soft.
You can now turn off the heat, add the cooked and cooled rice to the kadai. Season with salt, lemon juice and garnish with grated coconut.
Now comes the main step.Take your time to mix all the ingredients very well; every single grain of rice should be coated with the turmeric and lemon juice.
You can eat lemon rice with a side of raita or curd. Add a few slices of cucumber seasoned with salt and pepper as a side salad.
Keyword Lunch Box, Lunch Recipes, Recipes for beginners
If you are looking for more Rice Recipes, please click here.
Do follow me on Instagram at Make Potato — I post daily lunch box ideas and quick snack recipes.
Kadle Puri is a savoury snack made with puffed rice, peanuts, fried gram and South Indian spices.
Kadle Puri
Kadle Puri (pronounced cud-lay pu-ri) is an evening snack made with puffed rice, peanuts and South Indian spices.
People in South Indian homes, particularly in Karnataka, mostly prepare this crunchy snack. It is mostly a Karnataka delicacy made by moms who want to give their children healthy snacks but have less time on their hands.
My mum made Kadle puri as an after-school snack or for those in between snacking when dinner was not ready yet.
Kadle Puri also goes by the name of Murmura Chivda, Masala Pori (not the chaat kind), Khara Pori, Mandakki churmuri etc. These snacks are sold in packets in most chips shops or bakeries too, but I’ve noticed that they are way spicier than the one I make at home.
It’s a simple recipe and even beginners can try making this snack as it involves just a few ingredients. I have given you all an exhaustive list, but you can make this with just five ingredients – puri, oil, salt, peanuts and turmeric powder.
Ingredients for Kadle Puri
The main ingredient is Puri or Muri in Kannada, also goes by the name of Pori in Tamil, murmura in Hindi, and puffed rice in English.
There are several varieties of puri available in the market, but for this recipe you can use any size or shape available.
Kadle Puri Make Potato
The ingredients I have used for the tempering the puri are oil, mustard seeds, curry leaves and dried red chillies. If you wish to, you can also use small pods of garlic with the skin on. The kadle puri will have a garlic smell and taste, which I absolutely love. But in this recipe, I have not used garlic.
For the spice, I have used turmeric powder, red chilli powder and asafoetida powder. The quantity to use is entirely up to the spice levels that you and your family can tolerate.
The nuts I’ve used for the crunch factor are peanuts or kadale kai in Kannada and Bengal Fried Gram.
Bengal fried gram, also known as huri kadale or pottu kadalai in Tamil, is dried black chickpeas that have been rinsed in water and roasted at a high temperature using salt as the medium for roasting.
You will also need salt for seasoning and oil for tempering. I am using groundnut oil for this recipe.
The other optional ingredients are raisins, cashew nuts and thinly diced cobri (dried coconut).
How to make Kadle Puri at home?
The first step is to gather all the ingredients since the whole dish comes together in less than 10 minutes.
Place a large kadai or pan, preferably an iron kadai on a low to medium flame. Once the kadai is warm, add the oil – I use groundnut oil for this recipe.
Once the oil is warm, add the mustard seeds and allow them to sputter. Next, add the curry leaves, dried red chillies and garlic. Roast them on a low flame until the curry leaves crisp up. The smell of fried garlic will fill the air.
Now, add the raw peanuts and Bengal fried gram to the oil. Roast the nuts until they are crisp.
Add the spice powders – turmeric powder, red chilli powder, asafoetida powder and salt. Mix the spice powders well with peanuts. Roast the powders on a very low flame so that the raw smell of the powders go away. You have to keep the flame low so that the spice powders don’t burn.
Turn off the flame, add the puri to the kadai and mix all the ingredients well. Roast the puri in the residual heat until it is coated well with the spice powders.
If you are using puri that is old or has lost the freshness/crispness, you can turn the flame back on (low) for a minute to roast. This will help the puri regain the crispness.
Once you mix all the ingredients well, you can serve it fresh for an evening snack. If you want to eat it later, allow the Kadale Puri to cool down before storing it in an airtight container.
You can use this kadle puri as a base for a simple on the go Bhel Puri by adding a few chopped onions, tomatoes with a sprinkle of chaat masala and top it off with some sev. If you have green chutney and tamarind chutney, then it becomes a proper Bhel Puri.
Storage & Shelf Life
Kadle Puri can be stored in an air-tight container at room temperature for up to a week. It loses freshness after a week.
Always allow the kadale puri to cool down before storing it in a container.
Kadle Puri Make Potato
It’ll be great if you tag me on Instagram @ Make Potato when you make this recipe.
Please do leave a rating and a comment if you can, on the recipe below – it will help me grow and reach more food lovers like you.
Kadle Puri
Recipe
Kadle Puri
Kadle Puri is a savoury snack made with puffed rice, peanuts, fried gram and South Indian spice
Place a large pan/ kadai on a low-medium flame. Once the kadai is warm, add 2 tbsp of oil to the pan.
Add mustard seeds and allow it to sputter. Next, add the curry leaves and dried red chillies and allow them to crisp up.(If you are using garlic, add them now)
Tip in the peanuts and huri kadle and roast them on a low flame until they are crisp.
Now, add the spice powders – Turmeric powder, red chilli powder, asafoetida powder and salt. Give them all a good mix and roast them along with the peanuts and fried gram for a minute on a low flame (to ensure that the spice powders do no burn).
Turn off the flame and now add the puri / murmura. Mix all the ingredients well and allow the spice powders to coat well. If you feel that the puri is still a little soft, you can turn on the flame and roast it on a low flame for a minute – this will help the puri crisp up.
Transfer to an air-tight container and enjoy with chai or coffee in the evening.
Keyword After School Snacks, Evening Snacks, Healthy Evening Snacks, Karnataka Cuisine, Kids Snacks
If you are looking for more Tiffin Recipes, please click here.
Please follow me on Instagram at Make Potato — I post daily lunch box ideas and quick snack recipes.
Neer Mor is a spiced Indian buttermilk drink made during the summers to beat the heat.
Neer Mor
Neer Mor is a South Indian after meal drink prepared with curd that is diluted and seasoned with spices.
It is prepared by beating thick homemade curd, diluting it with water and adding a few spices and seasonings.
It goes by the name of Chaas in Hindi, majjige in Kannada and Sambharam in Malayalam.
You can enjoy Neer Mor alongside meals as it aids digestion and complements the spicy South Indian dishes well.
How to make Indian Spiced Buttermilk
There are two ways you can make buttermilk.
Buttermilk from curd
The first method I will describe to you in the simpler one. You will need one cup of curd, preferably homemade, or you can buy curd from your local milk booth that is sold in packets. Do not use the curd that you get in plastic cups/tubs. They are too thick and are better for eating as is.
Take a cup (about 180ml) of curd and add it to a large bowl. With the help of a matthu (math-u) or an Indian wooden whisk, place the round side in the bowl and roll the whisk in between your palms to make a back-and-forth action. This action will help break the lumps of curd and give it an even texture.
Once the curd has an even texture, add 1/2 tsp of salt and 1/2 tsp of asafoetida. Mix the two seasonings into the curd well.
Next, add chilled water (room temperature water is fine too) to the bowl. How much you want to add is up to you. If you prefer a thicker consistency of buttermilk, you can add 300-400 ml of water.
Neer mor as the name suggests, is quite thin, and this is the consistency I prefer. So I add a little over 1/2 litre of water to get a thin consistency of neer mor. This thin consistency actually makes the chaas more palatable in summers than its cousin the lassi.
Perform a little taste test and ensure the salt and asafoetida levels are up to your liking.
The finale of this variety of neer mor is to add the tempering.
Place a tadka pan on a low-medium flame. Add a tsp of cooking oil (I use groundnut oil for most of my tadkas) and allow it to warm up.
Once warm, add 1/2 tsp of mustard seeds and allow it to crackle. Turn off the flame and add curry leaves from 1 sprig.
Add this tadka to the buttermilk and mix well.
Serve buttermilk as a refreshing summer drink after lunch or dinner.
Buttermilk from churning butter from cream
This method is a slightly more laborious one. It involves the use of cream to churn the butter while and leave a watery residue which is the real “buttermilk”.
Buy a small carton of cream, the 200ml one, and add all the cream to a large mixer jar. You can cut open the carton and scoop out all the cream from it. Before starting the process, make sure that the cream is cold; butter gets churned faster when the temperature is lower.
Add 200-250 ml of cold water to the cream and mix it with a spoon. Now, switch on the mixer and let the machine do its job. The churning process in the mixer will take 2-3 minutes. Do not give up in between. If you feel the mixer is getting warm, add a little more cold water, just a little to help the mixer cool down.
The moment the butter forms, you will notice some of the buttermilk accidentally spill out of the mixer. This has happened to me several times to me, so I’ve given you a fair warning. You can turn off the mixer and remove the butter from the mixer with the help of a large spoon. You will need to collect a lot of bits and pieces of the butter floating.
(You can process the butter further and use it in your cooking.)
Once you have removed all bits of the butter, the leftover liquid is the precious buttermilk. Collect this in a separate container. This is the original way buttermilk used to be made and hence the name “butter” “milk” meaning milk of the butter.
You can either keep is at the same consistency or thin it down by adding a little water. Now, you can add salt and asafoetida powder to this buttermilk and mix well. To prepare the tadka, place the tadka pan on a low flame and add half a teaspoon of oil. Once the oil is warm, add mustard seeds and curry leaves and allow it to sputter. Turn off the flame and add this tadka to the buttermilk. Mix well and serve it cold after lunch.
In this recipe, I have described how we consume Neer Mor at my place. But there are a few variations to this delicious drink.
To make neer mor, in some households, people combine ginger, green chillies, onions, curry leaves, mint leaves, and coriander leaves with curd in a mixer jar. They then blend the ingredients into an even mixture, add salt and seasoning it with mustard seeds.
Storage and Shelf Life
Once you make Neer Mor, store it in the fridge and drink it chilled. You can store it for a couple of days in the fridge and consume it. After a couple of days, the oil and the curry leaves will change colour, its best to avoid that.
Neer Mor Chaas
It’ll be great if you tag me on Instagram @ Makepotato, when you make this recipe.
Please do leave a rating and a comment if you can, on the recipe below – it will help me grow and reach more food lovers like you.
Neer Mor
Recipe
Spiced Buttermilk | Neer Mor | Chaas
Neer Mor is a spiced Indian buttermilk drink made during the summers to beat the heat.
With the help of a wooden whisk, beat the curd with the back-and-forth action. This will help break the lumps of curd and achieve an even consistency. You can also do the whisking with a wire whisk or even in a mixer.
After beating the curd, add salt and asafoetida and mix it well into the beaten curd.
Now, add the cold water to the bowl and mix thoroughly. Your neer mor is almost ready.
To temper the buttermilk/chaas, place a tadka pan on a low-medium flame. Once the pan is warm, add a teaspoon of cooking oil.
When the oil is warm, add the mustard seeds and allow them to crackle. Turn off the heat.
Add the curry leaves to the tadka pan and let them sizzle in the oil for a few seconds.
The last step is to add this tempering to the buttermilk and stir well.
Serve your buttermilk chilled along with lunch on dinner during summers.
Keyword Curd Recipes, Summer Recipes
If you are looking for more recipes to make this summer, try Doddapatre Tambuli
Do follow me on Instagram at Make Potato — I post daily lunch box ideas and quick snack recipes.
Onion pakoras are crispy fritters made with thinly sliced onions dipped in gram flour batter, seasoned with spices and deep fried until golden brown.
Onion Pakoras | Onion Pakodas
Onion pakoras or Onion Pakodas are a popular Indian snack that is prepared with onions that are dipped in a spiced besan flour and deep fried to a crispy golden brown colour.
They have mostly a crispy texture and when you bite into one, you must taste the heat from the spices and green chillies, the nutty flavour of the gram flour and the onions that give a sweet texture.
In Bengaluru, we find onion pakoras at street side bajiya stores or “hot chips” stores sold by the kilo to relish at home.
Onion Pakoras also known as Khanda Bhajis is a version of Indian fritters and is a very popular street food. If you have ever wondered what is the difference between Onion Pakora/pakora and Onion Bhaji? – they are one and the same. People use the terms Onion Pakoras and Onion Bhajis interchangeably to describe them.
Bajji is a word used in South India to describe any vegetable/ingredient that is coated in a gram flour batter and deep fried. Bajjis typically have a smooth coating of batter, while pakoras/pakodas do not have as even of a look and usually consist of deep-fried vegetables with a lesser amount of batter. We also make onion bajjis in South India that consists of 2-3 rings of onion coated with a gram flour batter and deep fried. This onion bajjis will look more like an Indian version of onion rings.
What ever you may love calling it, I have to say that they make for an excellent tea time snack and especially a monsoon snack when there’s rain outside and you have a plate of these crispy fritters along with a cup of hot Ginger Chai.
Ingredients for Onion Pakoras
Onions are, of course, the hero ingredients of these pakoras. In India we only get red onions in the market, but in some places I’ve seen white onions too. But for this recipe, let’s get the red/purple onions.
I have used several spices and spice powders in the recipe – you can either add all of them or select a few from the list. But pick 2-3 from the list to feel the flavour burst in your mouth while chewing on the crunchy onion pakora.
Spices and spice powders
Cumin seeds | Jeera
Coriander seeds, crushed
Kasuri Methi | Dried Fenugreek leaves
Turmeric powder
Red Chilli powder
Salt
Herbs and additional veg
Coriander leaves, finely chopped
Green chillies, finely chopped
Ginger, grated
Tomato provides sourness and helps hydrate the batter without the use of water.
You will also need rice flour and gram flour to bind all the onions and spices together. Adding rice flour to the onion pakora batter provides the crunch, and the gram flour helps to absorb all the moisture from the onions and tomato.
In India, people know gram flour as besan in Hindi or kadala maavu in Tamil. It is made by soaking, drying, and grinding channa dal. (Channa dal is an ingredient that you get when you remove the skin of black channa and give it a polish).
In western countries, gram flour also goes by the name of chickpea flour, which is processed from white channa or popularly known as Garbanzo beans. If you don’t have besan, you can use chickpea flour – both have a nutty flavour and perform the same function of absorbing moisture in the batter.
The other optional ingredients you can use are – Onion powder and garlic powder. Fair warning to you, if you add garlic powder, the pakoras will taste nothing like the ones you eat at restaurants. However, they will still be delicious.
How to make onion pakoras?
Firstly, slice the onions into equal-sized pieces. Place the onion slices in a bowl and sprinkle salt over the onions and mix them well with your fingers. Let this rest for 20-30 minutes. During this time, the salt will help release water from the onions. This process of letting the water out of the onions will yield a crispier texture when fried in oil.
Meanwhile, roast the besan for 20 seconds on a low flame and allow it to cool down.
With the help of a mortar and pestle, you can roughly crush the coriander seeds.
Chop the green chillies and coriander leaves and keep aside.
Grate the tomato and keep it ready. You need a grated texture with all the water from the tomato oozing out. If you chop the tomatoes, you might end up eating chunks of fried tomatoes instead of onions, so I suggest grating it. If you do not want tomatoes, you can skip it. Instead, you can get the sour flavour from a 1/2 tsp of amchur powder (dried mango powder)
After 30 minutes, you can notice that there is some moisture released from the onions. Perfect, let it be and start adding the rest of the ingredients except the rice flour and besan.
Give all the ingredients a thorough mix and let it be for another five minutes. You might see that there is more moisture in the batter. Now, add the besan and the rice flour. (Check the recipe card below for measurements). The batter should look like there is enough masala coated on to all the onions. Adjust the salt levels and you can start the frying process.
Some people prefer making soft onion pakodas; if you want a soft texture, you can add a pinch of baking soda to the batter and this will aid it
Frying the Onion pakoras
Pour 1/2 lt. of oil into a kadai or more, depending on the size of your kadai. I always choose a small kadai to ensure that I use up less oil for the frying process. Once you fry the pakoras in this oil, you might not reuse it since there will be a lot of small fragments and colour in the oil by use of turmeric powder.
Turn on the flame to a medium-high setting and let the oil warm up. Once the oil is warm, add a small piece of the batter to the oil to see if it is ready. If the piece floats up immediately, the oil is sufficiently warm. Else you can wait for another few seconds.
With the use of your fingers, take a small portion (the size of a lime) and flatten it with your thumb. Add the batter to the oil. The onion pakoras will sizzle right away. Add as much as you can, depending on the size of your kadai. It is best to not crowd the oil with too much batter.
Reduce the flame to a low-medium flame and, with the help of a slotted spoon, turn the pakoras to cook them on both sides.
Your pakoras are ready when they are golden brown. At this stage, remove the crisp onion pakoras from the oil and add them to a plate lined with kitchen tissue paper. The paper will help absorb the excess oil.
The Onion Pakoras will continue to crisp up as it cools down, so don’t be tempted to eat them right away. They taste the best when they have cooled a little, yet warm at the center.
(Why are my onion pakoras not crispy? – They are not crispy because that there was too much water in the batter. You can course correct your next batch of onion pakoras by adding in some more finely chopped onions and a little rice flour.)
Plate up your crispy onion pakoras with green chutney or imli chutney or any chutney of your choice!
Onion Pakoras
Some tips for making Onion pakora crispy
Always cut the onion to equal lengths and size. It will ensure even frying. If some pieces are small, they will fry quickly and if they are long or thick, they will take some time to fry.
Toasting the besan flour for 30 seconds on low heat will help increase the nutty flavour in the pakoras.
The resting time where the onions are allowed to let our water will get you that even crispy texture. By doing this process, you will not need to add any extra water at all to the batter. Water needed for the batter comes from the onions and the one grated tomato we are using in this recipe.
Keeping the flame at a medium is the best. If you keep at a low flame, you will observe that the pakora has absorbed more oil. If you keep at a high flame, they brown up too fast on the outside and the insides remain soft.
The best Onion Pakora recipe for beginners
OK, if you find the above process a little too much for you, I have a simple way to prepare delicious onion pakoras in much less time. If you are a beginner or don’t have as many ingredients available, the simple ingredients you need to gather are:-
Onions – 1
Rice flour – 1 tablespoon
Besan – 2 tablespoons
Salt – 1 tsp
Red Chilli powder – 1 tsp and
Oil for frying – 1/4 litre
Slice the onions, add them to a bowl. Sprinkle the salt and allow the onion to release water. Let it be that way for 10 minutes. Add rest of the ingredients a mix well. If you think the pakora batter is a little dry, sprinkle some water with your hands and just get the batter to a moist texture. The lesser the water, the crisper your pakora will be.
You can then follow the same procedure as mentioned above for the frying and you will get an equally delicious Onion Pakora.
Storing and Reheating Onion Pakoras
In Bangalore weather, you can store them at room temperature in an airtight container for a day or two since they are fried. If you live in a warmer weather, it is advisable to consume it on the day it’s prepared.
If you want to store them in a box for eating them later, it is best to leave them out until they are completely cool and then store them in an air tight container to preserve the crispiness. If the pakoras are still warm, the condensation from the heat of the pakoras will make them soft.
If you think you cannot finish eating all of them and decide to store in the refrigerator, when you do eat them again, allow them to come to room temperature. You can then put it in the microwave for about 30 seconds to warm it up. It won’t get crisp, but it will get warm.
You can add the onion pakodas in an air fryer for 3-4 minutes on 160C and it should crisp up.
Onion Pakoras
It will be great if you tag me on Instagram @Make Potato, when you make this recipe.
Please do leave a rating and a comment if you can, on the recipe below–it will help me grow and reach many more food lovers like you.
I have adapted this recipe from Anjula Devi’s Instagram post; check it out. I love all her recipes and usually incorporate her palate of flavours in my everyday cooking.
Recipe
Onion Pakora
Onion pakoras are crunchy batter fried onions prepared with fragrant herbs and spices.
10-15gmCoriander Leaves and stemsa handful, finely chopped
½tsbpGingergrated
1Green Chillifinely chopped
1Tomatosmall, grated
1tbspRice flour
2tbspGram Flour
1/2ltCooking Oilfor deep frying
Instructions
Prep Work
Peel the onions and slice them into thin strips. You can achieve this cut by first peeling the outer skin and then cut the onions into thin rings. Once you have all the thin rings, cut them into halves to get those thin crescents.
Add the sliced onions to a bowl and sprinkle the salt. Allow the onions to rest for at least 30 minutes. This will help the onions release its water. Do not remove this water after the 30 minutes.
To this same bowl, add the spices, spice powders and herbs – Cumin seeds, ajwain seeds, kasuri methi, crushed coriander seeds, turmeric powder, red chilli powder, finely chopped coriander seeds, finely chopped green chilli, grated ginger and grated tomato. Mix all the ingredients well and make sure all the spices and herbs are coated well on the onions. Allow this to rest for another two minutes.
Next step is to add the rice flour and gram flour. With your fingers, mix the ingredients well. You will not need to add any water at all. You will notice the water from the onions and the tomatoes will be sufficient. Your Onion Pakora batter is ready.
Frying the Onion Pakoras
Place a small kadai with half a litre of oil. Turn on the flame and allow the oil to warm up. The oil should not be smoking, if it is, reduce the flame and allow the smoking to go away before adding the pakoda batter.
Once the oil is warm, take a small portion of the pakoda batter, flatten it with your fingers before slowly dropping it into the oil. They should immediately start sizzling and rise to the top.
Keep the flame on a medium-low and allow the onions to fry into a golden colour.
Remove your crispy Onion Pakodas from the oil and add them to a plate lined with kitchen tissue paper.
Serve these warm, crispy and delicious Onion Pakodas with a green chutney, or you can just enjoy the flavours all on its own.
Keyword After School Snacks, Evening Snacks, Onion Recipes
If you are looking for more Appetizer Recipes, please click here.
Do follow me on Instagram at Make Potato — I post daily lunch box ideas and quick snack recipes.
Green coconut chutney is a flavoursome chutney with coconut, coriander leaves and green chillies that make a great accompaniment to idlis and dosas
Coriander Coconut Chutney
Green Coconut Chutney is a side dish prepared with grated coconut, coriander leaves and stems, green chillies with a tadka of mustard seeds and curry leaves.
This chutney is a variation of the popular White Coconut chutney but has a fresher and greener taste to it as compared to its relative. Coriander coconut chutney is mostly prepared in homes, but you can find it in some local restaurants in Bengaluru.
The difference between Green coconut chutney and green chutney that is used in chaat dishes is the use of coconut. Green chutney is purely coriander leaves and mint leaves which make the body of the chutney.
Ingredients for Green Coconut Chutney
Grated coconut is the chief ingredient. If you want the chutney to be fresh, I recommend using a fresh coconut instead of a refrigerated one.
The other ingredients are coriander leaves (cilantro) and stems and 2-3 green chillies depending on the spice level of the chillies you are using. The small green chillies pack a lot more punch than the big green chillies.
You will also need to gather ingredients for the seasoning/tadka – cooking oil, mustard seeds, split urad dal, curry leaves and asafoetida powder.
A small piece of tamarind also can be a nice addition to the chutney, but just a small piece the size of a 25p coin or a penny. Tamarind will add a tang to the chutney beside the heat from the green chillies and sweetness from the coconut. This is an optional ingredient, but if you don’t have it handy, you can skip it.
How to make Coriander Coconut chutney?
Cut off the roots and wash the stems and leaves thoroughly. Remove any steams are thick and retain the thin stems. You need not throw them out. Roughly chop the coriander leaves and stems and keep aside.
Break open a coconut into two halves and grate the coconut with a scraper. I prefer to use grated coconut over pieces of coconut cut out from the shell. Grated coconut provides a smoother texture in the chutney than the cut up pieces. If you are cutting the pieces of coconut yourself, make sure to remove the brown bit and retain only the white parts of the coconut.
To a small mixer jar, add the grated coconut, green chillies and roughly chopped coriander. Close the lid and pulse the ingredients once and twice. Open the lid and add 1/4 cup of water and grind until it becomes a semi smooth chutney.
If you want a further smoother texture, you can grind it further for another 20 seconds.
Tip the chutney into a bowl and add 1/2 a teaspoon of table salt. Mix well and add some water and bring it to your desired consistency.
As a general rule, idlis go well with thin chutneys, and dosa pairs well with thick chutneys
Sometimes, depending on the quality or age of the coconut, it might have more water content. In such a case, if you wish for a thicker consistency in the green coconut chutney, you can add 1/4 cup of bengal fried gram or what we call in Tamil pottu kadalai or huri kadale in Kannada. When you grind it with the coconut, the chutney will have a thicker consistency.
Tempering the chutney | Tadka for the green coconut chutney
Place a tadka pan on medium flame. Once the pan is warm, add the one tablespoon cooking oil. I almost always use groundnut oil for cooking, but you can use sunflower or gingelly oil too.
Once the oil is warm, add the mustard seeds and allow it to sputter. Reduce the flame to low and now add the split urad dal. Mix the ingredients with the help of a spoon until the dal turns light brown.
Turn off the flame, and add the 1/2 tsp of asafoetida powder and curry leaves. Mix the tadka well and pour this tadka over the green coconut chutney.
Serve this delicious chutney along with idlis, dosas, upma or utappam.
Storage and Shelf Life
Any chutney made with coconut is best finished within the hour of preparation. If you wish to store the extras in the fridge, do so and finish it within a day.
As the days progress, the taste of the chutney, despite it being stored in the fridge, will not taste great.
When you remove the chutney from the fridge, if you are consuming it immediately, you may add a little hot water to bring it to room temperature.
Green Coconut Chutney
It’ll be great if you tag me on Instagram @ Make Potato when you make this recipe
Please do leave a rating and a comment if you can, on the recipe below – it will help me grow and reach more food lovers like you.
Recipe
Green Coconut Chutney
Green coconut chutney is a flavoursome chutney with coconut, coriander leaves and green chillies that make a great accompaniment to idlis and dosas
Split a coconut in half and grate the coconut with the help of a grater. You can also cut the coconut into small pieces and use them too. Add the grated coconut to a small mixer jar.
Cut off the roots and wash the stems and leaves together thoroughly. Roughly chop the coriander and add it to the mixer jar.
Wash and remove the stems of the green chillies. Break them into small pieces and add it to the mixer as well.
Add a small piece of tamarind to the mixer too.
Grind the ingredients without any water in the pulse mode until they are small pieces. Once they are small pieces, add ¼ of water and grind into a smooth chutney.
Tip the chutney into a bowl and add salt. Add more water if you want a little more liquidy consistency.
Tadka for the Green Coconut chutney
Place a tadka pan on a medium flame. Once the pan in warm, add the oil.
Add the mustard seeds and allow it to sputter. Next, add the split urad dal.
You can now turn off the flame and add the sprig of curry leaves. Mix until the curry leaves are crisp. Finally, add the asafoetida powder and mix all the ingredients of the tadka well.
Add this tadka to the green coconut chutney and mix well. Serve this Coriander Coconut chutney with Idlis or Dosas
Keyword Chutney Recipes, Coconut Recipes
If you are looking for more Chutney and Pickle Recipes, please click here.
Do follow me on Instagram at Make Potato — I post daily lunch box ideas and quick snack recipes.
Pesarattu is a healthy dosa made with green moong dal and served along with upma and a spicy ginger chutney.
What is Pesarattu?
Pesarattu is a protein packed dosa variety from the state of Andhra Pradesh made using whole moong dal. It also goes by the name of Pesara Dose or even Upma Pesarattu. It hails from the Guntur region of Andhra, which is known for its spicy cuisine.
We soak whole moong dal with the skin for 4-5 hours and grind it up with green chillies, cumin, ginger, and curry leaves, giving it that distinct green color.
The best side dish for Andhra Pesarattu is a ginger chutney called Allam chutney or even a tangy tomato chutney.
The use of green moong dal in the preparation adds protein to the dish, making it an excellent choice for an early dinner.
I learnt about the dish just a few years ago when I started my cooking journey. It has been a lifesaving dish for breakfast because it does not involve the process of fermentation. You can just soak the dal over night and grind in the morning along with the herbs and spices. You can eat it with any chutney or some days we just pair it with some butter or Chutney Podi.
A brief note about the dosa
Pesarattu means “Moong dal dosa”. The meaning of pesarattu can be explained in the Telugu language. “Pesara” means “Moong Dal” and “Attu” means “dosa”, hence the name Pesarattu.
Pesarattu also has a variation known by the name of MLA pesarattu which has a stuffing of Upma, raw onions and a side of chutney making it a whole meal. People call it MLA pesarattu because it was initially served in the canteens of the state legislative assembly in Hyderabad to the MLAs who wanted to scoop out the potatoes and replace them with upma.
Like its cousin Adai, from another South Indian state, pesarattu is only made at home and never found on restaurant menus. I really don’t know why, but it should be!
Pesarattu and Adai differ only in the fact that people use whole moong dal to make pesarattu, while they use either channa dal or black urad dal to make adai.
The chief ingredient is unskinned moong dal which is green, also goes by the name of green moong dal or green mung beans.
Adding the other ingredients gives flavor to the dosa itself. In the batter that I make, I add green chillies, ginger, cumin seeds and curry leaves. You can choose to add one or all of these ingredients to the batter.
Adding rice to prepare the batter is a matter of how it is being done in each household. I have never found the need to add rice, but adding a little rice while soaking the dal will add to a crispier texture. If you are adding, add only 2 tablespoons of raw rice.
How to make Pesaru Dosa at home?
Prep Work
Soak 2 cups of green moong dal for a minimum of 4 hours or overnight. Drain the water after soaking and rinse the moong dal a couple of times with fresh water. If you are using rice, you can rinse and soak the rice separately.
Once soaked, rinse out the green moong dal with fresh water and add it to the mixer for grinding. Grind the soaked moong dal (and rice) along with green chillies, ginger, cumin seeds and curry leaves.
Make it into a smooth batter, add a teaspoon of salt and 1/4 tsp of asafoetida powder and keep aside for frying.
You do not need to ferment the batter. It’s one of those dosas that you can prepare with just overnight soaking.
Frying the dosas
Place a cast iron dosa pan or griddle on a medium-high flame. Once the griddle is warm, sprinkle some water on top of it to sizzle. If it does not sizzle, then the tawa is not hot enough. Once the tawa is sufficiently hot, drizzle a few drops of oil and spread it with the help of a cloth or half of an onion. Your griddle is ready,
Take a ladle full of the batter and spread it like a dosa. Allow the spread out batter to cook, drizzle some oil at the edges of the moong dal dosa. With the help of a spatula, slowly release the edges of the dosa, working your way towards the center.
Flip the dosa and allow it to cook for 20 seconds. Remove the dosa from the flame and serve it hot.
If you are making it a special breakfast by making it an MLA pesarattu, flip the dosa back and add the Upma to the center of the dosa and top it up with some finely chopped raw onions. Close the dosa and serve it hot with some allam chutney or any chutney of your choice.
A few tips
Do not over soak the green moong dal. Just about 4 hours is enough. This will help in attaining a crispy texture. If you have soaked it overnight, rise the dal thoroughly and add about 1/4 cup of rice flour to help with the crisp texture of the dosa.
If you want to make a quick version of this dish, you can soak yellow moong dal for about an hour and grind it with the same ingredients. This dish will have cheela like taste and will not have the same flavour, but it’s delicious, nonetheless.
It is always better to leave the batter out at room temperature in order to avoid dosa breakages.
If you do not like raw onions on top of the dosa, you can slightly saute the onions separately and garnish of top of the dosa. Or you can add it top of the dosa before flipping and allow the onions to steam cook under the dosa. Flip it again and you will have a few onions pieces sticking in the dosa directly. This will look similar to onion dosa with its half cooked onions sticking into the dosa directly.
If you wish to make an instant variety of this dosa, you can dry roast the green gram (and rice if using) on a low flame. Allow it to cool down and grind it into a fine powder. You can make a paste of green chillies, curry leaves and ginger and add it to the flour along with some water to make instant Pesara dosa.
Pesarattu
Storage and Shelf Life
The batter stores well in the fridge for up to 2 days. After two days, the batter will start to ferment, at which stage the dosa will not taste that great.
It’ll be great if you tag me on Instagram @ Makepotato, when you make this recipe.
Please do leave a rating and a comment if you can, on the recipe below – it will help me grow and reach more food lovers like you.
Recipe
Pesarattu
Pesarattu is a dosa made with whole green moong dal served along with upma and a spicy chutney.
Wash and soak the green moong dal in water for five hours or more. The water level should be 2 inches above the soaked dal. This gives the dal space to expand.
Prep the ginger, green chillies and curry leaves and keep them handy. Drain the water and rinse the moong dal thoroughly.
Add it to the mixer along with the chopped ginger, green chillies, cumin and curry leaves. Grind it to a smooth batter. Add salt and asafoetida powder and adjust according to taste.
Place a dosa tawa on a medium-high flame. Once the tawa is hot, lower the flame and drizzle some water and see the water sizzle. If the water does not sizzle, it means the tawa is not hot enough. Once the tawa is hot, add a drop of oil and spread it with the help of a cloth/tissue or an onion.
Pour a large ladle of pesarattu batter and spread it thin. Once the batter is dried out, with the help of a spatula or a dosa turner, flip the dosa and allow it to cook on the other side. Drizzle some oil to the edges of the dosa.
Leave it for 20-30 seconds and flip it back. Fold the pesarattu in half and serve it hot with some chutney. If you are making MLA pesarattu, before folding the dosa, add a large scoop of upma and close the dosa. Garnish the dosa with the finely chopped raw onions on top.
Keyword Dosa Recipe, Moond Dal Recipes
If you are looking for more Dosa Recipes, please click here.
Do follow me on Instagram at Make Potato — I post daily lunch box ideas and quick snack recipes.
Potato smileys are golden and crispy potato snacks made with potato mash and a few choice seasonings, shaped as the emoji of a smiley.
Jump to…
Potato Smileys
Potato Smileys are delicious golden potato based snacks made with potato mash and seasonings. They are crispy on the outside and soft on the inside.
They make a great dish as an after-school snack or a great appetizer at parties for kids and adults alike.
I make these on the regular since they don’t take too much time to prep. Potato smileys are freezer friendly and healthy-ish when made at home.
Ingredients for Potato Smileys
The first ingredient you need is potato (obviously! :)). You can use 3-4 large potatoes to make 10-12 medium size potato smileys.
You will also need corn starch – this really helps bind the potato mixture together and remove any moisture they might have after boiling the potatoes.
Then come the seasonings of your choice. In this recipe I have used onion powder, garlic powder, salt, pepper and a little turmeric to add to the yellow colour. You can also use red chilli powder, oregano, paprika, red chilli flakes.
Or make it completely Indian flavours by adding jeera powder, coriander powder and garam masala. But I will say that potato smileys are most often associated with little to no spices but just a little hint of it for flavour.
How to make Potato Smileys at home?
The first step is to boil the potatoes. I usually pressure cook them for 3-4 whistles and they turn out to be sufficiently soft for a potato mash texture.
Once pressure has come down naturally, remove the potatoes from the cooker and let it cool down. It is important to allow the cooked potatoes to cool since this will reduce the moisture in the potatoes when mashing. Remove the skins and place it in a bowl for mashing.
Mash the potatoes until have a smooth texture. Now, add the cornstarch and seasoning. With a clean hand, knead the potato mixture until you have a smooth dough.
Take the dough and place it on a clean surface and roll it out with the help of a rolling pin. You can also flatten it out with your hand in an outward manner along the edges until you have reached about 1 inch of thickness of the dough.
Now, take a round cup or a round cookie cutter and make as many smileys as you can. Peel the rest of the dough from the sides so that you have only the smileys left on the surface.
Take a straw and poke holes to make two eyes. Now, take a spoon that has a good curve and make a long cut for the smile in the smiley potatoes.
Now, you can use the rest of the dough by rolling them out again and cutting more smileys. When you have reached the last stage where you have very little potato mash left, you can shape the circular disks with your hand and use them all up.
Once you’ve made all the smileys, you can rest them in the fridge on a baking tray for 30 minutes. You can fry them right away, but freezing before frying is a process that is recommended. The potatoes will get much crispier this way.
Potato Smileys
Frying the Potato Smileys
There are several ways you can fry the smileys – deep fry, shallow fry, bake or air fry.
– Deep fry
Place a pan on medium flame and add cooking oil. Let it warm up. Once the oil is warm, add the frozen potato smileys to the oil gently. If there are icicles on it, they will tend to splatter in the oil, so be careful. Add only as many 2-3 pieces depending on the size of your pan or kadai. It’s best not to crowd the oil.
Fry on one side, flip and fry on the other sides until they are gold and crispy on both sides. Remove the potato smileys from the oil and drain the excess oil on kitchen tissue.
– Shallow fry
This process is similar to deep fry, but you can use this technique if you have less oil at home or if you want to use less oil for the frying process. Let me also tell you that using less oil does not mean the potato smileys will absorb less oil.
Place a pan on medium heat and add about 1/2 an inch of oil. Place the frozen potato smileys on the pan. It is best to keep the same heat in the oil – you might be tempted to increase them temp to make it cook quickly, but I recommend that you dont.
Once one side is crisp, flip to the other side and shallow fry until golden brown. Remove the potato smileys from the oil and drain the excess oil on kitchen tissue.
– Baking
Pre heat the oven to 200 C or 450 F for 10 minutes. Take the potato smileys out of the freezer and remove any icicles you might find on it.
Take a baking tray and line it with parchment paper. If you do not have parchment paper, a layer of oil will also help.
Place the smileys on the baking tray with an inch or two gaps between them. With the use of brush, apply oil to both sides of the smileys generously.
Once your oven has preheated, place the tray in the oven and bake for 10 minutes. Now, take the tray out of the oven and flip the smileys to bake evenly. Place it back in the oven for another 10 minutes.
Once both sides are golden, remove from the tray and serve immediately.
– Air fryer
Pre heat your air fryer for 5 minutes at 180C. Meanwhile, brush the potato smileys with oil on both sides.
Place them in the air fryer for and cook for 5 minutes. Take the tray out and flip the potato smileys so that they are golden on both sides evenly. Remove from the fryer and serve immediately.
Shelf Life and Storage
The fried potato smileys are the best tasting when consumed immediately. But you can make them in advance and keep them in a food heater if they are being served for party later in the day.
You may, however, prepare the potato smileys (before the frying stage) and store them in the freezer for a good 3 months. You have to first make the smileys, place them flat on a tray and allow to freeze for an hour or two. Now that the shape has been set, you can remove them and store them in a ziplock or a silicone pouch for up to 3 months.
When you want to make them, take only as many as you want and leave the rest in the freezer.
Potato Smileys
It will be great if you tag me on Instagram @Make Potato, when you make this recipe.
Please do leave a rating and a comment if you can, on the recipe below–it will help me grow and reach many more food lovers like you.
Recipe
Potato Smileys
Potato smileys are golden and crispy potato snacks made with potato mash and a few choice seasonings, shaped as the emoji of a smiley.
The first step is to boil the potatoes. You can pressure cook the potatoes for 2-3 whistles and allow it to cool down. You can also boil the potatoes until they have reached a consistency where they are mashable – this will take 20 minutes.
Once the potatoes have cooled, peel the skin and add them to a bowl. Mash them until they have no lumps.
Next, add all the seasonings you've chosen. In this recipe, I have used onion powder, garlic powder, turmeric powder, salt and pepper. Add the corn starch as well.
Mix well and make it into a smooth dough. It should look like smooth potato dough.
Next, take the dough on a clean surface for rolling. With the help of a rolling pin, roll the potato mash until they are about and an 1-1.5 inches thick.
With the help of a cookie cutter or a small bowl, carve out the circular disks. For the eyes, use a straw and make two holes. For the shape of the mouth, use a spoon and punch in the smile. Remove the excess dough and keep the potato smileys aside. You can use the excess dough to make more smileys. When you reach the last few bit of dough, you can hand shape the circular disks.
Place the prepared smileys in the freezer for a minimum of 30 minutes.
Place a pan/ kadai on a medium flame and pour the cooking oil. Depending on the size of your kadai, you can either increase or decrease the quantity of oil. (If you are looking at other ways of cooking the potato smileys, please refer to the earlier sections of this blog post)
Once the oil is warm, add the semi frozen potato smileys in the oil. Once they are golden on one side, flip to the other side and fry them until golden.
Remove them from the oil and drain excess oil on a kitchen tissue paper.
Serve your Potato Smileys with ketchup or a dip of your choice.
Keyword After School Snacks, Appetizer, Potato recipes
If you are looking for more Potato Recipes, please click here.
Do follow me on Instagram at Make Potato — I post daily lunch box ideas and quick snack recipes.
Jhal Muri is a street food from Kolkata made with puffed rice, mustard oil, chopped vegetables and spices!
Jhal Muri
Jhal Muri is a street food from the city of Kolkata. The recipe for Jhal Muri calls for puffed rice/murmura, mustard oil, green chillies, potatoes, and a special spice powder called Bhaja Masala.
Jhal means spicy, Muri means puffed rice – so loosely translated, it means spicy puffed rice.
We can categorize it as a “Chaat” dish. Jhal muri makes an excellent evening snack along with a cup of chai.
Jhal Muri originates from Bengal, but migrants from Bihar created this dish as the ingredients used are extremely affordable
The difference between Bhel Puri and Jhal Muri is that bhel puri has the use of tamarind chutney, green chutney, chaat masala and red chilli-garlic chutney. Jhal muri does not have any of these chutneys and drier in texture than its Bengali cousin.
On an interesting note, I tasted Jhal Muri in Chennai at a small hole in the wall outlet in Spencer Plaza called Kolkatta Chaats. So, this dish has truly travelled all over and become different versions of itself. I’ve written this recipe, based on the flavours and texture that I remember and enjoyed.
The chaat guy used to mix it, give us a taste and ask if the spice levels were ok. If we wanted him to add more heat, he would add a few more green chillies and a dash of mustard oil. That was an entire experience of its own! He would then add them to a rolled paper cone and top it up with some sev for extra crunch. Yum!
Ingredients
The primary ingredients
Murmura – this goes by several names: muri, pori in tamil, puri in kannada, puffed rice in English. You get several varieties of murmura in the market. Choose the one that is thick and round, not the flaky and crumbly ones. If you feel that the muri is not crunchy enough, you can roast it on a low flame for a minute. You can even microwave it for 30 seconds.
Mustard oil – This oil is the only one you can use and cannot substitute for any other oil. The pungency that this oil adds to the experience of the dish. The feeling in your mouth as well as your nostrils when it hits you, add to the “jhal” or heat of the dish.
Green chillies – Depending on your taste buds, you can increase or decrease the number of green chillies to use. I like to eat a small piece of green chilli in every other bite.
Bhaja Masala or Jhal Muri Masala – this is a spice mix that is used in the Bengali cuisine. It is a multipurpose spice mix used for spicing up Bengali curries, and dals, too. It’s a combination of corianders seeds, cumin seeds, fennel seeds and cardamom.
These 4 ingredients provide the primary base for the dish. The rest of the ingredients – you can choose based on what you have available at home.
The secondary ingredients
Peanuts/ Channa Jor/ Cruncy green peas – Chosing one or a couple of these will give you the crunch factor in the dish. Depending on which part of the country you eat jhalmudi, the crunch ingredient will differ.
Sev – Barik sev or nylon sev, as it is commonly known, again adds the much-needed crunch to the murmura dish. Some also use any chivda available at home, it will work.
Vegetables – Chaat dishes have a lot of vegetables added to them. I have used boiled potatoes, onions, tomatoes, and cucumber in my creation, which are the most popular vegetables. You can also add grated carrots. However, people usually do not add grated carrots since they are sweet and reduce the heat of the dish.
The last step to any chaat is the garnish. Here I am using lemon juice and coriander leaves.
You can also top up the dish with more crunchy sev.
The other ingredients that get used in jhal muri are tamarind juice, sliced coconut flakes that are either dried, boiled kala channa, boiled white channa, boiled yellow peas, chaat masala and red chilli powder. Some even use powdered rock salt or Himalayan salt, but normal table salt works fine too.
Jhal Muri
How to make Jhal Muri at home
The prep part
There are only two parts to preparing JhalMudi. It is prepping the ingredients and keeping them ready in front of you to mix and serve as and when needed.
The prep part includes preparing the masala and boiling the potatoes.
To make the Bhaja Masala, place a pan on low-medium heat and add the jeera, cardamom, coriander seeds and fennel powder one by one and roast them until you get a nice aroma. Turn off the flame and allow them to cool down.
Once the roasted spices have cooled down, add them to a spice grinder and make a fine powder. Keep aside.
Pressure cook the potatoes for 3-4 whistles in a cooker and allow for the pressure to come down naturally. Once cool, peel the skin of the potatoes, and cut them into small cubes and keep aside. You can slightly season them with a pinch of salt.
Peel and chop the cucumber to small chunks, the same size as the potatoes. Finely chop the green chillies to small rounds.
Dice the onions to the small pieces and chop your tomatoes to the same size as the potatoes.
Preparing the Jhalmuri
Add the murmura to a large bowl. Follow it up with the chopped onions, tomatoes, potatoes, cucumber, green chillies, peanuts and sev, the bhaja masala and powdered rock salt. If using, add the red chilli powder too. Drizzle in the mustard oil as well.
Mix vigorously until all the ingredients come together. Do a small taste test and increase the “jhal” factor by adding more green chillies, bhaja masala /red chilli powder. A small drizzle of mustard oil will also increase the pungency of the dish.
Serve the Jhalmuri immediately on a plate and garnish with some coriander leaves on top.
Storage and Shelf Life
Any dishes that involve murmura or puffed rice are always best eaten immediately. I mean, within five minutes after it’s made. They get soggy from and get tough to eat even after 15 minutes.
You can always prep the ingredients like the bhaja masala and boiled potatoes in advance to make the Jhalmudi for evening snacks.
Jhal Muri
It will be great if you tag me on Instagram @Make Potato, when you make this recipe.
Please do leave a rating and a comment if you can, on the recipe below–it will help me grow and reach many more food lovers like you.
Recipe
Jhal Muri
Jhal Muri is a street food from Kolkata made with puffed rice, mustard oil, chopped vegetables and spices!
Boil / Pressure cook potatoes, remove the skin and cut them up into small cubes.
Prepare the Bhaja MasalaPlace a pan on medium heat – add coriander seeds, fennel seeds, jeera and cardamon pods. Roast it for a 2 minutes on a low flame and turn off the heat. Once the spices are cool, grind them to a fine powder – your Bhaja Masala is ready.
Chop up all the vegetables that you are planning to use – onions, green chillies, tomatoes, cucumbers and coriander leaves.
Putting the Jhal Muri together
To a large bowl, add the puffed rice, chopped vegetables, sev, mustard oil, bhaja masala, sev, roasted peanuts and salt. Mix all of them vigorously in the bowl.
Have a taste of the Jhal muri and add more bhaja masala and salt if needed.
Squeeze lemon juice and garnish with coriander leaves.
Serve Jhal Muri on a plate and consume immediately.
Keyword Chaat, Evening Snacks, healthy
If you are looking for more Snack Recipes, please click here.
Do follow me on Instagram at Make Potato — I post daily lunch box ideas and quick snack recipes.
Broccoli Paratha is a delicious flatbread recipe with a scrumptious filling of chopped broccoli, mint leaves and crumbled paneer.
Broccoli Paratha
Broccoli Paratha is a lovely paratha recipe with a filling of blanched broccoli, crumbled paneer and finely chopped mint leaves.
This is a recipe that just popped into my head when I was walking around a supermarket produce section. The combination of broccoli and mint just inspired something in me.
This broccoli stuffed paratha recipe is just like any other paratha for which you need an atta dough and the filling prepped to make them hot and serve it with butter or a chutney of your choice.
If you are a fan of stuffed paratha recipes, here is a recipe for Peas Paratha that you should check out.
Ingredients for Broccoli Paratha
Ingredients for the dough
Atta – two cups of whole wheat flour will make 6-7 paratha depending on the size you choose.
Salt – just a pinch for seasoning
Water – 1 cup of normal room temperature water.
Ingredients for the filling
Broccoli – one medium-sized broccoli. (250-400g)
Paneer – I have used 100 grams from a usual 200g block that you get. You can increase the quantity if you wish.
Mint leaves – I bought one bunch, washed them and plucked the mint leaves. But I used only one handful of the leaves. You can increase the quantity based on your taste preference.
Green chillies or dried red chillies – For this recipe, i used finely chopped green chillies. You may also substitute it with dried red chilli flakes for some heat in the paratha filling.
Besan/ Chickpea flour/ Kadala Maavu – Since broccoli is a watery vegetable, you need besan to absorb the moisture from it. You will need to adjust this the quantity according to how much moisture you have in the broccoli once blanched and chopped. I used two teaspoons of besan for this recipe.
Salt and Pepper – You can start with 1/2 tsp salt and 1/2 tsp pepper and go from there to adjust the seasoning according to your taste.
How to make Broccoli Paratha
Preparing the dough for the paratha
There are two prep steps involved in making this paratha. The first is to knead the dough. The second step is to prepare the filling.
To prepare the dough, add two cups of atta to a large bowl and sprinkle some salt on the flour. Use your fingers so that the salt is evenly mixed.
Add water little by little and start kneading the dough. For two cups of atta you will need one cup of water. Sometimes it depends on the wheat flour as well, adjust accordingly.
Your dough is ready when you see that there are no pockets of flour or cracks in the ball of dough – it should be a smooth ball. This process should take you five minutes. Make sure to take the time to knead the dough well – when you mix the water and atta thoroughly, your parathas will also puff up well and cook evenly.
Once the dough has come together, cover the vessel with a lid and keep it aside.
Preparing the filling for the broccoli paratha
Boil water in a large container or you can just turn on the kettle with a litre of water. Once the hot water is ready, turn off the flame. Take the entire head of broccoli and dunk it with the stalk side up. Be sure to dunk all the florets in the hot water. This process will ensure that you remove any sediment and kill any small creepy crawlies nestling in between florets.
Leave it aside for 15 minutes for the florets to blanch. Take the broccoli out of the hot water and let all the water drain out. The more water you remove, the less besan you will need to add later.
Pluck the florets and, with a knife, chop it up into fine pieces. They should be small and not large chunks. If there are chunks, you will find it difficult to roll out the parathas later.
You can also use a food processor to help you with cutting it into a fine texture.
While you are waiting for the broccoli to blanch, add the paneer to warm water and let it sit for 5 minutes. This will soften up the paneer and help easily crumble it into the paratha filling.
Wash the mint leaves and chop them fine and keep aside. Chop up the green chillies and keep them aside too.
If you want to make the process easy, you can just add the blanched broccoli and mint leaves in a food processor, too. Pulse the ingredients together for a few times. Do not add the paneer to this, it will become a complete mush.
To a large bowl, add the finely chopped broccoli, mint leaves, green chillies and crumble the soft paneer with your hands and fingers. Add salt and pepper and mix all the ingredients well.
You will notice there is some moisture in the paratha filling, so to remove this, add 2 teaspoons of besan flour. This will help absorb the water. Mix thoroughly. Take a handful of the broccoli paratha mixture and squeeze it. If you see any water oozing out, you need to add more besan until all the moisture gets absorbed.
Now that the filling and the dough are ready, now it’s time to roll out the parathas.
Rolling the parathas
Pinch out a small portion of the dough and roll it until it’s about 5 inches in diameter. Take a generous helping of the broccoli stuffing and roll it into a ball; place it in the middle of the dough.
Close the stuffing by bringing the sides of the dough together. Pinch off the excess dough.
Sprinkle some atta on the surface and coat the prepared dough on both sides with atta. Roll the paratha as thin as you can. At this stage, if you have too many broccoli chunks, it might get tough to roll and you might notice that the atta dough will tear. Let it be and make sure you cut up the thicker chunks of broccoli in the stuffing.
Once the parathas are rolled out, place a tawa on medium to high heat. Once the tawa is hot, place the paratha and cook on both sides until you see brown spots. Lower the flame, apply some ghee to one side and flip it to the other side and apply some more ghee.
Press the paratha to the tawa and you will notice at this stage that the paratha will puff up. Once you see that both sides are cooked, take the paratha off the tawa and serve it hot with curd and a pickle/chutney of your choice.
Cook all the rolled out parathas and you have a delicious meal on your plate!
Shelf life and storage
The broccoli stuffing can be prepared and kept in the fridge for up to a day. But it is best to consume it on the same day.
Parathas, in general, don’t taste good when stored in the fridge, so it’s best avoided.
Broccoli Paratha
It will be great if you tag me on Instagram @Make Potato, when you make this recipe.
Please do leave a rating and a comment if you can, on the recipe below–it will help me grow and reach many more food lovers like you.
Recipe for Broccoli Paratha
Broccoli Paratha with Mint and Paneer
Broccoli Paratha is a delicious flatbread recipe with a scrumptious filling of chopped broccoli, mint leaves and crumbled paneer.
Take a large bowl of hot water and dunk the entire head of broccoli into the hot water. Leave it in the hot water for a minimum of 15 minutes. In another bowl of warm water add the 100 g of paneer inside to allow it to soften up.
Once the broccoli has blanched, remove as much water as possible from it. Let it drain on a surface for a couple of minutes. Cut up the broccoli into really fine pieces and put them in a bowl.
To the same bowl, crumble the paneer into small pieces with the use of your fingers and hands.
Add the chopped green chillies, chopped mint leaves, salt and pepper too. Mix all the ingredients well.
To remove any moisture in the paratha filling, add 2 tsps of besan/chickpea flour. Mix well, adjust the seasoning according to your taste. The Broccoli paratha filling is ready.
Making the dough for the Paratha
Take a large plate or a bowl and add two cups of wheat flour to it. Sprinkle the salt into the bowl of flour and mix with your hands.
Now, add water to the dough little by little and starting kneading the dough. Make a smooth and soft dough without any pockets flour in it.This process roughly takes 5-10 minutes.
You know it is ready for resting when you do not see any cracks in the dough.
Cover the container or plate with another lid or a moist muslin cloth. Let it rest for a minimum of 15 minutes.
Cooking the Broccoli Paratha
Take the rested dough and divide them into equal sized balls.
Pick one dough ball and dip it in wheat flour. Sprinkle some wheat flour on the surface and start rolling out the dough.
When the dough is about 5 inches wide, take a small portion of the broccoli stuffing and place it in the centre.
Close the stuffing by bringing the sides of the dough together and pinch off excess dough.
Dip the stuffed dough in some more wheat flour on both sides. Roll it out as thin as you can. If you see any moisture seeping through, just sprinkle a little wheat flour to absorb the moisture. If you have difficulty because of thick broccoli stalks, remove those large chunk and roll it as much as you can.
Place an iron tawa on medium to high flame. Once the tawa is hot, place the rolled out paratha.Let the paratha cook on one side until you see a few brown spots. Flip to the other side and allow for brown spots to appear.
At this stage, lower the flame and apply some ghee on top of the paratha. Flip the paratha and apply ghee to the other side as well.
Keyword Broccoli Recipes, Paratha Recipes
If you are looking for more Paratha Recipes, please click here.
Do follow me on Instagram at Make Potato — I post daily lunch box ideas and quick snack recipes.
A paneer curry with a refreshing flavour of a peanut and buttermilk gravy and garnished with lots of coriander leaves
This Paneer Curry is a semi gravy curry made with paneer and capsicum. It goes great with rotis, parathas or as a side sabji with rice and dal.
The gravy base used is a combination of peanut powder, coriander leaves and buttermilk. Most of us almost always use onions and tomatoes in a gravy base, and if you are looking for a change, this recipe is for you.
This makes for a fantastic side dish for rotis in your tiffin box.
Ingredients for the paneer curry
The principal ingredients for the gravy base are – Peanuts, buttermilk and coriander leaves. This forms the base of the curry.
Paneer and capsicum are the two ingredients that I have chosen to add to this gravy base. You can choose to add diced onions, diced tomatoes or just capsicum as well. You can pick any coloured capsicum. Red and yellow bell peppers will be slightly sweeter than the green variety.
The spice powders – Coriander powder, jeera powder, turmeric powder, red chilli powder and garam masala powder.
I’ve also used ginger garlic paste.
For the final garnish – you will only need lemon juice. One half of a lemon is sufficient.
How to make paneer curry in a peanut grav
Prep Work
For this recipe, the maximum time goes into the prep work. So let’s see what are the ingredients you need to prep.
Chop the capsicum into small cubes and keep aside.
Prep the paneer by putting the block in a bowl of hot water with 1/4 tsp of salt. This will really help the paneer get soft and remain soft through the day. I don’t like it when the paneer gets rubbery and reheating it also does not help. Keep it in the water until you are going to use it in the dish.
The next ingredient is the peanuts. Roast the peanuts on a low flame until you hear the crackling sound. This means that the skin is breaking off. Turn off the heat and roast it on the residual heat for another 10-15 seconds. Allow it to cool before removing the skin.
Removing the skin in an optional step. If you want a smooth texture of peanut powder, removing the skin will help with that. Once the peanuts have cooled or at the temperature that you can handle the heat, rub them in between your palms and fingers to remove the skin. Do this over a sink so that you can blow off the skins into the sink and deal with it later.
Once you’ve skinned the peanuts (or not), add it to the small grinder and make it into a fine powder. This will happen in less than 7-10 seconds in the mixer. If you grind more than that, the texture of the peanut will be like peanut-butter and will not taste great in the curry.
Take the curd in a bowl and beat it with the help of a whisk. You do this so that the curd/buttermilk does not split when in contact with heat. After beating the curd, mix in 100-120 ml of water to make the buttermilk.
Wash and chop the coriander leaves as fine as possible and keep aside. This recipe called for coriander leaves as a major ingredient than in its usual position of “final garnish”.
Now, remove the big paneer cube from the warm water and chop it into small cubes, the size similar to the capsicum.
Take a large bowl or basin, add the chopped capsicum, paneer, peanut powder, all the spice powders, ginger-garlic paste and salt. Mix all the ingredients well.
Cooking the Paneer curry
Place a pan/kadai on medium heat. Add 2-3 tbsp of cooking oil. Once the oil is warm, add the contents of the basin – the paneer with all the flavours and mix well with the oil. Add the chopped coriander as well.
Lower the flame and add the buttermilk to the pan. Mix all the ingredients well and close the lid of the pan.
Let the peanut powder, buttermilk, and all spice powders cook well. The capsicum also cooks along with the rest of the ingredients.
The masalas and the capsicum should cook within 5-7 minutes. Taste a small amount of the masala to ensure that the spices have cooked well.
Turn off the heat and drizzle with some lemon juice.
Serve this lip smacking paneer curry with rotis or parathas.
Storage and Shelf Life
This paneer curry tastes the best when hot off the stove with this lemon drizzled on top of it. It also makes for a great side dish for lunch boxes.
If you have leftovers, it is best to store it in the fridge 1-2 hours after it’s prepared. Do not keep this curry in the fridge for more than a day or two.
When you remove it from the fridge, leave it out for 10-15 minutes, before reheating it. It is best if you do not reheat it again.
It will be great if you tag me on Instagram @Make Potato, when you make this recipe.
Please do leave a rating and a comment if you can, on the recipe below–it will help me grow and reach many more food lovers like you.
Paneer Curry
Recipe
Paneer Curry
A paneer curry with a refreshing flavour of a peanut and buttermilk gravy and garnished with lots of coriander leaves
Take a bowl of hot water and add a pinch of salt – place the cube of paneer in it. This will help soften the paneer and prevent it from hardening after cooking.
Place a pan on medium flame and add the peanuts. Roast it for a minute or two until you hear the crackle. This means that the skin of the peanut is cracking. Roast for another minute and turn it off. Keep it under a fan to let it cool. Once you feel you can touch the peanuts, remove the skin by rubbing it between your palms and fingers. (This step is optional)
Once the peanuts are relatively cool, grind it in a mixer until you have a powdery texture.
Wash and finely chop the coriander leaves – as fine as possible.
Add the curd to a small bowl and whisk it. You can use either a wooden "mathu" or a whisk to beat the curd. Add 100 ml water and make the buttermilk.
Take the paneer out of the water and cut it into cubes. At this stage, you can also cut the capsicum into a similar size of the paneer. Add the paneer and capcisum to a large basin.
Mix all the spice powders and salt. Add this mixture to the basin containing the paneer. Add the peanut powder and ginger-garlic paste too. Mix all the ingredients well and do a taste test to adjust spice levels.
Making the Paneer curry
Place a pan on medium heat. Once the pan is warm, add the oil. Once the oil is warm, add the contents of the basin to the pan.
Give it a good mix and then add the finely chopped coriander leaves. Mix it well. Finally, add the buttermilk and mix all the ingredients well.
Close the lid of the pan and reduce the flame to low. Let all the ingredients cook well in the peanut and buttermilk sauce. Keep stirring in between to make sure that the paneer doesn't stick to the base.
If you feel the gravy is too dry, add a little more buttermilk. In less than five minutes, the capsicum will cook and the spice powders would have cooked as well.
Do a taste test of the gravy and do a final adjustment of the taste. Turn off the flame and squeeze lemon on top.
You Paneer Curry is ready to be served as a side dish for roti or parathas.
Keyword Curry, Paneer Recipes, Veg Side Dish
If you are looking for more Curry Recipes, please click here.
Do follow me on Instagram at Make Potato — I post daily lunch box ideas and quick snack recipes.
Khara Bath is a spicy semolina dish from the state of Karnataka. It is a specialty served at restaurants in Bangalore and goes fantastic with a cup of filter coffee.
Jump to
What is Khara Bath?
Khara Bath or Baath is a rava/suji based breakfast dish from the state of Karnataka. Khara, the word means spicy in the Kannada language.
It is a variety of upma or upittu prepared with a spice powder, usually a rasam powder, sambar powder or bisi bele bath powder. The difference between upma and khara bath is just in the use of the spice powder.
Khara bath is usually served with coconut chutney as a side dish, but I think it tastes fantastic on its own.
Nowadays, at local restaurants in Bengaluru, you might see the name Khara bath on the menu, but when you get a plate of the food, it almost always turns out to be a white Upma. It is best to ask at the cashier or the food delivery counter if it is upma or khara bath.
Khara bath and Kesari bath is a beautiful combination served as Chow Chow bath in local restaurants like MTR or Upahara Darshini in Bengaluru. One small scoop of each served with a side of chutney and hot filter coffee on the side is a perfect start to a cold winter morning in Bengaluru.
Ingredients to make Khara bath
Sooji or Rava or Indian semolina is the main ingredient in preparing Khara bath. Rava is finely crushed wheat kernels but with less of the bran. That’s why it appears almost white.
Spice powder – I almost alwasys use Rasam powder (and specifically my athai’s rasam powder since it has a bright colour and slightly less spicy that store-bought rasam powder). You may also use sambar powder or bisi bele bath powder for the “khara” part of the dish.
Dals – Channa dal and cashew nuts are the main dals I use. But you can keep it just to channa dal as well.
Vegetables and herbs – You can use green chillies, curry leaves, finely chopped onions for a simpler version of the dish. You can also choose to add finely cubed pieces of carrots, potatoes and beans to add bulk to the dish.
For the final garnish, use lemon juice and finely chop coriander leaves.
Upma does absorb oil, so in this recipe, I’ve used two tablespoons. This is sufficient for 100g of rava. But you can use more oil if you wish – this will lead to a better texture if you are not fond of the usual upma texture. I use gingelly oil for most cooking, but you can choose to use sunflower oil, groundnut oil or even ghee too.
I prefer to use hot water over room temperature water since this speeds up the cooking process. So, please boil enough water before you begin.
How to make Khara Bath at home?
Prep Work
The first step is to boil enough water and keep it ready. For every measure of rava, you will require three times the measure of hot water. In this recipe, I have used 100g of rava, so I’ve boiled about a half a litre of water in the kettle.
Measure out the rava and keep aside.
Chop the green chillies, onions and, if using, any vegetables that you might be adding to the bath.
The preparation
Place a sufficiently large kadai on a medium flame. You will need it because the quantity of the dish always doubles when you cook sooji.
Add 2 tablespoons of cooking oil to the pan. Once the oil is warm, add the mustard seeds and channa dal. Roast for 10 seconds and then follow it up with cashew nuts. Roast the nuts in the oil until slightly brown. You can also choose to add the cashew nuts to the end by roasting them separately at the end to retain the crispness.
Next, add the curry leaves, chopped green chillies and onions. Saute them until they turn soft.
[If you are adding vegetables, add them now. Sprinkle a little salt on top of the vegetables, add 1/4 cup of water and steam the vegetables until they are soft (this should take 5-6 six minutes depending on the size of the vegetable. You can cut them all in equal size to ensure they cook evenly). ]
Now, you can add the rava. This step is very important. Roasting the rava in this oil along with the spices will coat the rava and prevent it from clumping up when you add water. Roast the rava for at least 2 minutes.
Lower the flame to the lowest setting and you can now add the hot water slowly to the kadai. While adding the water, mix the water and rava together by swirling them together. This will prevent the rava from forming lumps.
Make sure to always have extra hot water handy. Some varieties of rava absorb more water than some.
When the rava is almost cooked (you will see only a few white spots of rava granules), you should close the lid to the kadai and turn off the heat. Let the rava cook in the steam heat for five minutes.
When you open the lid after ten minutes, all the rava would’ve cooked. If you notice any uncooked rava, turn on the flame to the lowest setting, add a little more hot water and keep stirring.
Drizzle with lemon juice and garnish with finely chopped coriander leaves. If you have kept aside roasted cashew nuts, garnish them on top as well.
Serve Khara Bath with a dollop of ghee on top of it with a side green coconut chutney and hot filter coffee.
Shelf Life and Storage
Khara bath is best served hot and piping off the kadai. But it does taste better over the next few hours because the rava would have had a chance to absorb all the spices in. So, if you want to carry tiffin to office for the 5 PM hunger, this dish is the best option for dabba.
You can store Khara bath on the countertop for half a day, nothing will happen to it. But if you live in a place with warm weather throughout the year, best to put it in the fridge for a couple of days.
If you plan to store in the fridge, keep it out of 10-15 minutes before reheating it. Add a teaspoon of oil to a pan and add the upma and mix it thoroughly. Do not reheat it or store it in the fridge again.
Khara Bath
It will be great if you tag me on Instagram @Make Potato, when you make this recipe.
Please do leave a rating and a comment if you can, on the recipe below–it will help me grow and reach more food lovers like you.
Recipe
Khara Bath
Khara Bath is a spicy semolina dish from the state of Karnataka. It is a specialty served at restaurants in Bangalore and goes fantastic with a cup of filter coffee.
Boil half a litre of water in a kettle or on the stove and keep aside.
Chop the green chillies and onions. Keep the curry leaves ready.
Finely chop the coriander leaves, cut the lemon and remove seeds.
The preparation
Place a kadai on low-medium heat and add the cooking oil. Once the oil is warm, add the mustard seeds and allow it to sputter. Next, add the channa dal and cashew nuts. Roast the nuts until slightly brown.
Next, add the green chillies, curry leaves and onions. Saute until the onions are soft. If you are adding vegetables, add them now and allow them to steam cook with 1/4 cup of water.
Now, you can add the rava and mix it along with the rest of the ingredients. Let the oil coat the rava well. If you feel like it, add in a little more oil.
Once the rava is roasted, lower the flame to the lowest setting and pour in the hot water slowly while stirring the water and rava together. Make small swirls in the water, so that the rava gets mixed well. The ratio of 1 measure of rava : 3 measures of water works well. But if you feel that the rava has absorbed the water fast, you can add in more water.
When you see the rava bubbling and it has mostly cooked, turn off the flame and close the kadai with a lid. This will help with steam cooking. Let it be for a minimum of five minutes.
Lift the lid and make sure all the granules of rava are cooked. If not, add a little more water, switch on the flame to a low setting and allow it to cook for some more time.
Garnish the Khara bath with coriander leaves and a generous drizzle of lemon juice. For added crunch, you can roast a few cashewnuts in some ghee on the side and pour them over the khara bath.
Serve Khara Bath with a dollop of ghee on top with green coconut chutney and a hot filter coffee.
Keyword Karnataka Cuisine, Rava Recipes, Tiffin
If you are looking for more Tiffin Recipes, please click here.
Do follow me on Instagram at Make Potato — I post daily lunch box ideas and quick snack recipes.
Vangi Bath powder is a spice mix used in the preparation of a rice dish known as Vangi Bath.
Jump to
Vangi Bath Powder
Vangi Bath powder is a spice mix used in the preparation of a rice dish called Vangi Bath. This rice dish needs has a power packed flavour which this powder provides.
It is prepared using the usual suspect of spices – coriander seeds and red chillies, but the real flavour comes from the javithri, cardamon, cinnamon and cloves. The javithri/mace, cloves and cinnamon give the woody and floral flavours while cardamon provides a sweet and herbal note to the powder. The roasted dals provide thickness, and the 2 variations of red chillies provide the heat.
Ingredients for Vangi Bath Powder
The main spice ingredients are javithri, cinnamon, cloves and cardamom. These spices add a unique heat and sweetness to the Vangi bath.
You have to use two varieties of red chillies – Guntur chillies for the heat and Byadagi chillies for the bright red colour.
The next ingredients are split white urad dal and channa dal.
At last, we will use cobri or dried coconut to add the sweetness and nuttiness to the powder. If you do not have access to cobri, you can use desiccated coconut in its place.
How to make Vangi Bath powder at home
Measure out all the ingredients and keep it ready.
Place a wide pan on low to medium flame. Once the pan is sufficiently hot, add one tablespoon of gingelly oil.
Once the oil is warm, add the Javithri, cinnamon, cloves and cardamom. Toast the spices on a low flame for 20 seconds. Transfer to a plate.
Next, add the urad dal and channa dal and roast them until they are slightly golden. This should take 20-30 seconds. Transfer the dals on to the same plate.
Add in the coriander seeds and toast them until they are slightly brown. Since the pan is already warm, the seeds will get golden pretty fast. Transfer the toasted coriander seeds to the plate as well.
Finally, add all the red chillies – byadagi and the guntur variety together and roast them on a low flame for 20-30 seconds. Once the chillies are less shrivelled, remove from the pan and add them to the pan.
Turn off the flame, and add the cobri or desiccated coconut to the pan. Allow it to toast on the residual heat for 20-30 seconds. Make sure that the cobri does not get too brown. Transfer to the plate and let all the ingredients cool down.
Add the ingredients to a mixer and grind it to a fine powder. Add 1 tsp table salt and pulse the mixer once for the salt to mix with the rest of the powder.
The powder will be warn after the grinding process. So, it is best to first transfer the powder to a plate and let it come to room temperature before you store it in a clean glass jar.
Shelf Life and Storage
Vangi Bath powder is best stored in a glass jar for up to 2 months before it starts losing its freshness. It will still be ok to use but won’t have the same punch as a freshly ground powder.
If you want to store Vangi bath powder for a long time, transfer the powder to a zip lock pouch or a silicon pouch and store in the freezer for up to months. Take only as much as you require and put the rest back in the freezer.
Various uses of Vangi Bath Powder
Apart from using this powder for the main rice dish of Vangi bath, you can use this powder for spicing up your vegetable stir-fries of potatoes, yams, vendakka (okra), kathrikka (brinjal), carrots, beans, etc.
Although Vangi bath powder is used in the preparation of its namesake in the rice form, you can use this powder to spice up mix vegetable rice. I have also used this powder to spice up simple dal recipes to make it more flavourful.
Vangi Bath Powder
It will be great if you tag me on Instagram @Make Potato, when you make this recipe.
Please do leave a rating and a comment if you can, on the recipe below–it will help me grow and reach many more food lovers like you.
Recipe
Vangibath Spice Powder
A spice powder mix to make Vangibath (a flavoursome rice dish from Karnataka), this recipe describes how to make Vangibath spice powder or simply use it for flavouring vegetable stir fries.
10piecesGuntur Red Chilliesreduce the number for a less spicy powder
20piecesByadagi Red Chillies
2tbspCopra(grated dried coconut)
Instructions
Place a wide pan on medium heat. When you hover your hand over the pan, it should be warm, not hot. Once the pan is hot, add 1 tbsp gingelly oil and let it warm.
Add Javithri, Cinnamon, Cloves and Cardamom to the warm oil. Stir with a clean, dry ladle for a minute.
Next, add chana dal and urad dal to the pan. Roast it until the dals turn slightly brown.
Add the coriander seeds and roast until slightly brown
Next, you can add all the red chillies together. Roast until the red chillies turn crisp. This should take less than 2 minutes.
You can now switch off the flame, add the dry coconut and roast it in the residual heat.
Transfer all the ingredients on to a plate and allow it to cool down to room temperature. Once cool, grind them together to a blender until you get a smooth powder.
Store it in an airtight container for up to a two months outside or in the fridge for up to 6 months.
If you are looking for more Spice Mix recipes, please click here.
Do follow me on Instagram at Make Potato — I post daily lunch box ideas and quick snack recipes.
Adai is a South Indian dosa made using a blend of lentils, rice and spices. It is a great dish for breakfast or dinner and usually paired with butter, jaggery or a vegetable medley called Avial.
Adai is a lentil based dosa or a lentil pancake that you can serve for breakfast or dinner. It is a South Indian breakfast recipe and healthy protein rich tiffin that you should include in your weekly meal plan.
The batter is made with chana dal, masoor dal, tur dal and rice as the main ingredients. For flavour, you can add ginger, red chillies and coriander seeds.
The word adai, in Tamil language, usually refers to any dosa that is thick; or a thick pancake made of lentils.
Adai Aviyal is a classic combination but you can serve Adai dosa with butter and jaggery, or with a chutney of your choice.
Adai of this variety is commonly served in most South Indian homes, but you if you want to try another variety of Adai, you should check out Palakkad Style Adai which I make quite often.
Pesarattu is another type of lentil dosa that hails from the land of Andhra Pradesh/Telengana. The major difference between adai and pesarattu is that adai is made from chana dal and pesarattu is made from whole green gram or whole moong dal.
Very few restaurants serve them since they aren’t fast selling like their rice counterpart – dosa. A few old restaurants, maybe in small towns, serve adai with avial as a one of weekly special.
Ingredients
The primary lentil used is Channa Dal. I mix a little of other dals as well to increase the taste and colour of the adai. The other dals I use are Tur dal and Masoor dal.
You can make them just with the lentils, or you can add a bit of rice too. In this recipe, I have included rice in the ingredient list. But you can totally skip it and add more of the Tur and Masoor dal.
The flavours that I have used are coriander seeds and red chillies. I use the Byadagi variety as it adds colour and has less heat. But you can use any dried red chilli available to you. (Do reduce the quantity depending on your taste buds)
You can also add other flavour adding ingredients such as fennel seeds while grinding. You can also add chopped curry leaves to the batter before spreading cooking them. – This will be more like Masala Adai and taste absolutely wonderful.
I also add a large knob of ginger. Wash, peel and cut them into chunks that can easily grind along with the soaked dals.
How to make Adai?
Making the batter
Mix all the lentils and rice together and add it to a container. Rinse them until the water is clear.
I usually take them in a sieve and run it under a tap while using my fingers to rinse them. This has helped in speeding up the rinsing process in my experience.
Take the washed lentils and add it a container or a bowl. Add water to this bowl until there is an inch of water above the lentils. The dals expand during the soaking process, so it’s best when you add a lot of water and give them the space to expand.
In another small bowl, add the dried red chillies and coriander seeds and fill it up with water.
Let them soak for a minimum of 4 hours and a maximum of 8 hours. I usually soak overnight to make them for the breakfast. You can also soak it in the morning or even just 4 hours before dinnertime to eat adais for dinner. If you soak if for a longer time, you will observe bubbles on the surface of the water – you want to avoid that. If you do end up soaking for a long time, you can rinse the soaked dals with fresh water and proceed to the next step.
After soaking, drain the water and give it a quick rinse. Add the rinsed dals to the mixer along with a large piece of ginger and the soaked coriander and red chillies along with the soaked water.
Grind them until you have a smooth batter. Add salt to the batter and mix well.
Cooking the Adai
Place a dosa pan or tawa on a medium flame. Let the stone warm up. Sprinkle some water on the tawa – if it sizzles right away, it means that the pan is sufficiently hot.
Pour a large ladle of batter and spread it evenly. Let it cook and wait for it to dry out. If you feel the dosa is cooking too fast (centre is brown/black but the edges are still wet) reduce the heat. Once the edges are dry, drizzle some cooking oil along the edges of the dosa and the centre part, too.
Lift the adai and flip it so that both sides get cooked. Flip it back, fold it in half and serve it hot.
You can pair Adai with butter & jaggery, Avial or with any spicy chutney of your choice. Try this Tomato Ginger Apple chutney, I bet the combination is brilliant.
If you wish to make them crispy, I recommend scooping less batter in the ladle and spread it thin to get a crispy adai.
Shelf Life and Storage
Adai batter stores well in the fridge for up to 3 days. In my home, the quantity of batter from this recipe lasts for one breakfast and one evening snack time
Once adais are roasted on the tawa, it is best to consume it immediately. You may pack it for lunch box, but in my experience, adais taste the best when hot.
Adai
It’ll be great if you tag me on Instagram @ Makepotato, when you make this recipe.
Please do leave a rating and a comment if you can, on the recipe below – it will help me grow and reach more food lovers like you.
Recipe
Adai
Adai is a South Indian dosa made using a blend of lentils, rice and spices. It is a great dish for breakfast or dinner and usually paired with butter, jaggery or a vegetable medley called Avial.
Mix the dals and rice in a large container and wash them all together until the water runs clear. I usually add them to a sieve and rinse them until the water is clear.
Transfer the washed lentils and rice to a large bowl and fill it up with water. There should be at least 1 inch of water above the lentil, since they will expand. In a smaller bowl, add the dried red chillies, and coriander seeds and fill it up with water to allow them to soak too.
Let all the ingredients soak for a minimum of 4 hours and a maximum of 8 hours or overnight.
After soaking, drain the water from the lentils and rice and give it a quick rinse. Add them to a mixer jar. Also, add the soaked coriander seeds and red chillies to the mixer too. Add a peel and chopped ginger into the mixer.
Grind all these ingredients until they are a smooth batter. Add salt and mix the batter well.
Place a dosa pan /griddle on medium heat. Sprinkle some water on the dosa pan – if the pan sizzles, then you know that the pan is ready. Else, let it warm up for some more time.
Take a ladle full of the Adai batter and spread it on the dosa pan evenly.
Once the edges have dried out, drizzle some cooking oil on the sides and the centre of the adai. This will take up to a minute.With the help of a dosa thiruppu/ spatula, flip the Adai and allow it to cook on the other side as well.
Flip it back and fold it in half. Remove from the dosa pan and serve the adai with some butter & jaggery or a spicy chutney of your choice.
Keyword Adai Recipe, Dosa Recipe, Tiffin
If you are looking for more Dosa Recipes, please click here.
Do follow me on Instagram at Make Potato — I post daily lunch box ideas and quick snack recipes.
Crispy potato sticks are thin and crispy stick made with potatoes and flavoured with salt, pepper and chaat masala.
Crispy Potato Sticks
Crispy Potato Sticks are the most popular potato snacks in my house. They are potatoes that are cut into the shape of sticks and deep fried to a golden brown colour. Basically, they are skinny french fries.
You can season them with various flavours depending on how the kiddos and the adults like it at home. Some options are salt-pepper (classic), chaat masala, red chilli powder, paprika powder, peri-peri powder and even Italian seasoning.
I make these often as they make an excellent option for snack boxes and a short evening snack.
Ingredients for Crispy Potato Sticks
Potatoes!! – My favourite vegetable ever! I have noticed that using the old potatoes – the ones that are light cream colour that don’t have wet mud on top of them are the best for this recipe. These potatoes are old because large depots stored them for a while before they hit the market.
You can choose to use the fresher ones that you can visibly see that have wet mud on them, but I have noticed that they take a longer time to crisp up.
Another point to note is to avoid using potatoes that are soft. You might come across potatoes that are slightly soft to the touch even before being cooked and they are slightly golden yellow when you cut them. I say, absolutely avoid using them since these potatoes do not crisp up and it doesn’t matter how long you leave them on a low flame in the oil.
The other ingredients you will need are vinegar, cooking oil, salt, pepper, chaat masala and any other seasonings of your choice.
How to make Crispy Potato Sticks
Wash the potatoes and peel them. Cut the potatoes into slices that are about 0.5 cm thick. Pile the slices into a small deck and cut vertically to get the stick like shape.
Gather all the cut up potatoes sticks and add them to a bowl of cold water. Add salt and vinegar to the water and place the bowl in the fridge for a minimum of one hour.
Remove from the fridge after one hour, drain the water and spread it out on a dish towel. Dry it with the dish towel and prepare the oil for frying.
(At this stage, if you want to put some away some potato sticks for freezing, you can do that now. Place them in a ziplock bag and put it in the freezer and they will be good for a couple of months)
Frying the Crispy Potato Sticks
Place a pan/ kadai with oil on a medium flame. Once the oil is warm, add one potato stick to see if it floats to the top. This will indicate if the oil is warm or not.
Add one batch of potato sticks without crowding the oil. Stir the potatoes in the oil so that they fry evenly. Once they look golden brown, remove from the oil and drain the excess oil on a kitchen tissue paper.
Transfer the fried potato sticks to a bowl and add the seasonings – salt, pepper and chaat masala. You may even add red chilli powder, paprika powder, oregano/Italian seasonings or peri-peri powder, too.
Serve these Delicious Crispy Potato sticks as a snack in lunch boxes.
Shelf Life and Storage
These crispy potato sticks have a shelf life on the counter for 2-3 days. If you have fried all the pieces of potatoes into a crispy, they will be ok on the countertop for 2 days. Else, it’s best consumed within 2-3 hours.
You can, however, peel and cut and soak them in water overnight in the fridge to fry them up the next day. Another option is to place the cut potatoes in the water for up to an hour, remove them from the water, dry them on a tea towel and freeze them up. These frozen sticks will be good to for the next 3 months.
If you are a fan of potatoes like I am, I suggest you’ll have fun exploring other potato recipes on my blog.
Please do follow me on Instagram and Facebook and do subscribe to my channel on YouTube. Thank you so much!
Recipe
Crispy Potato Sticks
Crispy potato sticks are thin and crispy stick made with potatoes and flavoured with salt, pepper and chaat masala.
Kara Urulai roast is a potato roast with flavours of onions, garlic and red chillies. You can pair this with curd rice or rasam rice.
Jump to
Kara Urulai Roast
Urulai Roast is a lip smacking, garlicky, spicy potato dish with flavours from South India. This dish can be a dry potato side dish or even served as a special potato dish at weddings.
The potatoes are first parboiled, followed by deep frying them and finally adding them to a sauce containing the lovely flavours of onions and garlic.
You can pair this up with curd rice, rasam rice or for rotis as well.
Ingredients for the Urulai roast
This recipe is a three-step process, so each stage requires different ingredients.
The first stage requires potatoes that need to be parboiled. You can pick 5-6 medium-sized potatoes for serving 2-3 people.
Depending on whether you choose to deep fry or air fry them, you will need an appropriate quantity of cooking oil. For deep frying, you will need 200-250 ml oil, and for air frying just a couple of teaspoons.
For the final stage in which you make the base sauce, you will need mustard seeds, curry leaves, split urad dal, curry leaves, lots of cloves of garlic with the skin on and finely sliced onions.
The spice powders that I have used in this recipe are asafoetida powder and red chilli powder and pepper powder. You can choose to increase or decrease the quantity of each of these depending on your taste buds.
Finally, you will need finely chopped coriander leaves for garnish.
How to make Urulai Roast
Wash the potatoes thoroughly and place them in a small pressure cooker. Allow for 2 whistles to pass and turn off the cooker. The potatoes will only be partially cooked with just 2 whistles. After the pressure has naturally released, you can remove the potatoes and peel the skin. Cut the potatoes into small cubes and keep aside. The next step is to fry the potatoes.
You can either deep fry the potatoes or roast them in an oven or air fryer. I prefer the air fryer.
Deep frying
Place a kadai with 250ml of cooking oil. Once the oil is warm, add the cubed potatoes to the oil slowly. Deep fry the potatoes until they have a golden colour. Remove from the oil and drain them on a kitchen tissue paper.
Air Fryer
Add the cubed potatoes into a bowl and add 2 tablespoons of oil. Sprinkle some salt and give it all a good mix. Add the potatoes to the air fryer basket and close it. Air fry for 20 minutes at 170C. At the ten-minute mark, remove the basket and give it a shake so that the potatoes roast evenly. Remove from the air fryer basket into a bowl and keep aside.
Making the Uruali Roast
Now, place a kadai on a medium flame and add 2 teaspoons of oil. Once the oil is warm, add the mustard seeds and allow it to sputter. Next, add the split Urad dal and curry leaves. Give it a good mix for 10 seconds.
Now add the cloves of garlic and roast them until they are brown. This process will take 5-7 minutes. Once they are brown, add the finely sliced onions and roast them along with the garlic until they are slightly brown. You can add 1/2 a tsp of sugar to hasten the browning process of the onions.
Now add all the spice powders – red chilli powder and asafoetida powder. Give it a mix until the onions are garlic ware well coated. Add 1/4 cup of water to the pan and clove it with a lid. Let the masalas cook for 1-2 minutes. Once most of the water has evaporated, add the roasted potatoes to this base masala and mix well.
Adjust the seasoning – salt and pepper. Taste one or two pieces to adjust the spice and salt levels.
Turn off the heat and garnish with finely chopped coriander leaves.
Shelf Life and Storage
Urulai Roast is best eaten right off the pan. If you do end up storing it in the fridge, eat it up in the next meal without reheating it again.
You can keep parboiled potatoes ready for this recipe by making them the previous day.
It will be great if you tag me on Instagram @Make Potato, when you make this recipe.
Please do leave a rating and a comment if you can, on the recipe below–it will help me grow and reach many more food lovers like you.
Recipe
Urulai Roast
Kara Urulai roast is a potato roast with flavours of onions, garlic and red chillies. You can pair this with curd rice or rasam rice.
10-12clovesGarlicsmall size, or 3-4 of the large cloves
1Onionsmall, sliced thin
½tspAsafoetida powder
1tspRed Chilli powder
½tspSalt
½tspPepper powder
1tbspCoriander Leavesfor garnish
Instructions
Prep Work
Wash the potatoes and pressure cook them for 2-3 whistles. It is ok if the potatoes are par-boiled. Remove from the cooker and peel the skin. If you are boiling the potatoes on the stove, add the whole potatoes with the skin into a pot of boiling water. Cook until the outer part of the potato is tender. Remove from the water and peel the skin once they are cool enough to handle.
Chop the boiled potatoes into cubes. The next step is to fry the potatoes.
Chop the onions into thin slices and keep aside. Take a whole bulb of garlic and separate out the cloves. You can retain the skin of the garlic – this adds to the flavour.
Frying in oilPlace a pan with 250 ml oil and allow it to warm up. Once the oil is warm, add the cubed potatoes and fry them until they are golden brown. Drain the potatoes on a kitchen tissue and season them with salt. Air fryerAdd the cubed potatoes to a bowl and drizzle a tablespoon of oil on it. Season with salt and add them to the air fryer basket. Roast the potatoes at 180℃ for 15 minutes. At the 10 minute mark, pause and give the basket a shake to allow even roasting. Remove from the basket and keep aside.
Making the Uruali Roast
To a kadai, add a teaspoon of oil. Once the oil is warm, add mustard seeds and allow them to sputter. Next add the split urad dal.
Follow it up with some curry leaves and give it all a good stir.
Next, add the cloves of garlic and roast until they are soft and browned slightly. Keep pressing the garlic so that they pop out of their skins.
Once the garlic is brown, add the sliced onions and saute them together, At this stage you can add some sugar to help with browning the onions. This process might take 10 minutes. You need not caramelize the onions but just brown enough to add some flavour.
Its now time to add the spice powders – asafoetida and red chilli powder. Mix them well and add ¼ cup of water. Close the lid and allow the spice to cook.
After all the water has absorbed, add the fried potatoes and give them all a good mix. Season the potatoes with salt and pepper.
Have a taste of the potatoes and adjust the seasoning accordingly.
Garnish with chopped coriander leaves and serve hot.
Keyword Baby Potato Roast, Potato recipes
If you are looking for more Potato Recipes, please click here.
Do follow me on Instagram at Make Potato — I post daily lunch box ideas and quick snack recipes.
Aloo Gobi Matar is a delectable side dish prepared with potatoes, cauliflower and peas seasoned with Indian spices and served with either hot roti or rice.
Aloo Gobi Matar
Aloo Gobi Matar literally translates to potatoes, cauliflower and peas, but it is much more that the three vegetables combined in a pan. People from the North of India widely regard this dish as a comfort food.
A combination of common Indian spices is used to prepare this vegetarian dish in an onion-tomato gravy base.
You can serve this as a side dish for ghee laden rotis or jeera rice or just plain rice.
This recipe is a dry or stir-fry version of Aloo Gobi Matar, with a few spices that I have readily available in my pantry. For a gravy version of this dish, please refer to the section – Prep Work.
The first time I heard about and saw Aloo Gobi was in the movie Bend it like Beckham. The mother teaches the daughter how to make Aloo Gobi and gol-gol rotis while the main character was on a time-out for some incident with her travelling abroad without telling her parents.
Ingredients for Aloo Gobi Matar
As the title indicates, you will need potatoes, cauliflower and peas. Please refer to the recipe card below for measurements. You will need equal quantities of potatoes and cauliflower florets and a handful of peas to add colour and flavour.
The ingredients for the base sauce are onions and tomatoes. You will also need finely chopped garlic, ginger and thinly sliced green chillies. The dry spices I have used are just bay leaves and jeera, but you can add cloves and star anise too.
The spice powders that I have used in this recipe are turmeric powder, red chilli powder, jeera powder and coriander powder.
For the garnish, you will need finely chopped coriander leaves and lemon juice. You can also add garam masala as a final garnish.
How to make Aloo Gobi Matar
Prep Work
Cut off the leaves from the cauliflower and pluck out equal sized florets from the cauliflower. Add them to a bowl of hot water and salt. This will help in removing any dirt or worms that might live in the crevices of the cauliflower. Leave aside for 10-15 minutes.
Peel the potatoes, and diced them into chunks similar to that of the cauliflower florets. Cutting them in equal sizes helps in making sure that all the vegetables cook evenly.
I mostly use frozen peas. But you may use fresh peas as well. If you are using frozen peas, take a handful and dunk it in hot water for 10-15 minutes. Frozen peas are already par-cooked before the freezing process, so you do not need to cook it for a long time.
If using fresh peas, you can add them add them along with the potatoes and onions in the initial cooking process.
Chop the onions, garlic, ginger and green chillies. Take the tomatoes and cut them into large chunks. Add them to a mixer and make a puree. Keep aside. If you are plannig to make this as a gravy, add 3 more tomatoes to the mixer for the puree.
Now, let’s make the Aloo Gobi Matar.
Cooking the Dish
Place a medium-sized pan on medium heat. Add 2 teaspoons of oil. Once the oil is warm, add the bay leaves and jeera. Toast it for 10-15 seconds.
Next, add the ginger, garlic, onions and green chillies. Saute them until the onions are soft. This will take 2-3 minutes.
Next, add the tomato puree and all the spice powders – turmeric, red chilli, jeera and coriander. Mix them all well and allow them to cook in a low flame with the pan covered. Give it another two minutes.
Now, add the cauliflower and potatoes. (If using fresh peas, add them now along with aloo and gobi). Mix all the ingredients well and season the dish with salt. Add 1/2 cup of water and close the lid for the vegetables to cook. Close the pan with a lid and allow it to steam cook for 8-10 minutes. The larges the pieces are, the longer it will take. (You might need to add more water if that is the case).
Remove a piece of the potato and cauliflower to check if they are cooked. If the potato and cauliflower are not cooked yet, add 1/4 cup more water and simmer for another minute or two.
Once you cook the potatoes and cauliflowers, add the thawed peas and mix well. Check for seasonings and let it cook with the lid open for another minute or two.
(If you are making a gravy version of the dish, check if there is enough tomato onion gravy base. If not, add a little more water to increase the quantity. You may also add some roasted besan if you have added too much water and you want to thicken the dish. )
Turn off the heat and garnish with finely chopped coriander leaves and a generous squeeze of lemon juice.
Serve Aloo Gobi Matar as a side dish with ghee rotis, phulkas, jeera rice or plain rice.
Shelf Life and Storage
Eating hot off the pan Aloo gobi matar is the best, but I have to tell you that this dish tastes great even when cold. So they make a great lunch box recipe.
You can keep Aloo Gobi Matar on the counter for a couple of hours, but put it in the fridge soon after. You can store them in the fridge for up to 2 days. Once removed from the fridge, heat it up and consume it all during that meal. It’s best not to reheat it again.
It will be great if you tag me on Instagram @Make Potato, when you make this recipe.
Please do leave a rating and a comment if you can, on the recipe below–it will help me grow and reach many more food lovers like you.
Recipe
Aloo Gobi Matar
Aloo Gobi Matar is a delectable side dish prepared with potatoes, cauliflower and peas seasoned with Indian spices and served with either hot roti or rice.
Cut the cauliflower leaves off and pluck equal sized florets. Dunk them in a bowl of hot water and a teaspoon of salt. Peel the potatoes and dice them up in the same size as the cauliflower florets. Take a handful of frozen peas and add them to a bowl of hot water as well.
Chop your onions, green chillies, ginger and garlic. Puree the tomatoes and keep aside.
Place a medium-sized pan on medium heat. Add 2 teaspoons of cooking oil. Once the oil is warm, add the jeera and bay leaves. Toast for 10-15 seconds.
Next, add the ginger, garlic, green chillies and onions. Saute them all together until the onions are soft.
Now, add the tomato puree and all the spice powders – turmeric, red chilli, coriander and jeera. Mix all of them well and cook them with the pan closed for about two minutes.
To this onion-tomato base mixture, add the cauliflower florets and potatoes. Mix well until all the pieces are coated with the base mixture. Add salt and mix again.
Add 1/2 cup of water and close the pan with a lid. Let it cook for 8-10 minutes. Check the water level in the pan regularly while checking the progress of the doneness of the vegetables as well.
Once the vegetables have cooked, add the thawed peas to the pan and mix well. Let all the ingredients cook without the lid for a minute or two while continuosly stirring.
Turn off the flame and garnish with coriander leaves and lemon juice.
Serve Aloo Gobi Matar with rice or roti.
Keyword Potato recipes
If you are looking for more Potato Recipes, please click here.
Do follow me on Instagram at Make Potato — I post daily lunch box ideas and quick snack recipes.
Mashed Potato French fries is handshake between the classic mashed potatoes and French Fries – a delectable crunchy treat to make with your leftover mashed potatoes.
Mashed Potato French Fries
Mashed Potato French fries are a golden mash delight where a classic mashed potato meets the crispy allure of French fries. You get the best of both worlds in a single bite.
If you have leftover mashed potatoes, or cooked too many potatoes and didn’t know what to do with them, this is the best way to use them up.
Truthfully, I prefer these French fries to the normal fries because there’s more potato in the fries. And I love symmetry, they are so appealing to the eyes as well, when I eat them.
Ingredients for Mashed Potato French Fries
You will need 4 large potatoes for this recipe. Double or triple the quantity depending on your needs.
The next key ingredient will be cornstarch. This will help bind the potatoes and remove any moisture from the potatoes. You may also use potato starch or all purpose flour instead. Be sure not to confuse between corn flour and cornstarch. Corn flour is the ingredient used for making tortillas or makki rotti and might not be a great binding agent for this recipe.
The seasonings are totally your choice. In this recipe I have used – onion powder, salt and pepper. But can use oregano, red chilli flakes, paprika powder and even cheese powder.
I prefer to use refined sunflower oil/ groundnut oil to fry the mashed potato french fries, but you can use any oil/fat that you prefer.
How to make Mashed Potato French Fries
Making the Mashed Potatoes
The first step is to make the mashed potatoes. I always use my trust pressure cooker to boil the potatoes – it is the most convenient and fast way to cook it without watching a pot of boiling water. Wash the potatoes, cut them into halves and put them in a small pressure cooker with an inch of water. Let 2-3 whistles out and turn off the flame. Let the pressure come down naturally. Remove the potatoes and allow them to cool down. Remove the peel and crush them with your hand and add to another bowl.
If you don’t have a pressure cooker, you can always boil the potatoes in a pot of boiling water. Peel the potatoes, dice them into big chunks and add them to a pot of salted boiling water. Around the 15 minute mark, check the potatoes. If they are soft all the way to the center, turn off the flame and drain the water.
Allow the potatoes to cool down before mashing. This step will ensure that there is less moisture in the mashed potatoes – which is exactly how you want it.
Mash the potatoes in a bowl and you can now add the cornstarch and seasonings. Mix all the ingredients well and by the end of it you should have a potato dough good enough to roll flat. Add more cornstarch if needed to reduce the moisture completely.
Take this potato mixture and roll it out on a clean surface to about an inch thick. With the use of the side of your hand, bring the dough together to form a rectangle with equal thickness.
Mashed Potato French Fries
Freezing the Mashed potato sticks
Cut the dough lengthwise and the width wise, forming equal sized “French Fries”. Take the individual fry and place it on an oiled or a parchment paper lined tray. Place the tray or plate in the freezer for a minimum of 1 hour. Remove from the freezer and check if the potatoes have set.
(At this stage, if you want to store some of them for later, you can add the required quantity to a zip lock back and put the bag in the freezer. )
Frying the French Fries
Place a pan on medium flame and add cooking oil. Once the oil is warm, slowly add the mashed potato French fry one by one. Do not crowd the oil, you will need space between them.
Let the fries be in the oil for 30-45 seconds without disturbing with your spatula or slotted spoon.
Now, turn the spud fries until all the sides are golden brown. Remove from the oil and drain excess oil on a tissue paper.
Sprinkle sea salt on top of the fries and serve your delicious Mashed Potato French fries with ketchup of a dip of your choice.
Frying in the air fryer
You can fry them in the air frier too, but it won’t be the same, let me warn you.
Start off by applying a generous coat of oil on the frozen french fries. Place them in the tray and air fry them for 20 minutes on 170 C. At the ten-minute mark, pause the fryer and flip them to make sure to fry them evenly all around.
Remove from the air frier and season with sea salt.
Shelf Life and Storage
Mashed potato french fries are best eaten when hot out of the oil. But you can keep them on the counter for up to 3 hours – although at that point the crunch will be gone.
You can, however, make the mashed potatoes and store them in the fridge overnight before cutting up the pieces and frying them the next day.
To make your like even easier – you can make a bulk batch of these spud sticks and store them in the freezer. The process is pretty simple.
Once you have prepared the mashed potato with all the seasonings, roll the mashed potato and cut it up into thick French fries. Place them flat on a tray or a plate and freeze them for an hour to two. Remove the tray from the freezer and pick the frozen fries and store them all in a zip lock or silicone bag.
When you want to serve it as a snack, just take out as many as you want and put the rest back in the freezer.
It will be great if you tag me on Instagram @Make Potato, when you make this recipe.
Please do leave a rating and a comment if you can, on the recipe below–it will help me grow and reach many more food lovers like you.
Recipe
Mashed Potato French Fries
Mashed Potato French fries is handshake between the classic mashed potatoes and French Fries – A delectable crunchy treat to make with your leftover mashed potatoes.
The first step is to boil the potatoes. I mostly use the pressure cooker. Wash and halve the potatoes and add them to a small pressure cooker with an inch of water. Let out 2-3 whistles, switch off and allow the pressure to go down naturally. If you are boiling the potatoes on open pan – peel the potatoes, dice them into thick chunks and add them to a pot of salted boiling water. Test the potatoes around the 15 minute mark, if they soft all the way to the center, turn off the flame and drain the water. Allow the potatoes to cool down before mashing them.
Once the potatoes have been mashes, add it to a bowl and the rest of the ingredients – corn starch, onion powder, salt and pepper. Mix well and adjust seasoning according to your taste. You can also modify the taste your mashed potato French fries with other spices like oregano and red chilli flakes, or paprika powder or onion and garlic powder.
Once you've prepared the mixture, there should be no moisture left in the potato dough.
Roll it out to about 1 inch thickness. With a knife cut the rolled out potato mixture vertically. Then cut them horizontally to get you thick French fries that are 3 inches in length.
Place all the cut strips of potato mash on an oiled or parchment paper lined plate and store it in the freezer for a minimum of one hour. This will help the potato mixture bind well.
Frying the Mashed Potato French fries
Place a pan on medium flame and add oil. Remove the frozen potato sticks and keep aside.
Once the oil has warmed up, add them French fries one by one to the oil without over crowding them,Let it be for 30-45 seconds before using a spatula or slotted spoon to move them in the oil.
Fry them until all sides are golden brown. Remove from the oil and drain the excess oil on a kitchen tissue paper.
Serve your Mashed Potato French fries with ketchup or a dip of your choice.
Keyword After School Snacks, French Fries, Potato recipes
If you are looking for more Potato Recipes, please click here.
Do follow me on Instagram at Make Potato — I post daily lunch box ideas and quick snack recipes.
Aloo Bonda is an Indian snack that features a spiced potato filling encased in a gram flour batter and deep-fried to golden perfection.
Aloo Bonda is a vegetarian deep fried potato snack that has a spiced potato filling encased in a golden and crispy chickpea flour/besan batter.
These bondas are a fantastic tea time snack or an after-school snack or just a great appetizer that you can serve at a dinner party. They are a common feature of wedding food, especially in the South.
Aloo Bonda also goes by the name of Batata Vada in the North of India but has slightly different spices. Batata Vada is a central ingredient in the famous Mumbai snack – Vada Pav.
Bonda is a term used to describe a spherical deep fried dish in Karnataka – there are few more varieties of Bonda like Mangalore Bonda or Egg bonda.
Aloo Bonda is also popular street food in Bangalore served by Bajji Angadis found in almost all street corners in the older parts of Bangalore. I remember walking up to the Bajji uncle at the end of my lane to pick up 20 bajjis for 10 rupees. I used to wait for that uncle to make every single variety of bajji he made, but especially waited a long time in case he had run out of Aloo Bonda. I have fresh memories of biting into that hot and spicy bonda while walking back home with a newspaper packet full of bajjis.
Ingredients for Aloo Bonda
For the potato mixture – potatoes, of course! You also have to make a ginger-green chilli paste, which acts as a flavouring agent in the potatoes. You can add up to 3 green chillies for 4-5 medium-sized potatoes.
To make the potato mixture, the ingredients you need are – Curry leaves, mustard seeds, coriander leaves and lemon juice.
The Ingredients for the batter are – Besan or black chickpea flour/ Kadala maavu / Kadale hittu, rice flour, salt and turmeric powder.
Finally, you will need 250 ml of cooking oil to deep fry the vadas.
How to make Aloo Bonda | Batata Vada
The first step is to cook the potatoes and prepare the batter before deep frying them.
Making the potato mixture
Wash the potatoes and add them to a pressure cooker for 2-3 whistles. Once the pressure has come down, open the lid and allow the potatoes to cool down. This step is crucial since you do not want excess moisture in the potato mash. If you peel the skin and mash the potatoes before they come to room temperature, the moisture content will be more.
Mash the potatoes and keep aside.
Next, add an inch of ginger and 2 green chillies to a mixer and grind it into a smooth paste with a teaspoon of water. This paste will help in giving the aloo mixture a nice spice throughout the bonda instead of biting into a piece of ginger or green chilli.
Place a pan on medium heat and add a teaspoon of oil. Once the oil is hot, add mustard seeds and curry leaves and saute them for a few seconds. Next, add the ginger-green chilli paste and cook it until the raw smell goes away – reduce the heat to low.
Next, add the mashed potato, along with the turmeric powder and salt. Mix well until you have thoroughly combined all the ingredients.
Turn off the flame, add garnish with coriander leaves and drizzle of lemon juice. Mix well and adjust the seasoning accordingly. Allow this Aloo mixture to cool down. Make small equal sized balls of the aloo mixture and keep side.
It’s time to deep fry the Aloo bonda potato balls.
Making the Batter
Into a bowl, add one cup besan and one tablespoon of rice flour. Add the seasonings – turmeric powder and salt. Mix all these dry ingredients thoroughly. Add water little by little until the batter’s consistency has reached as that of a dosa batter. It should not be too thick or too thin.
Keep the batter aside.
Deep Frying the Bondas
Place a deep kadai and add cooking oil to it. Let the oil warm up in a low-medium heat. You can test if the oil is hot or not by adding a drop of the batter. If the batter rises to the top of the oil, then the oil is perfect for deep frying.
Dip the potato balls into the batter fully and transfer them one by one to the hot oil. Use can use a spoon to coat the batter onto the potato mixture. Drop them gently into the oil. Use a slotted spoon and turn them once the bubbling has reduced a little. Keep moving the vada in the oil so that they don’t sink to the bottom.
Remove them from the oil when you see golden colour appear on the outside. Transfer to a kitchen tissue and serve hot with a dip of your choice.
What is the difference between Aloo Bonda and Batata Vada
Both Aloo Bonda and Batata vada look similar, but the difference is in the taste. Aloo bonda usually does not contain garlic in the ingredients, but Batata Vada does.
Batata Vada batter does not include rice flour or turmeric powder in them. So they yield a light yellow colour when deep fried. Aloo Bonda batter does have a tablespoon of rice flour to help with the crisping it up. When deep fried, aloo bonda comes out with a golden colour, thanks to the addition of turmeric powder.
Shelf Life and Storage
The bondas are best consumed immediately when hot from the oil. However, they can stored at room temperature for 3-4 hours. They will be fine. I do not recommend storing aloo bonda in the fridge.
You may store the prepared aloo mixture in the fridge for making fresh bondas the next day.
It is also best to discard any leftover batter and make a fresh batch of batter if you have any leftover aloo mixture.
It will be great if you tag me on Instagram @Make Potato, when you make this recipe.
Please do leave a rating and a comment if you can, on the recipe below–it will help me grow and reach many more food lovers like you.
Recipe
Aloo Bonda | Batata Vada
Aloo Bonda is an Indian snack that features a spiced potato filling encased in a gram flour batter and deep-fried to golden perfection.
Wash and pressure cook 4-5 potatoes for 3 whistles or on a low flame for five minutes. Turn off the flame and allow the pressure to come down naturally.
Remove the potatoes from the pressure cooked and allow it to come to room temperature. Peel the skin, mash all the cooked potatoes and keep aside.
Place a pan on medium heat, and two teaspoons for cooking oil and allow it to warm up.
Add the mustard seeds and allow it to sputter. Add the curry leaves and green chilli-ginger paste. Cook it on a low flame for 20 seconds.
Add the mashed potatoes, along with turmeric powder and salt. Mix all the ingredients well and turn off the flame.
Garnish with finely chopped coriander leaves and a drizzle of lemon juice. Allow it to come to room temperature. You can then roll the Aloo Bonda potato mixture into equal sized balls and keep them ready for deep frying
Making the batter
To a bowl, add 1 cup of besan flour, 1 tbsp of rice flour, salt and turmeric powder. Mix all the ingredients well.
Add water little by little until the batter reaches a consistency of that of dosa batter. The batter is now ready.
Deep frying the Aloo Bondas
Place a kadai on low-medium flame and allow it to warm up. To test if the oil is sufficiently hot for deep frying, add a drop of the batter to the oil. If the piece of batter rises up immediately, then it means that the oil is hot. (Take a teaspoon of this hot oil and mix it with the batter, this helps in crisping up the vadas on the outside.)
Take the rolled aloo bonda mixture and dip it in the batter. Make sure to coat all the sides of the aloo ball. You may even use a spoon to coat and lift the bonda and drop it into the oil.
Add 4-5 aloo bondas depending on the size of the kadai. They should have enough space to move around in the oil.
Take the back of the slotted ladle and rotate it over the Aloo bonda so that all sides of the bonda get cooked. This action will also help in the bonda keeping its spherical shape.
The Aloo Bondas are ready when all the sides are golden. Remove them with the help of a slotted spoon and drain it on a kitchen tissue paper.
Serve Aloo Bondas with a Tamarind Chutney or as it is!
Avarekalu Chitranna is a variety of rice dish prepared with cooked Avrekalu/Hyacinth beans and rice tempered with mustard seeds and curry leaves.
Avrekalu Chitranna
Avarekalu Chitranna is a rice-based dish from the state of Karnataka. During winters in this region, people harvest avrekalu and use it abundantly in all dishes.
The green chillies, curry leaves and onions add a lovely flavour to the chitranna, while the beans provide the satiety when consumed along with a raita.
Avarekalu Chitranna makes for an excellent tiffin box/ lunch box dish for both kids and adults. I make this dish at least 3-4 times when they are in season.
Avarekalu is the Kannada word for these beans. Avarekalu goes by several names -Hyacinth beans in English, Mochai in Tamil, Lablab or Papri in Hindi, Surti /valor Papdi in Gujarathi, Avarakkai in Malayalam, Shim in Bengali and Avade in Konkani.
Although Avarekalu is common in India, it has its origins in Africa. Avarekalu, which has its origins in Africa, may have exchanged through trade several centuries ago, but people in India consider it as much Indian as the humble potato.
Ingredients for Averkalu Chitranna
The first ingredient you need to prepare is the Avrekalu or Hyacinth beans. If you have them with the shell, take your time and remove the beans from the pods. But I would suggest you buy the shelled beans from Hopcoms shop or online stores like Deep Rooted.
The next ingredient is rice. I use the normal sona masoori rice but you can use basamati too. The flavour will be much better, I bet.
The other ingredients are – Onions, curry leaves, green chillies and grated coconut.
For the seasoning – Oil, mustard seeds and chana dal are required.
Optional ingredient – Dill leaves. I use a lot of dill leaves in my daily cooking since I absolutely enjoy the flavour. So I always have some plucked and cleaned dill leaves in my fridge. Dill leaves and avrekalu are a lovely combination, so I will recommend that you add them.
How to make Avrekalu Chitranna
The Prep Work for Avrekalu Chitranna
The first step is to make sure you have the avrekalu shelled from the pods. This activity will, of course, add to the time spent on this preparing this recipe. But if you are like me, I would totally skip that part and buy the shelled avarekalu available at Hopcoms or the online stores.
The next step is to get the rice ready. For a family of 3, I use about 200gm rice for one meal time. Wash and rinse the rice until the water is clear. Transfer the cleaned rice to a vessel and fill water until there is one inch of water. The best way to measure is, for every measure of rice, you will need two measures of water.
Add the water and place it in a large pressure cooker. You can also directly cook it in a small pressure cooker too. I usually place a bowl above the lid of the rice vessel with the avrekalu so that I can cook both rice and beans in the same cooker.
Pressure cook for 3 whistles and turn off the flame. Let the cooker’s pressure come down naturally.
While the rice and beans are cooking, you may get the other ingredients ready. Peel and chop the onions, get the coriander and curry leaves out of the fridge. If you are using dill leaves, you can pluck and wash them too. I love the combination of avarekalu and dill leaves, so I end up adding them in any avrekalu recipe.
Once the rice and beans are ready, take the rice out and spread it on a large plate for it to cool down. You will need rice that doesn’t stick to each other, so the best way to achieve that texture is to spread it out on a plate under the fan.
Cooking the Avrekalu Chitranna
Place a deep kadai on medium flame and add cooking oil. Once the oil is warm, add mustard seeds and allow it to sputter. Next, add the chana dal and saute for 10-20 seconds.
Next, add the curry leaves and green chillies. Saute for 20-30 seconds. Add the chopped onions to the kadai and the dill leaves if you are using. Saute the onions until they are soft. If you are going to add grated coconut, add it now if you are planning to pack it for a lunch box.
(If you are going to eat the avrekalu chitranna for lunch immediately, you can add the grated coconut as a garnish along with the lemon juice)
Sprinkle in some turmeric powder and salt and mix all the ingredients well. Turn off the flame and take it off the stove.
Add the cooked and cooled rice to the kadai. Season with half a teaspoon more salt, lemon juice and coriander leaves. Mix all the ingredients well and thoroughly. Take your time and do this.
Your Avarekalu Chitrannna is ready! Serve it up with some raita or curd on the side.
Storage and Shelf life
Avrekalu Chitranna is best eaten the same day that it cooked, especially if you have added coconut to it. It can stay on the counter for 2-3 hours, but after that you can put it in the fridge.
It is possible to store it in the fridge for up to 2 days. But after that, you may reheat it once.
It’ll be great if you tag me on Instagram @ Makepotato, when you make this recipe.
Please do leave a rating and a comment if you can, on the recipe below – it will help me grow and reach more food lovers like you.
Recipe
Avrekalu Chitranna
Avarekalu Chitranna is a variety of rice dish prepared with cooked Avrekalu/Hyacinth beans and rice tempered with mustard seeds and curry leaves.
The first step is to cook the Avrekalu. If you have purchased avrekalu that is already shelled, that's great! Your work is half done. Else, please shell the avrekalu and collect one cup or close to 200 g of it.
Once the avrekalu is ready, give it a wash once and put it to the small pressure cooker with an inch of water and a teaspoon of salt. Pressure cook for 2 whistles and allow the pressure to come down naturally.
You can then get the rice ready. Wash the rice until the water is clear. Pressure cook the rice with 1:2 ratio. That is, for every measure of rice, you can add two measures of water. Less water while cooking the rice in a pressure cooker will yield cooked rice that isn't lumpy.Once the rice is ready, spread the cooked rice on a plate to allow it to cool down.
Preparing the Avrekalu Chitranna
In a large kadai, add two tablespoons of cooking oil. Once the oil is warm, add the mustards seeds and allow it to sputter.
Next, add the chana dal and toast it in the oil for 10-20 seconds. Follow it up with the curry leaves and green chillies.
Cook them for another 10-20 seconds and then now you can add the onions.
Saute the onions until soft – you can add turmeric powder at this stage and mix all the ingredients well. If you are using dill leaves, add them at this stage and cook it along with the onions.
Now add the cooked Averkalu without the water and mix them well. Sprinkle some salt and mix well. Turn off the flame.
Add the cooked rice to this averkalu mixture, season with salt and lemon juice. Take your time to mix all the ingredients well. The key to any good chitranna is in proper mixing of all the ingredients.
Your Avarekalu Chitranna is ready! Serve it hot with onion raita and salad.
A nutty, sour and spicy chutney, this peanut chutney will make a fantastic pairing with dosa, idli and shavige!
Peanut Chutney
Peanut Chutney is a favourite chutney of mine with peanuts as the hero ingredient. The chutney has flavours of spice from the red chillies, sourness from the tamarind extract and a subtle sweetness from the peanuts itself.
I make this chutney often since it goes well with all tiffin dishes, either be it for breakfast or for office dabba.
This condiment pairs well with dosa, idli, and I specifically love it with Shavige as it compliments well with it.
Chutneys have always been popular in Indian cuisine, but peanut chutney would’ve made its appearance much later since the Portuguese introduced peanuts to Indians in the 16th century. Peanuts have their origin in South America, much like several ingredients that we use in day-to-day food.
Peanuts gained its popularity in South India more than the North, since the Portuguese presence was primarily on the coasts of Southern India. It is popular since it is terribly easy to make and accessible to everyone. It has high nutritional value and provides satiety when consumed with dosa or idli.
Ingredients for the Chutney
I use roughly 100-150g of peanuts for my family of 3, but you can increase it up to 200-250g. Once you grind the chutney, the quantity does tend to increase.
For any chutney, there should be some sort of souring agent. In this recipe, we are going to use tamarind extract. Take a one rupee coin sized quantity of tamarind and soak it in some warm water. Once it has dissolved for a bit (2-3 minutes), you can rub the tamarind in between your fingers to extract the pulp. At this stage, you can remove the fibres and seeds if any.
A chutney is nothing without its spice – I love to use dried red chillies for chutneys and in this case I am using 2-3 dried Byadagi red chillies, that render a mildly spicy flavour along with the beautiful red colour.
Garlic is an optional ingredient but I must tell you that it really adds to the flavour. I add garlic to this chutney when I know the chutney will finish in one sitting and will not be making a stop in the fridge.
The other ingredients you need are for the tempering/ seasoning part – you will need gingelly oil, mustard seeds, split urad dal, asafoetida powder and curry leaves.
How to make the peanut chutney?
The process is fairly simple. The groundnuts need to be toasted first. This will aid in enhancing the flavour texture and intensifies their natural oils and brings about a nuttier flavour. It also helps in removing any moisture, if it’s there. If you plan on removing the skin of the peanuts, toasting will assist in this process.
Place a pan on medium heat. Add the peanuts and toast it until the skin has a slightly darker colour. You might also observe the skin peeling off and the groundnut splitting into halves. This process will take about 2-3 minutes. Transfer the peanuts to a plate and allow it to cool down before you can de-skin them. (I usually don’t remove the skin, but you can if you have the time)
Meanwhile, you can soak a small piece of tamarind in warm water. After a few minutes, rub the tamarind between your fingers to extract the pulp. Remove any fibre and seeds if any. You may also use store-bought tamarind extract but added less than half a teaspoon of it – they tend to be quite concentrated.
Use the same pan and dry roast the red chillies and garlic on a low flame. Toss them around on the pan for roughly 2-3 minutes until you can see that the red chillies have crisped up. Turn off the flame and add it to the same plate as the peanuts.
Once all the ingredients are cool, add the peanuts, red chillies, garlic and tamarind extract to the mixer and grind it to a smooth paste. Transfer the peanut chutney to a bowl and add 1/2 tsp of salt. Adjust it according to your taste. If you want to, at this stage, add a little water to achieve the desired consistency.
Tempering the Peanut Chutney
The last step of making this chutney is to temper/season it.
Place a tadka pan on a low-medium heat and add cooking oil. I use gingelly oil. Once the oil is warm, add the mustard seeds and allow it to sputter. Next, add the split urad dal, asafoetida powder and curry leaves to it. Turn off the flame.
Add this tadka mixture to the peanut chutney and mix well.
Serve your Peanut Chutney with a dosa of your choice. They go well with idlis and shavige too.
Storage and Shelf Life
Peanut Chutney is best eaten fresh. If you add garlic to the chutney, I suggest not to keep it in the fridge at all. I suggest eating all chutneys fresh and finishing them within the mealtime they were made for.
If you do have leftovers, you can keep it in the fridge, but finish it off the next day.
It’ll be great if you tag me on Instagram @ Make Potato when you make this recipe
Please do leave a rating and a comment if you can, on the recipe below – it will help me grow and reach more food lovers like you.
Recipe
Peanut Chutney
A nutty, sour and spicy chutney, this peanut chutney will make a fantastic pairing with dosa, idli and shavige!
The first step is to roast the peanuts on a low flame. Place a pan on low-medium flame. Once the pan is warm, add the peanuts to it. Roast the peanuts until you hear the crackle of the peanuts splitting and you can notice that the skin is about to come off.
At this stage, turn off the flame and transfer the peanuts to a plate for them to cool down. I usually do not remove the skin but if you want to you can remove the skin at this stage by rubbing the peanuts between your fingers to remove it.
While the peanuts are cooling down, you can soak the tamarind in bowl of warm water. Allow it to soak for a few minutes. Using your fingers, extract the pulp from the tamarind and remove the fibres and seeds if there are any.
In the same pan, roast the dried red chillies for a couple of minutes without the stalk. Once the red chillies are crisp, (should take less than 2 minutes) turn off the heat and allow it to cool down. If you are using garlic, roast the garlic for a couple of minutes along with the red chillies too.
To a mixer jar, add the cooled peanuts, tamarind extract along with the water and the red chillies (and garlic). Grind it to a smooth paste. Transfer the chutney to a container. Add 1/2 tsp salt and adjust it according to your taste. The next step is to season/temper the chutney.
Tempering the chutney
Place a tadka pan on a low-medium flame. Add a teaspoon of oil to it.
Once the oil is warm, add the mustard seeds and split urad dal. Alow the mustard seeds to crackle.
When the crackling stops, add the asafoetida powder and curry leaves. Turn off the flame.
Add this tempering to the bowl of peanut chutney.
Mix well and your Peanut chutney is ready!
Keyword Chutney Recipes
If you are looking for more Chutney and Pickle Recipes, please click here.
Do follow me on Instagram at Make Potato — I post daily lunch box ideas and quick snack recipes.
Potato Sagu is a potato-based gravy that you can serve as a side dish with pooris and rava idlis.
Jump to
Potato Sagu
Potato Sagu is a gravy or side dish served wtih pooris or rava idlis in Karnataka, India.
Sagu is a word used to describe a gravy like or stew like consistency of the dish.
Potato sagu also goes by the name of Bombay sagu probably because it got popular there, but South Indians make this dish more that folks in Mumbai. Or I think it might be because that the “Bhaji” paired with poori resembles this dish closely, if that makes sense.
Ingredients for Potato Sagu
Potatoes are the main ingredient for this dish. Choose medium-sized potatoes so that all of them get cooked evenly in the pressure cooker.
Onions – one medium-sized, diced
Herbs – Curry leaves, Green chillies slit vertical, ginger – skin peeled and finely chopped.
Garnish – Coriander leaves without the stems finely chopped, and juice from one whole lemon.
How to make Potato Sagu or Bombay Sagu?
Cooking the potatoes
The first step to making the sagu is to boil the potatoes. Personally, I prefer to pressure cook potatoes because it saves me time and space on the stove. Wash the potatoes thoroughly and cut into halves.
Place them in a small pressure cooker with an inch of water and allow for 3-4 whistles. Let the pressure come down naturally. If the potatoes are not cooked, pressure cook for 2 more whistles (some times, some potatoes take more time to cook). Once done, remove the skin, mash and keep aside.
If you are boiling your potatoes in a pot of water, add peeled potatoes that are cut into quarters into a pot of boiling water. Allow it to boil on a low-medium flame until they are soft and reach a mashable texture.
Making the Sagu
Start off with placing a pan on low-medium heat and add a tablespoon of cooking oil. Once the oil is warm, add the mustard seeds and allow them to sputter.
No South Indian dish is complete without the curry leaves, green chillies and ginger to add that extra zing. Add them one by one until they are sauteed in the oil well.
Next, add the diced onions and saute them until they get soft. You can speed up the cooking process by adding hald a teaspoon of turmeric powder and salt.
If you have the Potato Sagu Masala ready, you can add it at this stage and allow the spices to combine well with the onion.
Next, you can add the star ingredient – potatoes. You can keep the potatoes slightly lumpy as this will provide texture to the dish and will avoid it being completely gooey.
At this stage, season the Potato Sagu with salt. Mix well and check for salt and spice level. You can also add more Potato Sagu Masala at this stage if you feel like it.
Add 1/2-3/4 cup of water to make it into a gravy like consistency. Cover the pan and allow it to simmer for a minute or two.
Turn off the flame, and garnish with chopped coriander leaves and the juice from one whole lime.
Serve your Potato Sagu with Pooris or Rava Idlis.
Storage and Shelf life
Potato Sagu is best served hot, but you can prepare it and store it in the fridge for a couple of days. The flavours will remain intact.
If the weather is warm/hot, the sagu will go bad, so it’s best to put it in the fridge as soon as you finish your meal, especially if you have leftovers.
It will be great if you tag me on Instagram @Make Potato, when you make this recipe.
Please do leave a rating and a comment if you can, on the recipe below–it will help me grow and reach many more food lovers like you.
Recipe
Potato Sagu
Potato Sagu is a potato-based gravy that you can serve as a side dish with pooris and rava idlis.
The first step is to cook the potatoes. Wash the potatoes thoroughly and pressure cook them for 3-4 whistles. When the potatoes are in a mashable consistency, they are ready. Mash the cooked potatoes and keep them aside.
Next, place a pan on medium-high heat and add a tablespoon of oil.
Once the oil is warm, add the mustard seeds and allow them to sputter.
Add the chana dal and allow to roast for a bit until slightly golden.
Follow it up with the green chillies, curry leaves and ginger. Saute for about 30 seconds.
Next, add the onion and saute them along with the rest of the spices until they are soft.
You can add half a teaspoon of turmeric powder and the two tablespoons of Sagu Masala powder at this stage and give it all a good mix. Saute for under a minute.
Add the mashed potatoes and season with salt. Start off with half a teaspoon and adjust accordingly later.
Since sagu is a gravy-like dish, add half a cup of water (preferably warm). Mix all the ingredients well and allow it to simmer on a low flame for the couple of minutes.
Finally turn off the flame, and garnish with finely chopped coriander leaves and a juice from a full lemon.
Your potato sagu is ready to be served with pooris or rava idli.
Keyword Potato recipes, Potato sagu
If you are looking for more Potato Recipes, please click here.
Do follow me on Instagram at Make Potato — I post daily lunch box ideas and quick snack recipes.
Sagu Masala powder is a spice mix used to maximize the flavour of a popular potato dish called Sagu.
Sagu Masala Powder
Sagu Masala powder is a unique powder that you can make at home to elevate the taste of Potato Sagu served with pooris or Rava Idli.
The spices used in this spice mix bring heat by the use of cloves, cinnamon, jeera and coriander seeds. The Bengal fried gram provides the base to these spices and also acts as a thickening agent when your potato sagu is too watery.
Popular brands like MTR and Maiya’s Potato Sagu Masala powder are great, but I prefer making them in fresh and small quantities
Ingredients for Potato Sagu Masala / Sagu Pudi
Bengal fried gram or pottu kadali or huri kadale in Kannada is the main ingredient that adds a base to this masala.
The other spices used are – Cloves, Cinnamon, Coriander seeds, Jeera and Cobri/ dessicated coconut.
A special ingredient used in such gravies is Khus Khus (not to be confused with Cous Cous) or locally in Karnataka, known as Gasa Gasay. They are poppy seeds that are edible and usually added to foods to make it richer. I especially love the Gasa Gasay Payasa served during family functions that my aunt makes – it is to die for!!
How to make the masala powder
Place a nonstick pan on low flame and allow it to warm up. First, add the cloves, cinnamon and Khus Khus and roast for 10-15 seconds.
Follow it up with coriander seeds and jeera to the same pan and further roast for 10-15 seconds.
Add the bengal fried gram and roast it along with the rest of the spices for another 10- 15 seconds.
Finally, turn off the flame and add the dessicate coconut/ cobri and roast briefly in the ambient heat of the pan.
The idea is to toast all the spices lightly without letting them brown up. If you notice that the Khus Khus is dancing on the pan, the flame is either too high or they’ve roasted sufficiently, and it’s time to remove it from the pan.
Transfer the toasted ingredients to a plate and allow it to cool down. Once they are at room temperature, grind them into a powder.
Storage and Shelf Life
Sagu Masala powder is for immediate use, so it is best to make it in small batches. If you have a little left over, store it in an airtight container for a couple of days outside.
You can use this powder for making Veg Kurma and thickening/flavouring dal.
f you are looking for more Spice Mix Recipes, please click here to find the recipe you are looking for.
Please do subscribe to my channel on YouTube. Thank you so much!
Recipe
Sagu Masala Powder
Sagu Masala powder is a spice mix used to maximize the flavour of a popular potato dish called Sagu.
Chettinadu Baby Potato Roast is a spicy yet flavourful potato recipe from the Chettinad cuisine of Tamilnaduthat uses several spices to create a wonderful melange in your mouth
Jump To
Chettinadu Baby Potato Roast
Chettinadu is a region in the state of Tamil Nadu known for its flavours and use of fresh spices in the masalas that render a mouthwatering culinary experience.
This Chettinadu baby potato roast recipe is one such that has eight spices that provide the flavour and warmth, that makes an excellent appetizer. We usually eat it with rasam rice or curd rice.
Since this recipe requires some prep work, it makes an excellent recipe that you can try during the weekend for a Sunday brunch.
Chettinadu Baby Potato Roast
Ingredients for the Chettinadu Baby Potato Roast
Baby potatoes are the best option for this recipe, but you can also use normal potatoes.
The ingredients for the Chettinadu spice mix are – Fennel seeds, cloves, cinnamon, fenugreek seeds, peppercorns, dried red chillies, jeera and coriander seeds. Please refer to the recipe card for the measurements.
If you wish to, you can prepare fresh ginger garlic paste by crushing them with a mortal and pestle. The flavour is much better as compared to when using store bought GG paste.
No South Indian cuisine is complete without the use of curry leaves, so keep them ready too!
How to make Chettinadu Style Baby Potato Roast
The first step is to cook the potatoes. Wash the potatoes thoroughly and add it to the pressure cooker. I feel the pressure cooker is the best method as I think it is quite convenient. But you can cook them in a pot of boiling water until they are tender.
Once cooked, dunk the potatoes in cold water. Remove the skin and keep aside. You can choose to retain the skin too.
Meanwhile, you can prepare the Chettinadu Masala. Place a pan on low heat and add the spices and dried red chillies. Roast them for about a minute or two only; you do not want to brown them. When you can smell the aromas from the spices, turn off the heat and transfer them to another plate.
Once they are cool, grind the spices to a coarse powder in a spice mixer.
Now that you have cooked the baby potatoes and prepared the Chettinadu spice mix, all you need to do is bring them together.
Cooking the Chettinadu Baby Potato Roast
Start off with placing a pan on low-medium flame. Add the cooking oil and allow it to warm up.
Add mustard seeds, allow it to sputter. Follow it up with curry leaves and ginger-garlic paste. Cook them on a low flame for thirty seconds.
Now, add the cooked baby potatoes and give it a good mix. Let it roast for a minute or two.
Next, sprinkle salt and turmeric powder and mix well. Once mixed, add the prepared Chettinadu mix and bring them together until all the masala has coated well.
Roast the potatoes for a few more minutes and turn off the heat.
Your Chettinadu baby potatoes are ready to be served as an appetizer or a side for rasam/curd rice.
Storage and Shelf Life
These potatoes have the best flavour when eaten hot off the pan. But it also makes a great appetizer at parties and get together. You can serve it along with a yogurt dip of your choice.
I would advise you to not store them in the fridge for consumption the next day.
You may, however, cook the baby potatoes, peel them and keep in the fridge overnight. You can then prepare the fresh masalas and add the potatoes to it.
It will be great if you tag me on Instagram @Make Potato, when you make this recipe.
Please do leave a rating and a comment if you can, on the recipe below–it will help me grow and reach many more food lovers like you.
Recipe
Spicy Baby Potato Roast | Chettinadu Style
Baby Potato Roast is a spicy yet flavourful potato recipe from Chettinad part of Tamilnadu.
Wash the baby potatoes and cook them. If using the pressure cooker, 2-3 whistles on a medium flame will do the trick. If you are boiling the potatoes, they should cook in 20 minutes. Once cooked, dunk them in cold water, remove the skin and keep aside.
The next step is to prepare the Chettinadu Masala Powder.
Place a small pan on low-medium heat. Add the spices one by one and roast them for a minute until the aromas from the spices arise. Roast them for less than a minute.
Once the spices are cool, grind them into a powder in a spice mixer.
If you are planning to use fresh ginger garlic paste, add them to a mortar and crush them until you get a dry paste.
Cooking the Baby Potato Roast
Place a pan on low-medium heat. Once the pan in slightly warm, add the cooking oil.
Follow it up with the mustard seeds and allow it to sputter.
Next, add the curry leaves and roast. Add the ginger-garlic paste and cook it for about 30 seconds.
Add the peeled baby potatoes and toss them in the ginger-garlic paste mixture and let them roast for a minute or two.
Sprinkle in some turmeric powder and salt. Give it a good mix.
Finally, add the prepared Chettinadu Masala to the potatoes and mix until they coat the potatoes completely.
If you feel at this stage, the baby potatoes are dry, drizzle some more oil and roast them on a low flame for another minute.
Turn off the flame and serve hot as an appetizer or a side dish with rasam rice.
Keyword Baby Potato Roast, Chettinadu
If you are looking for more Potato Recipes, please click here.
Do follow me on Instagram at Make Potato — I post daily lunch box ideas and quick snack recipes.
Peas Paratha is a lovely paratha recipe with mildly spiced peas and potato as a stuffing, served with a generous dollop of butter and spiced yogurt.
Jump to
Peas Paratha
Peas Paratha is made of wheat flour dough with a peas and potatoes stuffing flavored with fresh herbs and spices.
It makes for a wonderful breakfast, lunch or dinner and tastes great even when cold. This makes it a great dish to pack for school or office dabbas.
Peas are a winter vegetable, but with it available through the year in the frozen form, you can make it absolutely anytime.
Ingredients for Peas Paratha
Freshly shelled peas are one of the main ingredients in Peas paratha. The months of December, January and February are the time when fresh peas are available in the market plenty. You can prepare this paratha with frozen peas as well.
Potato – I prefer to add one small potato to the filling to make the stuffing a homogenous mixture.
Besan/ Kadala Maavu – This helps with absorbing any moisture that peas bring when made into a puree. You can add any flour too, that will aid in absorbing moisture, but besan adds a nice nutty flavour to the filling.
Herbs and Spices – Green Chillies, Corainder leaves, Jeera and Garam Masala. These ingredients are readily available to anyone. If they aren’t, you can use simple turmeric powder, red chilli powder and coriander powder. The idea is to make the stuffing as flavourful as possible. Add just enough to complement the sweetness of the peas.
To make the dough – you will need 2 cups of Atta (wheat flour), 1 cup of water and a 1/2 tsp of salt.
How to make Peas paratha?
Making the dough
The first step is to make the dough for the paratha. Take two cups of atta and add 1/2 tsp salt. Mix them well. Add water little by little and bring the dough together. The dough should be soft to the touch and without cracks.
Once you’ve brought the dough together, cover the dough with a wet kitchen towel or you can even just close the container. Allow it to rest for a minimum of twenty minutes. After 20 minutes, knead the dough for a full five minutes. This will ensure that the dough is further smooth and the paratha will puff up at the cooking stage.
Making the Peas stuffing
Take a pot of water and allow it to come to a boil. Lower the flame and add the shelled peas to it along with a 1/2 tsp salt. The peas should cook in 10-12 minutes. Alternatively, you can pressure cook the peas for 2-3 whistles and allow the pressure to come down naturally.
You will also need to cook one small potato to a mashable texture like with making a stuffing for aloo paratha. If you are pressure cooking your peas, you can add the potato along with it too. Else you can separately boil the potato too.
While the peas and potato are cooking, prep your herbs and spices. You may finely chop the green chillies, coriander leaves and keep them aside.
After cooking the peas, drain the water thoroughly and transfer them to a bowl. Peel the potato and add it to the bowl with the peas. Mash both the peas and potato together until no lumps are visible.
Peas to have a lot of water in them, so at this stage you can add one tablespoon of besan and mix the peas paratha mixture. If the stuffing is still watery/full of moisture, sprinkle in one more teaspoon of besan. Making the peas mixture dry is essential because if the peas’ stuffing is too moist, you will have difficulties in rolling out the paratha.
Finally, add the spices and herbs that you have prepped – green chillies, coriander leaves, jeera and garam masala. Give it all a good mix and keep aside.
Matar Paratha
Rolling out and cooking the peas paratha
Pinch out a small portion of the dough and roll it until it’s about 5 inches in diameter. Take a generous helping of the peas stuffing and roll it into a ball; place it in the middle of the dough.
Close the stuffing by bringing the sides of the dough together. Pinch off the excess dough.
Sprinkle some atta on the surface and coat the prepared peas paratha dough on both sides in the atta as well. Roll the paratha as thin as you can. At this stage, you will know whether your stuffing has too much moisture in it. If it does, you might experience some difficulty in rolling. Just sprinkle some more atta and try not to roll any further.
(Add more besan to your peas stuffing to reduce the moisture content in it)
Once the parathas are rolled out, place a tawa on medium to high heat. Once the tawa is hot, place the paratha and cook on both sides until you see brown spots. Lower the flame, apply some ghee to one side and flip it to the other side and apply some more ghee.
Press the paratha to the tawa and you will notice at this stage that the paratha will puff up. Once you see that both sides are cooked, take the paratha off the tawa and serve it hot with curd and a pickle of your choice.
Cook all the rolled out parathas and you have a delicious meal on your plate!
Shelf life and storage
The peas stuffing can be prepared and kept in the fridge for up to a day. But it is best to consume it on the same day.
Peas paratha tastes good even when cold, so it makes a good lunch dabba recipe for kids and office goers.
Parathas, in general, don’t taste good when stored in the fridge, so it’s best avoided.
If you are looking for more Paratha Recipes, please click here to find the recipe you are looking for.
Please do subscribe to my channel on YouTube. Thank you so much!
Recipe
Peas Paratha
Peas Paratha is a lovely paratha recipe with mildly spiced peas and potato as a stuffing, served with a generous dollop of butter and spiced yogurt.
Take a large plate or a bowl and add two cups of wheat flour to it. Sprinkle the salt into the bowl of flour and mix with your hands.
Now, add water to the dough little by little and starting kneading the dough. Make a smooth and soft dough without any pockets flour in it. This process roughly takes 5-10 minutes.
You know it is ready for resting when you do not see any cracks in the dough.
Cover the container or plate with another lid or a moist muslin cloth. Let it rest for a minimum of 15 minutes.
Peas filling for the paratha
To a pressure cooker, add one cup of frozen peas and a cleaned medium sized potato cut up into small chunks. Cook for three whistles and allow the pressure to come down naturally. (If you are using fresh peas, you can cook it for 3-4 whistles until they are tender and mashable)(Frozen peas have already been through a round of par-boiling so, it needs less time to cook)
Open the cooker and remove the potatoes and remove the skin. Mash them with your hands and add to a bowl. Take the cooked peas with your hands/strainer and avoid collecting the water along with it.
Mash the peas and potatoes together and mix them well. You will notice that the mixture is slightly damp. So, at this stage, add the besan powder along with the jeera and garam masala.
Make sure that the moisture content is reduced significantly to avoid issues while rolling out the parathas.
Add the finely chopped coriander leaves, green chillies, jeera and salt. Mix all the ingredients well and your paratha stuffing is ready.
Cooking the Paratha
Take the rested dough and divide them into equal sized balls.
Pick one dough ball and dip it in wheat flour. Sprinkle some wheat flour on the surface and start rolling out the dough.
When the dough is about 5 cm wide, take a small portion of the peas stuffing and place it in the centre.
Close the stuffing by bringing the sides of the dough together and pinch off excess dough.
Dip the stuffed dough in some more wheat flour on both sides. Roll it out as thin as you can without the stuffing popping out of the dough.
Place an iron tawa on medium to high flame. Once the tawa is hot, place the rolled out paratha. Let the paratha cook on one side until you see a few brown spots. Flip to the other side and allow for brown spots to appear.
At this stage, lower the flame and apply some ghee on top of the paratha. Flip the paratha and apply ghee to the other side as well.
Your Peas Paratha is ready when both sides are fully cooked and you can see the paratha puff up.
Shavige or Rice Noodles is a tiffin variety from the state of Karnataka, prepared using rice noodles, vegetables and South Indian spices.
Table of Contents
Shavige
Shavige is a Kannada word used to describe noodles. This shavige is prepared with rice noodles and South Indian spices – mustard seeds, green chillies and curry leaves.
This recipe describes who you can make lemon shavige that serves as an excellent lunch box recipe.
Shavige is most usually prepared when people are short on time and need a hearty meal to fill in that evening 4PM snack.
It is also a popular evening tiffin served at popular local eateries. Shavige is usually served with white coconut chutney.
Ingredients for Rice Noodles
There are two types of Shavige – one that is prepared with dried rice noodles available in stores or the one that is prepared from scratch, also known as Otthu Shavige. In this recipe, we are going to use the dried rice noodles.
I prefer to use Dragon or Double horse brand – both are excellent. You will need about 250-300 grams of dried rice noodles for a family of three.
The spices we are going to use in this recipe are – mustard seeds and turmeric powder.
Chana dal, cashew nuts and peanuts add a crunch factor to the shavige to an otherwise soft texture of the dish.
Curry leaves and green chillies will add the intense South Indian flavours. To make it easier for kids or elderly people to eat, cut the green chillies in half lengthwise so we can remove them if needed.
In this recipe I have only used onions, but you can add finely chopped carrots, beans and potatoes as well to make it a filling tiffin item. When dicing the vegetables, ensure that you cut them into small and equal pieces. This will help them cook evenly and quickly.
And finally, in order to make it a lemon shavige, you need a juice of a full lemon that will give it that lemony tangy flavour with a hit of heat from the green chillies.
You may also add grated coconut as a garnish at the end just before serving.
How to make Shavige
Cooking the rice noodles
The first step is to cook the rice noodles. Since the store-bought noodles are really thin, they take very little time to cook.
Take a large vessel and fill it with water and 1/2 a teaspoon of salt. Bring it to a rolling boil.
You can now add the rice noodles and allow all of them to submerge in the hot water. Lower the flame and allow it to cook. You are basically rehydrating the dry rice noodles. Turn off the flame after a minute.
You take a string of rice noodles and check if it is sufficiently cooked. If it is about 90% of the water, you can good to go.
Drain the water with the help of a large sieve. You can collect this starch water and use it for your plants.(after it cools down).
Rinse the rice noodles in cold water to arrest the cooking process. Allow the rice noodles to remain in the sieve to allow all the water to drain out. Keep it aside while you prepare for the tempering and flavouring.
Tempering and flavouring the Shavige
Place a pan/ kadai on low-medium heat. Add 2 tablespoons of cooking oil – I prefer to use groundnut oil but refined oil is good too.
Once the oil is warm, add the mustard seeds and allow them to sputter. Follow it up with the chana dal and cashew nuts. These provide the crunch element in this shavige. If you do not have cashew nuts, you may add peanuts too.
Once you have browned the nuts, add the curry leaves and sliced green chillies. Saute for 10-20 seconds. Add the finely chopped onions. Follow it up with turmeric powder and a pinch of salt. This will help cook the onion faster.
(If you are using other vegetables such as carrots, beans or potato, add them at this stage with a sprikle of salt and 2-3 tablespoons of water. Cover and cook until the vegetables are soft.)
After the onions are soft, add the cooked rice noodles and add about a teaspoon of salt too. At this stage, you can turn off the flame. Squeeze the juice of one whole lime into the kadai.
Now comes the actual part of making these rice noodles. The shavige will taste delicious only when you have mixed all the ingredients thoroughly. Take at least 2-3 minutes mixing all the ingredients so that you don’t have pockets of salt or lemon in different parts of the Shavige.
Once mixed, if you feel fancy, you can garnish it with some grated coconut too.
Allow the rice noodles to rest for 10-15 minutes before serving.
You may serve this Lemon Shavige with coconut chutney or, if you are like me, with a spoon of sugar on the side.
Storage and Shelf Life
You should eat Shavige as soon as you prepare it. If you are packing for a lunchbox, avoid adding the grated coconut as it might spoil sooner depending on where you are.
You may also cook the rice noodles and store it in the fridge overnight to prepare the tempering fresh the next morning.
Fully prepared rice shavige store well in the fridge for up to 2 days. If you plan on eating it, remove the container from the fridge and leave it on the counter for 15-20 minutes before reheating.
Notes for Beginners
Rice shavige is the best dish for a beginner. The most common issue that I faced as a beginner was with the consistency of the shavige itself. I have over cooked or under cooked them at times. The key part of the process is to wash the cooked rice noodles under water/cold water – this will prevent them from overcooking.
Also, as mentioned in the recipe, take your time to mix all the ingredients thoroughly.
It’ll be great if you tag me on Instagram @ Make Potato when you make this recipe
Please do leave a rating and a comment if you can, on the recipe below – it will help me grow and reach many more food lovers like you.
Recipe
Rice Noodles
Shavige or Rice Noodles is a tiffin variety from the state of Karnataka, prepared using rice noodles, vegetables and South Indian spices.
Place a large bowl with water and allow it to come to a boil. Add 1/2 tsp salt to this water.
Once the water reaching a rolling boil, add the dried rice noodles and allow it to simmer on a low flame for a minute.
Let the rice noodles cook in the hot water for a minute and turn off the flame. Let a minute or 2 pass and take a string of the rice noodle and check if it is done.
When you see the noodles are about 90% cooked, take a container and drain the water into a sieve. Run the sieve with the cooked rice noodles under cold water to stop the cooking process.
Let the noodles sit in the sieve and allow all the water to drain out. Let it cool down completely.
Flavouring the Rice noodles
Place a kadai on low-medium heat. Add two tablespoons of cooking oil. I like to use groundnut oil.
Once the oil is sufficiently warm (you should not see smoke from the oil), add the mustard seeds and allow it to sputter. Now, lower the flame.
Next, add the chana dal and cashewnuts. Allow it to brown while sauteing it in the oil.
Add the curry leaves and sliced green chillies and give it a good mix. Follow it up with the finely diced onion and mix them all together.
Now, you can add ½ a teaspoon of turmeric powder and a small sprinkle of salt. This will aid in cooking the onions faster.
Once the onions are soft, you can now add the cooked rice noodles. Season the rice noodles with ½ tsp salt. This is the part which will take the longest time. Turn off the flame and mix all the ingredients thoroughly mix until you have a nice yellow colour on all the rice noodles.
Squeeze the juice of one whole lemon and mix is well again. Do a taste test and adjust salt accordingly. Your Shavige is ready. I usually allow the Shavige to rest for at least 15 minutes before serving since this allows the noodles to absorb all the flavours well.
You can serve Shavige with coconut chutney, or sometimes I eat it with a teaspoon of sugar on the side. (Childhood habits)
Keyword South Indian Cuisine, Tiffin
If you are looking for more Tiffin Recipes, please click here.
Do follow me on Instagram at Make Potato — I post daily lunch box ideas and quick snack recipes.
Menthia Dosa is a variety of dosa made using rice and methi seeds. This dosa has a slightly bitter taste but has a spongy textureand makes for a great breakfast.
Methi Dosa
Methi dosa or Menthia Dosa is a variety of dosa we prepare in our home frequently. It is a soft and spongy dosa with a faint bitter taste, thanks to the addition of methi seeds.
It is a dosa variety popular in South Indian homes and definitely not found in the menus of restaurants. This recipe has its origin in Udupi, like most dosa varieties. In Tamilnadu, it is called Vendhaya dosai
Fenugreek seeds provide immense health benefits that aid in digestion. This dosa is great for nursing mothers as methi seeds aid in lactation.
Its the best dosa to make after a long week of travel and you just want food to help your stomach settle.
Ingredients for Menthia Dosa
Rice – You may use normal rice/ sona masoori rice, dosa rice or parboiled rice for the recipe. If you are using a baking cup measurement, take 2 cups of rice and wash it until clear. You can use any cup measurement depending on the number of people in your household.
Menthia / Methi seeds / Fenugreek seeds – take 2-3 tablespoons or even up to 1/4 cup. I have tested with 2 tablespoons up to 1/4 cup and I can assure you that the dosa does not get bitter.
How to make Menthia Dosa
Take two cups or 500g of rice in a container and wash the rice until the water is clear. Fill the container of washed rice with drinking water until you have up to 1 inch above the level of rice. Cover and keep aside for a minimum of 4 hours or a maximum of 8 hours.
Take 3 tablespoons of methi seeds or even up to 1/4 cup. Rinse the methi once and add it to a bowl with enough water for the methi to expand. Soak the methi separately from the rice for a minimum of 4 hours and a maximum of 8 hours.
In case the soaking exceeds the 8 hour limit, just make sure to rinse the rice and methi seeds in water again before grinding it.
Grinding the methi dosa batter
Grinder
If you are using a grinder, firstly wash the grinding once with water to remove any dust when stored.
Drain out some water from the soaked rice and keep aside.
Switch on the grinder and let the stones roll. Add the bowl of water+methi seeds into the grinder. Follow it up with the soaked rice and water. Allow the machine to do the magic and watch the batter start to get fluffy as time passes. You have to make sure that all the rice and methi seeds get ground well by scraping down the sides periodically.
It should take less than 15 minutes for the batter to grind. The result of the wet grinder batter will lead to a fluffy and light batter. Scoop out the batter and place it in a large container with a lid. Cover and allow to ferment overnight or until you see bubbles on top.
Mixer
If you are using the mixer, add the methi seeds and water along with the soaked rice. Use cold water instead of the soaked water – this will help in creating a fluffy batter similar to what you get when using a wet grinder.
You can do the grinding in batches until all the rice is ground. Once done, transfer the batter to a container and mix well.
Cover the container and allow the methi dosa batter to ferment.
Making the Methi Dosas
Once the batter has fermented, give the batter a good mix and bring it to a pourable consistency by adding a little water. It has to be as thin as a dosa batter.
To a hot griddle on a medium – low flame, pour a ladle of batter and spread it gently without spreading it too thin. As the batter cooks, you will see small craters appear in the dosa.
Close the dosa with a lid to steam cook it for 20- 30 seconds. Gently, with the help of a dosa turner, lift the sides of the dosa and move slowly to the center.
Now, drizzle some oil on the sides and allow it to cook for another 10-15 seconds.
Remove the dosa from the tawa and serve. It’s best to eat Menthia dosa hot with a chutney of your choice.
Serving Suggestions
Methi Dosa goes great with any kind of chutney or even just with some ghee on the side.
Methi dosa batter can be stored in the fridge for a couple of days only. After that, it may get a little sticky and will not look appetizing.
It’ll be great if you tag me on Instagram @ Makepotato, when you make this recipe.
Please do leave a rating and a comment if you can, on the recipe below – it will help me grow and reach more food lovers like you.
Recipe
Menthia Dosa | Methi Dosa
Menthia Dosa is a dosa variety made using rice and methi seeds. This dosa has a slightly bitter taste but has a spongy texture because of the methi seeds.
Take 2 cups of rice in a bowl, rinse it out until the water is clear. Once done, add water to soak the rice. There must be 1 inch of water above the rice.
In a separate bowl, add methi seeds. Add enough water to soak them.
Soak both of them separately for a minimum of 4 hours and a mzaximum of 8 hours.
Once soaked, add the soaked methi seeds along with the water to a grinder or mixer. Keep it grinding until the methi seeds fluff up during the grinding process.
Next add the soaked rice with a little water. Use cold water to grind the rice and methi together.
Transfer the batter to a separate container, add rock salt and mix with you hand.
Allow it to ferment for 6-8 hours until you see tiny bubbles on top.
Add some water to thin down the batter and you can now make your Methi dosas.
Pour a large ladle of Methi Dosa batter and gently spread it on a preheated tawa. You will see small holes appear in the dosa. Place a lid on top of the dosa and allow it to steam cook. You will not need to cook on both sides since you are steaming cooking.
Drizzle some cooking oil around the dosa and cook without the lid for thirty seconds. Remove from the tawa and serve with a chutney of your choice.
Keyword Dosa Recipe
If you are looking for more Tiffin Recipes, please click here.
Do follow me on Instagram at Make Potato — I post daily lunch box ideas and quick snack recipes.
Chickpea and corn fritters are a delicious evening snack or a party appetizer made with chickpeas, boiled corn, and a few herbs and spices.
Chickpea and corn fritters are delicious, crispy, and simple to make. They’re great for kids’ snacks or as appetizers for parties.
The ingredients are simple and easy to access – cooked chickpeas, boiled corn, carrots, corn flour and a few choice herbs and spices.
Fritters are the best way to use up any leftover vegetables you may want to use up from the fridge before your next fridge stock up.
Ingredients to make chickpea and corn fritters
For any fritter, the main need is an ingredient with starch and in this recipe, that ingredient is chickpeas. I always cook extra channa to have on hand for various recipes or as a snack – hummus, fritters or a simple crunchy air fried canna after making chole.
I’ve used one cup of cooked chickpeas for this recipe.
Boiled corn is one of the other key ingredients I’ve used in the recipe. I always have frozen corn with me and it comes in handy when making quick evening snacks.
The other ingredients I’ve used are one small carrot and a few pieces of sliced black olives. I equally sized slice them into small pieces so that they get evenly cut when in the food processor.
Spices and herbs that I use for any fritter recipes are salt, pepper, red chilli powder and chaat masala. The other options you can think of to flavour your fritters are – oregano + parsley, peri-peri spice or, if you want to keep it simple – salt and pepper.
You will also need corn flour or all purpose flour (Maida) as a binding agent to remove excess moisture.
The other ingredients you can use, along with the chickpea and corn, are
Finely chopped green chillies
Finley chopped onions
Olives
Jalapenos
How to make chickpea and corn fritters?
Take a cup of frozen corn and add it to hot water to allow it to thaw. If you are using corn kernels that aren’t cooked, pressure cook for two whistles or boil until the corn is tender. If you are using corn from the cob, cook them in a pressure cooker for 2 whistles and cut them from the cob once cool enough to handle.
For the chickpeas, if using canned chickpeas, drain the water from the can, rinse the chickpeas and keep it aside. If you using dried chickpeas, soak one cup overnight. Drain the water and add fresh water to pressure cook the chickpeas (3 whistles).
To a food processor, add the cooked chickpeas, boiled corn, chopped carrots, olives, corn flour and spices. Run the processor until you have a homogenous mixture or until the ingredients are all small enough to make patties.
(If you do not have a food processor, you can smash the cooked chickpeas, and chop the cooked corn into small pieces. Instead of cutting the carrots into small pieces, you may grate them add to the mixture.)
The fritter or patty mixture should not have too much moisture, so adjust the corn flour/madia quantity accordingly.
Once the mixture is ready, take a small ball and flatten it to a thin patty. The flatter you prepare the patty, the crispier the fritter will be. Once you’ve made all the patties, keep it covered. If you want to make the fritters later, you can store them in the fridge and even use them the next morning.
Place a pan on medium flame and add 3-4 tablespoons of cooking oil. Once the oil is warm, place the patties in the oil without crowding them. Shallow fry the fritters for 1-1.5 minutes on one side. Once the bottom of the fritter has sufficiently browned, turn the fritter over to shallow fry the other side. After both sides are brown and crisp, remove from the pan and drain excess oil on a kitchen paper.
If you want to be fancy, sprinkle a teaspoon on dried parsley or fresh finely chopped coriander leaves. You can even place a wedge of lime to drizzle on top when eating.
Serve them hot off the pan with a dip of your choice.
How to cook chickpea and corn fritters in the oven or air fryer?
If you are using the air fryer to the prepared patties, brush some oil on one side and place them in the air fryer at 180 C for 10 minutes. At the 5 minute mark, pause the air frying, flip the fritter and brush a little oil to the other side.
If using the oven, preheat to 200C for ten minutes. Place the patties on a baking tray lined with parchment paper. Brush oil to the fritters on side and bake for 10 minutes. At the five-minute mark, flip the fritter and brush a coat of oil. Bake it until you get the desired brown colour.
Personally, I prefer to shallow fry on a pan with a little oil at the base of the pan since it gives me the desired crispy texture.
It’ll be great if you tag me on Instagram @ Makepotato, when you make this recipe.
Please do leave a rating and a comment if you can, on the recipe below – it will help me grow and reach more food lovers like you.
Recipe
Chickpea and Corn Fritters
Chickpea and corn fritters are a delicious evening snack or a party appetizer made with chickpeas, boiled corn, and a few herbs and spices.
Prepare your boiled chickpeas and boiled corn. (Look at the earlier part of this post for detailed instructions)
To a food processor, add all the ingredients – cooked chickpeas, cooked corn, olives, cornflour spices and herbs. Blend until you have a course mixture.
Do a little taste test to ensure that it is to your liking. Bring it to a bowl and mix a little with the use of your hands.
Make little balls, the size of ping pong balls and flatten them to make patties. Keep making the patties until all the chickpea-corn mixture is used up.
Place a shallow pan on medium heat, and add 2-3 tablespoons of cooking oil. Once the oil is warm, place the chickpea-corn patties in the center without crowding.
Once the bottom is sufficiently brown, flip the fritter to brown the other side.
Remove from the pan and drain the excess oil on a kitchen towel or paper. Garnish the chickpea-corn fritters with some parsely and drizzle lemon juice on top.
Serve hot with a dip of your choice.
Keyword Evening Snacks, Kids Snacks
If you are looking for more Snack Recipes, please click here.
Do follow me on Instagram at Make Potato — I post daily lunch box ideas and quick snack recipes.
Akki Rotti is a roti, or a flatbread from the state of Karnataka made from rice flour, spices and vegetables, usually served with a chutney or gravy on the side.
Akki Rotti is a staple flatbread from the state of Karnataka and is a weekly staple in most homes. Akii rotti is made with rice flour, herbs, spices and vegetables.
If you’re looking for a fast meal with minimal prep time, just gather rice flour, grated veggies, and water.
I make akki rotti almost every week, with slight variations in the ingredients and serve it with different chutnies to keep it interesting in the menu.
Akki rotti is a tiffin item that people can eat at breakfast, lunch, or dinner.
It goes well with any type of chutney or gravy.
Ingredients for Akki Rotti
The chief ingredient for an akki rotti is rice flour. Akki in Kannada means rice and rotti means flatbread. To make 8-10 small size rottis, you will need 2 cups or roughly 350g of rice flour.
The ingredients to add to the akki rotti flour can be completely up to you. I typically include finely chopped onions, green chillies, grated carrots, cucumber, dill leaves, curry leaves, and coriander leaves.
The spices that I use for akki rotti are just jeera seeds. If you have the time, you can even add tempered mustard seeds.
How to make Akki Rotti
The prep part
The recipe to make Akki rotti is actually pretty simple. You just have to prep all the ingredients and bring it together with some water to form a soft and supple dough.
You start by adding the rice flour and salt in a large bowl. Peel and finely chop onions, peel and grate carrots and add them both to the rice flour.
Now, add the herbs and spices – jeera seeds, finely chopped green chillies, finely chopped coriander leaves and curry leaves.
Mix all the dry ingredients well and then start add the water slowly while mixing the dough with your hand. For two cups of rice flour, you will need about a cup of water. You may use more or less depending on the texture of the dough.
You know the dough is ready when all the rice flour has absorbed the water and the Akki rotti dough is wet and soft.
Leave it aside covered for a minimum of 20 minutes before starting to make them. Most times I make the akki rotti dough the previous night in order to use it for the next morning’s breakfast.
Rolling out/ Spreading your Akki Rottis
To roll out the akki rottis, you will either need banana leaves or parchment paper. Since I do not have easy access to banana leaves, I mostly use parchment paper.
If you have access to banana leaves, before patting the rice dough, run the banana leaf over a flame to help the leaf get a little pliable. Or else, the leaf has a tendency to tear when patting the rice flour dough out.
Uncover the Akki rotti dough, and divide them into equal parts and roll them into balls. You should get about 8 -9 tennis ball sized dough. Cover and keep aside.
Apply a little oil on to the banana leaf or parchment paper, and place a ball in the center. Start patting and spreading the dough outwards until you have the desired thickness. Make five small holes in the rotti in the middle and sides – this will help the rotti cook evenly.
(The first few times will be tough to get a nice round rotti, but don’t let that discourage you. The more you do it, the bigger and thinner you’ll be able to spread it out)
Cooking the Akki Rotti
Place an iron tawa on medium flame. Once the tawa is hot, invert the parchment paper on to the tawa and allow the akki rotti to stick to the tawa. After a few seconds, gently remove the banana leaf or parchment paper off.
Place a lid on top of the tawa for it to steam cook. The rotti should get steam cooked in about 20-30 seconds. Lift the lid and ensure that the rottis cooked. (It is ready when there are no dry spots left on the rotti. If you notice any dry spots, place the lid back on to cook some more).
At this stage, you can drizzle some oil to the sides of the rotti and the indentation (holes) made in the rotti. Allow it to cook for a few more seconds and take it off the tawa. You can allow the rotti to roast a little more by adding a little oil and cooking it on a slow flame until the bottom is crisp.
Take the akki rotti off the tawa and serve it immediately.
Serving Suggestions – You can serve akki rotti with tomato chutney or any type of chutney, gravy, curry or just with plain butter or ghee.
Few points to remember
Adding more grated vegetables like cucumber and carrot more than the quantity of the rice flour will yield a softer rotti. This texture of rotti is good for packing in lunch boxes, as they will remain soft throughout the day.
If you add fewer vegetables, you can make a crispy textured rotti that is perfect for immediate consumption.
You can add any vegetable that you can grate or finely chop. A few variations of akki rotti include – Dill soppu , Averekalu, Cucumber and Masala akki rotti.
For the beginners
Akki Rottis can be prepared by those who have never made it before, since the ingredients are easily available. The only reason most beginners shy away from making akki rotti would be the part requiring the spreading of the dough.
When making it for the first time, don’t worry about spreading the dough perfectly. Just make sure it’s evenly spread, so it cooks evenly. To make the cooking part easier, you may even make more holes in the spread out dough so that it cooks faster.
The more you do it, the better you will get at the spreading/patting the dough.
It’ll be great if you tag me on Instagram @ Makepotato, when you make this recipe.
Please do leave a rating and a comment if you can, on the recipe below – it will help me grow and reach more food lovers like you.
Recipe
Akki Rotti
Akki Rotti is a flat bread from Karnataka made with rice flour, spices and vegetables
To a large bowl, add 2 cups of rice flour. Add one teaspoon salt, and mix well.
Peel and chop a medium-sized onion into small pieces. Peel and grate a carrot and add it to the rice flour. Chop green chillies into small pieces and add to the rice flour too.
Take a small cucumber, peel the skin and grate it. Add the grated cucumber to the rice flour.(If you want a softer akki rotti and also a rotti filled with veggies, add one more grated cucumber)
Add a teaspoon of jeera seeds and mix all the ingredients well.
Add water to the mixture little by little until you have a soft and smooth dough. You will approximately need 1 cup of water for 2 cups of rice flour. Make sure the dough it sufficiently wet, it is easier to pat the dough out when it is wet.
Let the rice flour dough rest for a minimum of 20 minutes. You can even make this mixture and leave it in the fridge to make the rottis in the morning.
Divide the dough into equal balls, the size of a small rubber ball.
Use either banana leaf or piece of parchment paper to pat the rice flour dough.If using the banana leaf, run the leaf over a flame to reduce the stiffness.
Apply a coat of oil to the banana leaf or parchment paper and place a ball of rice dough and start spreading it out. Keep a cup of water handy, to aid you with patting the dough. Once you've rolled it out, make a few holes in the centre and middle portions that will aid the cooking process. (The rotti may not be perfect the first few times, but keep trying to get the dough thinner and thinner. )
Place a tawa on medium flame and coat it with some oil. Once the tawa is hot, invert the parchment paper on to the tawa allowing the akki rotti dough to stick to the pan.
Press down gently so that the rotti gets transferred on to the pan. Peel the parchment paper or the banana leaf slowly as the akki rotti gets cooked with the heat of the pan.
Once you've removed the paper/leaf, place a lid on top of the akki rotti so that it can cook in its steam for 10-20 seconds.
Remove the lid, and drizzle oil around the rotti and in the cavities that you've made.On a low flame, you can crisp up the rotti or you may remove from heat and transfer it on to a plate.
Eat Akki Rotti when hot along with a chutney of your choice.
Keyword Akki Rotti, Breads, Breakfast
If you are looking for more Tiffin Recipes, please click here.
Do follow me on Instagram at Make Potato — I post daily lunch box ideas and quick snack recipes.
Veg Kadai is a warm and spicy vegetable curry that pairs well with rice or roti – If you are looking to make a restaurant style Veg Kadai curry, this is the recipe for you
Veg Kadai is a medley of vegetables in a flavour rich curry, served at Indian restaurants as a side dish to go with rotis, naan or rice.
This dish will be on every menu that serves North Indian cuisine and I’ve loved to order it every single time. This dish comprises several vegetables, cooked together in a spicy and flavour rich tomato sauce and yogurt enhanced by the addition of several spice mixes.
If you’ve ever eaten Veg Kadai and want to replicate it at home, this is the recipe for you.
Ingredients for Restaurant Style Kadai Veg
Veg Kadai, as the name suggests, needs a lot of vegetables. The vegetables you may use are carrots, potatoes, peas, baby corn and capsicum. The other vegetables you can use are cauliflower and broccoli. (If using blanch them in a pot of boiling water with some salt before adding them along with the rest of the vegetables)
Onions, Green chillies and Ginger-garlic paste – A good curry base must always contain these ingredients.
Tomatoes – Here, we are going to use the pureed version of tomatoes.
Curd – Since we will be adding quite a lot of spices, the curd in this recipe helps reduce the intensity of the spices while giving the gravy some thickness.
Spice powders – For the recipe, I have used – turmeric powder, red chilli powder, coriander powder and jeera powder. I will also be using garam masala in the end as a taste enhancer.
Whole Spices – In this recipe, I am only using bay leaves. But you may also use some cloves to take it to the next level.
Coriander leaves – Washed and dried coriander is an ingredient that I always have prepped in my fridge as, fresh herbs make a lot of difference to the taste when added. And, I frankly love the taste of coriander leaves.
How to make Veg Kadai Curry?
The prep work for Veg Kadai
The first step is to wash, peel and cut all the vegetables that you are planning to use. Wash, wipe, and peel the skin off carrots and potatoes. Remove the ends of the beans.
Cut the potatoes, carrots, beans and baby corn into 2 inch sticks. It is important to do this step because it enhances the visual and textural experience of eating the vegetables.
If you are planning to use green peas, I recommend using frozen green peas. You can just grab a handful from the packet and place it in hot water for it to thaw out. Using frozen peas saves a step since they are already cooked. You can use fresh peas too, if using you have to add it to the pan along with all the vegetables.
Chop the onions into thin slices, the same size as the rest of the vegetables. Slice up a couple of green chillies too.
Take 2-3 medium-sized tomatoes or 2 large tomatoes and remove the top off. Dice them into quarters and put it in a blender. Make a puree of the tomatoes and keep aside.
If you are using paneer, take about 100g of paneer and place it in warm water. This helps the paneer soften up.
Take the curd out of the fridge too. Keep it whipped and ready.
Wash, dry and finely chop the coriander leaves and keep it ready.
Cooking the Veg Kadai curry
Place a medium-large sized pan or kadai on a flame. Add 2-3 tablespoons of cooking oil and allow it to warm up. Once the oil is warm, add the bay leaves and cloves. Toast the spices for 10-15 seconds.
Next, you can add the sliced onions and green chillies. Saute them until the onions become tender. To enhance the flavor of the onions, you can sauté them until they turn brown. It will take at least 15 minutes – it’s up to you, okay?
Next, ginger-garlic paste and cook that for about 20 seconds. Be careful, as GG paste usually tends to sizzle when it comes to contact with a hot pan.
You can now add all the spice powders, one by one. Mix all the ingredients that you’ve added so far. You will mostly see that the mixture you have in the pan is dry. So, you can now add 2-3 tablespoons of water to bring them all together.
Now, add all the vegetables you have prepped. Leave the paneer and capsicum out because these two do not need much cook time.
Sprinkle about one teaspoon of salt, mix everything well and cover the pan with a lid. Check in between to make sure they are getting steam cooked. Now, you can pour in the tomato puree and mix them well too.
Close the lid again and cook until all the vegetables are firm but tender. Once all the vegetables are cooked, add the whipped curd and mix well. Take a taste of the gravy and make sure the spice and salt levels are up to your liking.
Finishing touches to the Veg Kadai
You need not cover the kadai now. Add the cooked peas, capsicum and paneer into the (almost) ready Veg kadai and mix. The capsicum will cook in the ambient heat in the pan. Sprinkle in the garam masala – this makes sure that there is a nice kick to the curry.
Mix for another minute and turn off the flame. Garnish your Veg Kadai with coriander leaves.
When serving, if you feel like it, you may squeeze in some lemon juice just before serving.
Shelf Life and Storage for Veg Kadai
Veg Kadai is best eaten hot off the stove and immediately after its prepared. But you can store it in the fridge for a couple of days if you have leftovers.
The paneer might get rubbery and when you reheat the Kadai Veg, it will not have the same oomph as hot off the stove.
For the beginners
If you feel the prep work is too much, stick to the simple vegetables of carrots, potatoes, baby corn and beans. If you can prep the ingredients much ahead of time, putting together the curry will not be a hassle.
You can also use a few spice powders if you don’t have them all. Remember, you can always add, but you can’t take away, so be mindful of how much spice powder you are adding into the gravy.
Do a taste check in between to make sure it is to your liking.
It’ll be great if you tag me on Instagram @ Makepotato, when you make this recipe.
Please do leave a rating and a comment if you can, on the recipe below – it will help me grow and reach more food lovers like you.
Recipe For Veg Kadai
Restaurant Style Kadai Veg
If you are looking to make a restaurant style Kadai veg curry, this is the recipe for you- a warm and spicy vegetable curry that pairs well with rotis and rice.
10-15floretsCauliflowercleaned and soaked in salted warm water
100gPeasfrozen variety
½Capsicumcut leangthwise
100gPaneercut lengthwise to the size of vegetables
2Tomatoespureed
Spice Powders
1/2tspTurmeric Powder
1-1.5tspRed Chilli powderdepending on you need
1tspCoriander powder
1tspJeera powder
1-¾tspGaram Masala powder
1tspSaltadjust accordingly
For the Gravy
2-3tbspCooking oil
2Bay Leavesdried
1tbspGinger Garlic paste
½cupCurdwhipped
Garnish
Coriander Leavesfor garnish
1Lemonjuice
Instructions
Wash, wipe, and cut all the vegetables you are going to use. Cut the paneer as well and keep aside.
Place a pan on medium heat and add the cooking oil. Once the oil is hot, add in the bay leaves and cloves.
Toast the spices in the oil for less than 20 seconds and followed by the addition of sliced onions and slit green chillies. Cook the onions until tender or if you wish for more flavour, you may even brown the onions.
Once the onions are soft, add the ginger-garlic paste and allow it cook for 10-15 seconds.
Next, add all the spice powders and mix well. The ingredients in the pan might be a little dry, so at this stage add about a tablespoon or two of water and give it a good mix. Cook the spices for a minute on low flame.
Add all the cut vegetables and mix until all the spice powders have coated well to the vegetables. (Do not add the capsicum and paneer at this stage)Sprinkle some salt on top and mix that in as well. Close the lid and allow it to cook for 3-4 minutes while stirring it occasionally.
After a few minutes, add the prepared tomato puree and mix well. Cover the lid and allow it to cook for 3-4 minutes more.Check for how well the vegetables have cooked so as to ensure that they do not get mushy.
At this stage, add the whipped curd to the curry and mix well along with the vegetables and tomato puree.
Once the vegetables are tender but firm, add the capsicum and paneer to the pan and give it a good mix. Stir continuously so that the capsicum can cook in the ambient heat.
The last vegetable to add is the green peas that you have kept cooked and ready. Add them and sprinkle in the garam masala as well.
Garnish your Veg Kadai Sabzi with finely chopped coriander and a generous squeeze of lemon juice. Your Veg Kadai is ready to be served with roti, naan or rice.
Keyword Veg Side Dish
If you are looking for more Tiffin Recipes, please click here.
Do follow me on Instagram at Make Potato — I post daily lunch box ideas and quick snack recipes.
Cucumber Kosambari is a refreshing South Indian salad prepared with diced cucumbers, grated carrots, soaked moong dal, green chillies, and fresh coriander leaves.
What is Kosambari?
Cucumber Kosambari is a salad native to the state of Karnataka. This salad has diced cucumber, soaked moong dal, and grated carrots seasoned with mustard seeds and urad dal, topped with pomegranates, grated cucumber and a drizzle of lemon juice.
Kosambari is a Kannada word for salad and is a staple dish at weddings and bale ele oota (banana leaf meal).
Southekayi Kosambari is a must have dish at every wedding, function or festival food. Without beginning with this salad, the meal always feels incomplete. As long as you have all the ingredients, Kosambari is simple to put together.
Kosambari also goes by the name of Koshambir in Marathi and Kosu Malli is Tamil.
Ingredients or Cucumber Kosambari
The chief ingredient in this Kosambari is Cucumber. Take the local variety of cucumber, peel the skin and diced the cucumber to small pieces – smaller the better. You can include the seeds or discard them is you wish. You can use the English cucumber variety too. The local variety of cucumber contains more water and makes the salad much tastier.
Wash, peel the skin and dice the cucumber into small pieces; to the size of teeth.
Yellow Moong Dal – For every cucumber used, take one tablespoon of split yellow moong dal. Wash the moong dal and soak it in water for a minimum of 20 minutes. Once soaked, drain the water and keep aside.
Grated Carrots – These add colour and texture to the salad and who doesn’t like carrots in their salad, right?
For a bit of heat, you can use 1 large green chilli, finely chopped. If you want to flavour of chilli but not the heat, you can remove the seeds and the white vein while cutting the green chilli.
If you want to use pomegranates, open one and keep the kernels ready.
For the seasoning or tadka – You will need 1 teaspoon of cooking oil, 1 tsp of mustard seeds and split urad dal, 1/4 teaspoon of asafoetida powder and a couple of sprigs of curry leaves.
Finally, for the garnish, you can use one tablespoon of grated coconut, one tablespoon of finely chopped coriander leaves and a lemon juice from half a lime.
Optional ingredients – Fried peanuts, Congress Kadlekai, Raisins
How to make Cucumber Kosambari?
Making Kosambari is quite simple, really. Take a large bowl, add the diced cucumbers, grated carrots, pomegranates, soaked moong dal, chopped green chillies and mix well.
In a small tadka pan, add a teaspoon of cooking oil and allow it to warm up. Next, add in a teaspoon of mustard seeds and urad dal. Once they sputter, turn off the flame and add the curry leaves and 1/4 tsp of asafoetida powder. Once the curry leaves are crisp, you can now add the tadka to the bowl of diced cucumbers.
For the final touches, garnish with finely chopped coriander leaves, fresh grated coconut and a large drizzle of lemon juice.
If you are eating the kosamabari right away, you may add 1/2 tsp salt and mix well along with the rest of the ingredients.
If you are eating later, add the salt closer to the time of serving, to avoid the cucumbers releasing water upon the addition of salt.
Storage & Shelf Life
Kosamabari does not have a long shelf life, and it does need to be consumed within a few hours after preparation. This is because the cucumbers will start leaving water the moment you season it with salt.
If you are looking to prep all the ingredients, you can do that without the seasoning and garnish. You can store it for up to a day in the fridge. (Cut vegetables tend to wither slightly after a day or two when stored in the fridge.)
For the beginners
Cucumber Kosambari is a simple recipe for beginners too. If you are making it for the first time, you might feel overwhelmed to prep all the ingredients. You can make this kosambari with just cut cucumber, soaked moong dal and grated coconut along with the tadka to get the classic cucumber kosambari taste.
It’ll be great if you tag me on Instagram @ Makepotato, when you make this recipe.
Please do leave a rating and a comment if you can, on the recipe below – it will help me grow and reach more food lovers like you.
Recipe
Cucumber Kosamabari
Cucumber Kosambari is a refreshing South Indian salad prepared with diced cucumbers, grated carrots, soaked moong dal, green chillies, and fresh coriander leaves.
The first step is to wash and soak the yellow moong dal in water. You can soak it for 15-20 minutes.
Wash, peel and dice the cucumber into small pieces (the size of a tooth) and transfer them to a large bowl.Wash, peel and grate the carrot. Add the grated carrot to the bowl with the diced cucumbers.
Chop the green chillies into small pieces and add it to the cucumbers and carrots. If you want to reduce the spice from the green chilli, you can remove the seeds and the white vein.
Once the yellow moong dal has soaked for a minimum of 15-20 minutes, drain the water from the bowl add only the soaked yellow moong dal to the bowl.
Mix all the ingredients well.
Place a tadka pan on low-medium heat. Once the pan is warm, add the cooking oil. Once the oil is warm, lower the heat and add the mustard seeds. Once the seeds sputter, add the split urad dal and mix until they slightly brown. Turn off the flame and add 1/4 tsp asafoetida powder and curry leaves.
Add this tadka to the Kosambari bowl and mix well.
If you are serving right away, add the salt and pepper along with a generous drizzle of lemon juice. Garnish with some grated coconut and chopped coriander leaves. Mix well and serve immediately. If you are serving the kosambari later, do not add the salt, pepper and lemon. This will lead to the cucumber leaving water into the salad. Store in the fridge and season & garnish them just before serving.
Keyword Indian Salad
If you are looking for more Tiffin Recipes, please click here.
Do follow me on Instagram at Make Potato — I post daily lunch box ideas and quick snack recipes.
Barbeque Nation’s Cajun Potatoes are a beloved appetizer – crispy potatoes, creamy sauce, and crunchy onions on top.
Barbeque Nation’s Cajun Potatoes
Barbeque Nation Cajun potatoes are a fried potato appetizer that we enjoy at the Indian chain restaurant called Barbeque Nation. They are creamy, spicy and crunchy potatoes that we love to eat whenever we go there.
You know why they call ’em Cajun potatoes? ‘Cause they use the same spices in the mayo sauce as in Cajun recipes. The spices are paprika powder, onion powder, garlic powder, black and white pepper powders and salt. In this recipe, I’ve used ketchup as one of the ingredients, as they contain a lot of the spice powders used in “Cajun” recipes.
Cajun (pronounced “Kay Juhn”) is a type of food from Louisiana in the US. It was created by French, West African, and Spanish immigrants who moved there in the 18th century. The combined influences from each of these settlers in now referred to as Cajun.
Ingredients for Barbeque Nation’s Cajun Potatoes
Potato is the chief ingredient for Cajun potatoes – you can choose baby potatoes or normal potatoes. If using normal potatoes, they need to be cut into small cubes before being flattened.
Ingredients for the sauce
Mayonnaise is the main sauce. I have tried regular and thousand island mayonnaise and both taste good. If you are using regular mayonnaise, you need to add a few spice powders that mimic the taste of the original Barbeque Nation Cajun Potatoes.
Ketchup – Ketchup gives that sour and sweet kick in the sauce.
Red chilli powder – This spice gives that classic reddish look.
Garlic powder – This is a key ingredient that a lot of restaurants add in their dishes to intensify the flavours of any dips.
Salt and pepper – start with 1/4 teaspoon of each and adjust accordingly.
Chaat Masala – This makes Cajun potatoes a little more Indian and taste we all recognize, just a small sprinkle is sufficient.
If you are using thousand island flavoured mayonnaise, you can use 1 tsp of red chilli powder and 1 tsp of garlic powder is sufficient.
Mix all the ingredients in a bowl. Once you have all the thick sauces mixed, use either milk or cream to thin the sauce so that it is a pourable consistency.
For the garnish, chop an onion and some coriander leaves and keep aside.
Instead of potatoes, you can use any variety of potatoes or even sweet potatoes.
How to make Barbeque Nation’s Cajun Potatoes?
The first step is to mix all the ingredients needed for the sauce. Mix them in a bowl with the indicated quantities. Do a taste test and keep them aside.
The next step to making these delicious potatoes is to boil in an open pan or in a pressure cooker.
If using the pressure cooker, wash and add the potatoes to bowl and fill it up with water. You can leave the skin on. Add a pinch of salt to this water and pressure cook for two whistles. Once the pressure of the cooker has come down, remove the potatoes from the water and dunk them into cold water. Once you are able to handle the potatoes with your hand, peel the skin. You can also leave the skin on provided you know that they are washed thoroughly before cooking. Leaving the skin on adds an extra crunch.
If you are boiling the potatoes in an open pot, fill the pot with water and bring it to a boil. Once the water is boiling, add the potatoes along with the skin and allow it to cook until tender. Remove from the water and dunk into cold water. Remove the skin and keep aside for the next process.
If you are using normal potatoes, at this stage, cut them into small cubes and set aside.
Take each potato and smash them flat in between the palm of your hands. You can also smash them flat with the back of a cup/tumbler.
The next step is to deep fry the potatoes. Take all the smashed potatoes and place them in a bowl. Add enough corn flour to cover each potato. Season with salt and pepper.
Place a shallow pan and fill it up with 1 inch of cooking oil. Let the oil warm up. Once warm, add the potatoes one by one. Do not crowd the oil with too many pieces. Flip the potato to the other side and fry until both sides are golden brown. Remove from the oil and place it on a napkin for excess oil to drain.
On a serving plate, place the fried potatoes and sprinkle with some chaat masala and salt. Next, bring that delicious sauce you’ve prepared and pour over each of the potatoes.
Finally, garnish your Barbeque Nation’s Cajun Potatoes with finely chopped onions and coriander leaves.
Serve them hot!
Storage & Shelf Life
Cajun potatoes taste best when eating fresh and hot. They do not taste great when stored in the fridge. I am sure you will finish everything on your platter because Cajun potatoes are absolutely lip-smacking!
You can prep the sauce and keep in the fridge for later use. You can also cook the potatoes and store in the fridge to deep fry them later.
For the beginners
If you are making Barbeque Nation’s Cajun Potatoes for the first time, I have to tell you that it is very simple to assemble. You can just buy the thousand island mayonnaise sauce and mix it with milk/cream to prep the sauce. If you are not confident about deep frying, you can also shallow fry them with minimal oil in the pan. Potatoes and mayonnaise based sauces go well together in any form.
It’ll be great if you tag me on Instagram @ Makepotato, when you make this recipe.
Please do leave a rating and a comment if you can, on the recipe below – it will help me grow and reach more food lovers like you.
Recipe
Barbeque Nation’s Cajun Potatoes
Barbeque Nation's Cajun Potatoes are a beloved appetizer – crispy potatoes, creamy sauce, and crunchy onions on top.
Finely chop one onion and keep aside. Wash, dry and finely chop coriander leaves and keep them ready as well. You will need them for garnishing in the end.
Add all the ingredients listed in the "For the sauce" into a bowl and mix well until well combined. In order to thin down the sauce, you can use milk or cream until you have reached the desired consistency.
Rinse and pressure cook the baby potatoes for 3-4 whistles. Allow the cooker pressure to come down naturally. You can either choose to keep or remove the skins.
Remove the skin of the cooked baby potatoes. Place the cooked potato in between your palms and flatten them. Keep aide. If you have the time, you can coat the surface of the flattened potatoes with corn flour.
Cooking and assembling the potatoes
Place a pan on medium heat with an inch or two of oil for shallow frying. Once the oil is warm, add the cornflour coated potatoes one by one.
After a minute, flip the potato and allow it to fry on the other side. Once both sides are golden and crisp, remove from the oil and drain them on a paper napkin.Add salt and pepper as seasoning on top.
To prepare the sauce for the Barbeque Nation style Cajun potatoes, to a bowl add the ingredients listed in the ingredient section. If you feel the sauce is too thick, you can add milk or cream to thin down the sauce to your desired consistency.
Arrange the fried potatoes on plate and drizzle the sauce on top of each of the potatoes. Garnish the Cajun Potatoes with finely chopped onions and coriander leaves.
Vella Aval is an Indian sweet made with flattened rice called Aval, jaggery and coconut. We usually prepare it as an offering to Lord Krishna during Janmashtami.
Vella Aval
Vella Aval is an Indian Sweet made with Aval, powdered jaggery and grated coconut.
It is a quick sweet made during Indian festivals, especially during Krishna Janmashtami, as aval is considered one of Lord Krishna’s favourite foods.
Vella Aval is one of the easiest naivedyam or prasadam dish you can prepare for Gokulashtami or any Indian festival.
Ingredients for Vella Aval
Aval – There are several varieties of Aval available in the market and any of them is suitable for this recipe. I use the medium-sized thick variety. I usually use just one cup (180g) of aval which suffices the three of us when we eat it as prasadam. You may also use the red rice poha which will give a nuttier flavour to the Vella Aval.
Jaggery – I prefer using powdered jaggery, as it requires minimal processing. If you are using the traditional jaggery, cut or grate the jaggery cube until you have 3/4 cup. This variety of jaggery will have impurities and will need to be filtering before using it for the sweet.
Grated Coconut – adding grated coconut gives the sweet volume and makes it sweeter and healthier too. The nutty flavour from grated coconut adds a special taste in Vella aval.
Cardamom Powder – You can use cardamom powder or just take 3-4 cardamom pods and pound it with a mortal and pestle until you have the black seeds in a coarse powder.
Ghee – No sweet is complete without ghee and this recipe is no exception. You can use one to two tablespoons of ghee for 1 cup of aval.
Optional ingredient – If you have access to edible camphor, you can use a tiny pinch of it in the end. Edible camphor gives a unique flavour-smell and personally always reminds me of sweets and festivals.
How to make Vella Aval/ Jaggery Poha
Prep Work
Poha / Aval – Take one cup of aval and rinse it in water several times. I generally take Poha in a sieve and run it under water until the water is clear. I then leave the aval in the sieve for all the water to drain. If I feel that poha is not soft, I run it under water a couple more times or sprinkle water on top of it.
Another method is to soak the aval in water for 5-10 minutes and drain the water once soft. I do not do this because there is a risk of the aval getting too soft. I prefer to have a little bite when I eat poha.
If you are using the thin variety of aval, you can soak it for less than 5 minutes and it will be soft. Its better to not get the aval too mushy.
Jaggery – If using a block of jaggery, cut the jaggery into small pieces or grate is until you have 3/4 cup of jaggery pieces. This variety of jaggery usually contains impurities that need to be filtered before using it in the sweet.
Place a pan on low-medium heat and add 1/4 cup of water. Add the jaggery pieces and allow it melt. Once all the pieces have melted, turn off the flame and filter out the impurities with a tea strainer and keep the liquid jaggery aside.
If you are using powdered jaggery, you need not need to do the above process. You can use powdered jaggery directly in sweets because it mostly has no impurities.
Coconut – If you do not have grated coconut ready, please break open a coconut and grate until you have 3/4 cup.
Cardamom Powder – If you are using cardamom pods, take 3-4 pods, open the shell and remove the black seeds from it. You can then pound the black seeds until you have a coarse powder.
Preparing the Vella Aval
Place a pan on low-medium heat and add 1/4 cup of water and powdered jaggery. If you are using the prepared jaggery liquid, add it directly to the pan.
Allow this jaggery to thicken slowly over low heat. This should take less than 8-10 minutes and it should look like a syrup. You can go one step further and check if the jaggery syrup has one string consistency. The jaggery syrup should appear thick and syrupy like honey.
At this stage, add the grated coconut, mix well.
Next, you can add the soaked poha and mix these three ingredients very well.
Finally, sprinkle the cardamom powder and pour as much ghee as you want on top and mix well together.
If you are adding edible camphor, take a very minute piece and mix that too. Edible camphor has an intense taste, so the smaller the piece, the better. Otherwise, the taste and smell will overwhelm all the other tastes.
Some people garnish with fresh grated coconut on top of the vella aval too, it adds a nice freshness to the Poha.
For the Beginners
If you are a beginner or making Vella Aval for the first time, you have nothing to fear. I would definitely suggest using powdered jaggery to simplify the process. Don’t worry about the string consistency I’ve mentioned in the recipe. Just reduce the jaggery liquid until it’s thick, this will prevent the poha from getting soggy.
If you do not have access to grated coconut, that’s fine. You can make this recipe with jaggery powder and poha too. The other ingredients enhance the flavour a lot more, you can add them the next time.
Shelf Life and Storage
You can prepare Vella Aval and store in the fridge up to 4-5 days. I like to eat it cold, but you can warm it up after leaving it out of the fridge for 20 minutes.
Vella Aval preserves well because it has both ghee and jaggery.
It’ll be great if you tag me on Instagram @ Makepotato, when you make this recipe.
Please do leave a rating and a comment if you can, on the recipe below – it will help me grow and reach more food lovers like you.
Recipe
Vella Aval
Vella Aval is an Indian sweet made with flattened rice called Aval, jaggery and coconut. We usually prepare it as an offering to Lord Krishna during Janmashtami.
Rinse and soak Aval in water to soften it up. The aval should be soft within 10-15 minutes. I generally rinse the poha thoroughly by running it under water for a few minutes and allowing the water to drain in a sieve.
Place a pan on low heat, add 1/4 cup water followed by the powdered jaggery. Use the back of the spoon to split any lumps of the powdered jaggery.
Allow this jaggery to thicken up but make sure the heat is low-medium since you do not want the sugars in the jaggery to harden rapidly.
The jaggery is ready when most of the water has evaporated. You may also check for 1 string consistency – but be careful, the jaggery syrup will be extremely hot.
Add the grated coconut and mix well.
Next, add the soaked aval to the pan. Make sure the flame is on low heat. Mix well.
Sprinkle in 1/4 teaspoon cardamom powder and 1-2 tablespoons of ghee and mix well the ingredients well.
Corn Kosambari is a corn-based salad from the kitchens of Karnataka. It is a medley of steamed corn, grated carrots, pomegranate, and a generous drizzle of lime!
Corn Kosambari
Corn Kosambari is a salad very popular in Karnataka homes, especially during festivals and weddings.
Kosambari is a common word used for salad in Kannada.
This salad is sweet, spicy and sour, with all the notes being contributed from the multiple ingredients in this scrumptious salad. This salad’s chief ingredient is corn along with multiple garnishings, such as grated coconut and lime juice.
It is one of the Kosambari varieties that I always look forward to eating at weddings.
Corn Kosambari
Ingredients for Corn Kosambari
The main ingredient is, of course, corn. You can use fresh corn, slice and pressure cook them or you can use frozen corn that requires just thawing. In South Bangalore, especially in the Gandhi Bazaar and DVG road area, you will find carts of corn available shucked from the cob. This is going to save you that extra step.
In this recipe, I am listing the ingredient quantities with the assumption of using one cup of corn (180-200g).
The next ingredient is yellow moong dal. For every cup of corn you use for this kosambari, you can use up to one heaped tablespoon of yellow moong dal.
Other ingredients.
– Pomegranate – a handful
– Grated carrot – one small, grated
– Chopped green chillies – 1 large, finely chopped. If you do not want the salad to be too spicy, you may remove the seeds and the white vein from the green chillies.
– Golden raisins – 8-10
For the garnish
– Coriander leaves – 2/3 sprigs, washed and finely chopped
– Grated coconut – 1 tablespoon
– Lemon juice – 1 small lemon
For the seasoning
– Cooking oil – 1 teaspoon
– Mustard seeds – 1/2 teaspoon
– Split Urad dal – 1/2 teaspoon
– Curry leaves – 1 or 2 sprigs (washed and dried0
– Asafoetida powder – 1/4 teaspoon
Salt and pepper are the last ingredients you need to finish making this mouthwatering salad.
How to put together Corn Kosambari
The first step is to wash and soak the yellow moong dal for twenty minutes. Once soaking is complete, drain the water and it’s ready for the salad.
If you do not have pomegranate pearls ready, you can open out one pomegranate and keep aside a handful for the kosambari. Adding the pomegranate adds sweetness to the salad.
You may then grate one small carrot for this recipe.
If you are going to use fresh corn, cut out the corn kernels from the cob. Pressure cook the corn kernels for 2 whistles and allow the pressure to come down naturally. If you are using frozen corn, you may just add the corn kernels to a bowl of hot water to defrost them. Frozen corn has already been pre-cooked, so cooking it again is not necessary.
Combine cooked corn, pomegranate, grated carrot, raisins, soaked yellow moong dal, and chopped green chillies in a large bowl.
Garnishing the Kosambari
Next, to garnish this salad, add finely chopped coriander leaves, grated coconut and drizzle lemon juice.
The next step is to season the corn kosambari. Take a tadka pan and place it on medium heat. Add in a teaspoon of cooking oil. Once the oil is warm, add the mustard seeds and split urad dal. Once they sputter, turn off the flame and add the asafoetida and curry leaves.
Seasoning the Kosambari
Now, add this tadka to the corn kosambari and mix all the ingredients well. The corn kosambari is almost ready.
When you are ready to serve, add 1/2 a teaspoon of salt and 1/2 a teaspoon of pepper powder and mix well. Adjust the salt level according to your taste and serve this Corn Kosambari with rasam rice and potato curry.
Storage and Shelf Life
If you are planning to serve Corn Kosambari at a later time, mix all ingredients except the salt. You may also add the tadka and garnish it just before serving the salad.
If you have leftovers, place it in an air-tight container and you can store it in the fridge up to 2 days. The Kosamabri might not be fresh, but it will taste alright.
For the beginners
If you’re making corn Kosambari for the first time and find the number of ingredients overwhelming, you can skip a few from each section. Use only the cooked corn, lemon juice and finish with a tadka of mustard seeds. This will definitely taste fantastic too.
The first time I made Corn Kosambari, I took a long time to prep each ingredient. Nowadays, since my fridge always has pomegranate, grated coconut and washed coriander leaves ready all the time, it is easy for me to put it together.
It’ll be great if you tag me on Instagram @ Makepotato, when you make this recipe.
Please do leave a rating and a comment if you can, on the recipe below – it will help me grow and reach more food lovers like you.
Recipe
Corn Kosambari
Corn Kosambari is a corn-based salad from the kitchens of Karnataka. It is a medley of steamed corn, grated carrots, pomegranate, and a generous drizzle of lime!
Wash and soak the yellow moong dal in water for 20 minutes. Drain the water and keep aside.
If using frozen corn, add the corn to hot water and allow it to defrost for 5 minutes. Remove the corn from the water and add it to a large mixing bowl. If you are using fresh corn, boil the corn kernels in water until tender or pressure- cook for 2 whistles.
Add all the ingredients that you have prepped for the Corn Kosambari. Mix well.
Now, garnish with chopped coriander leaves, grated coconut and lime juice.
The next step is to season the salad. In a tadka pan, add one tablespoon of cooking oil. Once it's warm, add the mustard seeds and urad dal. Once the sputter, turn off the flame and add asafoetida powder and curry leaves.Pour this tadka over the salad and mix well.
Finally, season with salt and pepper, mix well and serve immediately.
Keyword Corn Recipes, Indian Salad
If you are looking for more Salad Recipes, please click here.
Do follow me on Instagram at Make Potato — I post daily lunch box ideas and quick snack recipes.
Semia Upma is a breakfast or a tiffin variety prepared with vermicelli, vegetables and South Indian spices.
What is Semia Upma?
Semia Upma is a South Indian breakfast or tiffin dish prepared with vermicelli, vegetables, spices, and grated coconut.
Semia Upma is a variation of the traditional upma commonly made with another wheat product – rava/semolina.
This tiffin makes a great dish to pack in kids’ or office lunch boxes along with curd and a salad.
Semia is also known as seviyan or vermicelli. It is a ready to cook staple available in local and online stores.
Ingredients for Semia Upma
The principal ingredient for Semia Upma is Semia also known as Seviyan, Vermicelli. Seviyan is a Persian word that describes noodles made with refined wheat flour.
What is Semia? – Semia is noodles made with refined wheat flour, i.e., Maida. With the use of precise proportions of maida, hot water and salt, the ingredients are mixed and kneaded in a machine, squeezed out into thin noodles shape and allowed to sun dry. These sun-dried noodles get broken into equal sizes, followed by the packaging process.
If you see the term “roasted vermicelli” on the packet, this means that the noodles have gone through another process, that is the roasting process. This gives semia that classic golden colour that we usually see in semia pulav or semia kheer.
You may use either the white coloured or the golden roasted ready to cook semia. But the roasted semia is most commonly used in preparing payasam or other Indian sweets.
Vegetables – You may use a variety of vegetables such as carrots, peas, potatoes and beans. By adding more vegetables, the dish will make quite a filling tiffin/breakfast item.
Nuts – You can use peanuts or cashew nuts in the upma to give it that lovely crunch texture.
Spices – In an upma, you typically use South Indian spices like mustard seeds, split urad dal, curry leaves, chopped ginger, and asafoetida.
Garnish – drizzling lemon juice and grated coconut at the end of the cooking process gives the upma a slight tart and sweet flavor, making this upma an absolute delight!
How to prepare Vermicelli Upma?
Prep Work
Place a pot of water and allow it to come to a boil. Once the water has boiled, bring the heat to a simmer and then add the vermicelli to it. You can then add 1 teaspoon of salt to this water and allow it to simmer for a few minutes until the semia has cooked through.
You can check if the semia is cooker or not with the help of a spoon. Take a large spoon and scoop out a few stands of the semia and then carefully try to squeeze the semia. If you can squish it without effort, it means that the semia is ready to use. Alternatively, you can also use a knife to cut into the semia to check.
Once the semia is ready, drain the hot water with the help of a sieve. Pour some cold water or you can also run some clean tap water over the sieve to stop the semia from cooking further. Leave the semia in the sieve for the water to drain out completely.
Next, chop the onions, ginger, green chillies and the vegetables you plan to use into small pieces. Cutting the vegetables into small pieces will allow for them to cook faster and evenly.
You can next wash the curry leaves and coriander leaves. Chop the coriander leaves and keep aside.
If you are using grated coconut, take it out of the fridge or grate some fresh coconut.
Cooking the Semia
Place a Kadai on a medium flame and add two teaspoons of cooking oil. When the oil is warm, add the mustard seeds and split Urad dal and allow them to sputter. You may now add the peanuts or cashew nuts if you are using them. Roast them until they are golden brown.
Next, add in the curry leaves, ginger and green chillies. Give them a good mix.
Follow it up with the finely chopped onions and stir until they are soft. Next, add the turmeric powder and salt.
You may even add a couple of chopped tomatoes at this stage. If you are using the tomatoes, you can immediately add the turmeric powder and salt. This will help the tomatoes cook faster. Stir until the tomatoes are mushy.
If you are using vegetables such as carrots, beans, potatoes and peas, add them at this stage and sprinkle a little salt. Add 3-4 tablespoons of water, mix and cover the pan with a lid for the vegetables to cook.
With a spoon, try to cut the vegetable. If the vegetable cuts without effort, you can proceed to the next stage. Now, the base masala for the semia upma is ready.
Next, add the cooked semia to the pan and mix until the base masala is well coated to all the strands of the semia. Adjust the salt at this stage if necessary. Turn off the flame.
Finally, add a handful of grated coconut followed by a generous drizzle of lemon juice.
Mix the Semia Upma well and serve it hot with coconut chutney.
Storage & Shelf Life
Semia Upma is best eaten on the same day or fresh off the stove. If you are eating the upma right away, you can add the grated coconut.
If you are packing semia upma for tiffin box, you can avoid adding the grated coconut. Since coconut might go bad in the heat, the semia upma will be inedible, especially if you are carrying a dabba for dinner.
Semia upma stores well for a couple of days in the fridge. Keep the upma out of the fridge for 15-20 minutes before reheating. After reheating, do not store semia upma in the fridge again.
It’ll be great if you tag me on Instagram @ Makepotato, when you make this recipe.
Please do leave a rating and a comment if you can, on the recipe below – it will help me grow and reach more food lovers like you.
Recipe
Semia Upma
Semia Upma is a dish made with wheat vermicelli served as a breakfast or evening snacks
Vegetable stock is a nutritious liquid made with vegetables and scraps of vegetables that serves as the base for soups and dals.
What is Vegetable Stock?
Vegetable stock is flavourful golden liquid used in preparation of soups, stews or sauces derived by simmering vegetables and vegetable scraps in water.
The typical vegetables used in homemade vegetable stocks are onions, garlic, carrots; broccoli florets stems and leaves; cauliflower florets, stems and leaves, ; mushrooms caps and stems or any vegetable scraps available to you. You can also increase the flavour profile by adding spices like cinnamon, cloves and bay leaves.
Vegetable Stock also goes by the name of vegetable broth.
You can use your vegetable stock to prepare any soups, stews, or in case of Indian cuisine – any dal or rasam too.
Ingredients for Vegetable Stock
This is the easiest recipe that you will ever make. You just need a large pot of water and lots of vegetables.
In culinary tradition, people have prepared broths or stocks with a medley of meat scraps, bones, and residual vegetables, forming the foundation of soups or stews. However, given the substantial population of vegetarians in India, I have adapted this recipe to cater to our dietary preferences. We can combine an array of vegetables and spices and prepare a flavorful broth that both honors tradition and embraces the essence of vegetarianism.
Here is the list of ingredients you can add to your vegetable broth.
Vegetables to add to your stock
– Onions and onion peels (if the peels are clean). In India, the peels aren’t usually clean, but you may use them once washed.
– Garlic cloves and peels
– Carrots and carrot peels
– Cauliflower florets, stems, and leaves
– Broccoli florets, stems, and leaves
– Potato and potato peels
– Mushroom caps and stems
– Corn and Corb cobs
– Celery stalks and leaves
Vegetables to avoid in your broth
– Tomatoes – They will become too soft and might render a sour taste to the broth.
– Gourds can become too soft and bitter in the broth, particularly the bitter gourd. You may also avoid the entire gourd family for preparing stocks.
– Radish – While radishes make an excellent addition for sambar, you avoid it in your stock.
– Beets – You can use beets if you want a red-coloured stock, but it is best avoided.
– Lady fingers/ Okra – These slimy vegetables are best used in curries, you may leave them out of stocks.
– Brinjal/Eggplant
– Zucchini
– Green Beans
If you feel that some vegetables scraps are dirty, please wash them before using them for the broth.
Spices you can add to the veg stock
Using whole spices to the broth adds more flavour and makes the broth a lot more nutritious. Some spices that you can use are :-
– Bay Leaves
– Cinnamon Sticks
– Cloves
– Pepper corns
– Thyme stalks
Depending on the cuisine you select for your meal, you may include or exclude ingredients. For instance, when planning for Asian cuisine, you can enhance the stock’s flavor by adding ginger, galangal, and/or kaffir lime leaves. These ingredients impart the essential flavors required to create a variety of spicy Asian soups.
How to make Vegetable Stock at home?
Prep Work
Start off by picking out all the vegetables and scraps that you are planning to use. Before using them for the stock, wash them thoroughly and make sure none of them have sediment or have gone bad.
Further, if you are using onions, especially in India, since we only get onions that are stored for a long time, they tend to have a black covering inside the fist peel. Once you peel the first dry layer of the onion, wash them thoroughly and only then use them.
If you have been saving peel of carrots and potatoes, wash them and keep aside. Then again, if you are using mushrooms, be sure to remove the black sediment that usually coats them.
Cut all the vegetables and scraps into smaller pieces if they are bigger than the pot.
The next step is to find a heavy-bottomed pan. You may even use a pressure cooker without the lid to prepare the vegetable stock.
Next, fill the pan with about 90% filtered water. You need this 10% space to hold all the vegetables and scraps.
The boiling and straining process
Put the pan on a high flame and add all the vegetables and vegetable scraps you have chosen for this broth.
From now, allow the water to be in a constant state of boil along with all the vegetables and scraps. Around the 25 minute mark, you might see a slightly golden tinge to the broth.
When the quantity of water is reduced to half of what you started with, the stock is ready. If you start with a small pot of water, the stock will be ready in 30 minutes; however, if you begin with a large pot of water, it may take more time.
When the water has a nice golden colour, the stock is ready. Turn off the flame and allow the rolling boil to settle down.
As soon as the water has settled, strain the water and the now softened vegetables into a large container to collect the golden coloured broth.
If you are going to use it right away, you need not allow the broth to cool down. If you are planning to use it later, allow the stock to cool down to room temperature before you add it to a clean glass container.
Shelf Life and Storage
You can store vegetable stock in the fridge in a clean glass bottle for up to a week.
If you wish to store them for longer, you can pour the stock water into ice cube trays. Once the ice cubes set, take them out of the mold and put the Vegetable Stock cubes in a ziplock bag. You can store these cubes for up to six months in the freezer.
FAQ
Adding salt to the stock at any stage is unnecessary. When preparing soups, it’s most effective to utilize the stock as-is and incorporate salt as needed later on.
Veg broth prepared at home does not need gelatin or any thickening ingredients.
It’ll be great if you tag me on Instagram @ Makepotato, when you make this recipe.
Please do leave a rating and a comment if you can, on the recipe below – it will help me grow and reach more food lovers like you.
Recipe
Vegetable Stock
Vegetable stock is a nutritious liquid made with vegetables and scraps of vegetables that serves as the base for soups and dals.
Maa Laadu is a smooth and nutty flavoured laddoo made with powdered pottukadalai, powdered sugar and ghee.
What is Maa Laadu?
Maa Laadu also known as Maladu is a typical South Indian quick laddoo recipe made with readily available fried Bengal gram, powdered sugar and Ghee. Maa is a short word for maavu, meaning flour in Tamil.
It is a laddoo that my mother used to make as an extra sweet for Diwali. Every South Indian kid growing up in the 80s and 90s will have distinct memories of this laddoo being eaten at Diwali and exchanged between households. At the end of the 3 days of Diwali, we used to have different versions of the same Maa laadu from multiple houses.
What are the ingredients for Maa Laadu?
The principal ingredient in Maa laadu is Fried Bengal gram or Pottu Kadalai in Tamil or Huri kadale in Kannada. The other ingredients used in Maa Laadu are powdered sugar, cardamom powder and Ghee.
The ratio of Pottu Kadalai : powdered Sugar: Ghee is 1: 3/4: 1/2. So for every cup of fried gram, you will need 3/4 cup the measure of powdered sugar and 1/2 cup measure of ghee. You may also use 1:1 ratio of pottu kadalai and powdered sugar if you prefer your maa laadu really sweet.
Bengal fried gram/ Pottu Kadalai / Huri Kadale – How is it made?
To make Bengal fried gram, you roast black Chana dal at a high temperature. This makes the skin pop off, leaving behind the dal in a fried form, which is ready to eat. This fried gram is further split into two sections, making it to look like dal.
This roasted Bengal gram makes a fantastic snack along with peanuts and jaggery. We also use roasted Chana dal as one of the major ingredients in chutneys served at Bangalore eateries.
How to make Maladu?
Getting the ingredients ready
Take a cup of white sugar and add it to a mixer jar. Pulse the mixer until you get powdered sugar. Measure out 3/4th cup of sugar and keep aside.
Take a few pods of cardamom and pound them in a mortal and pestle until you get cardamom powder. Remove the skins of the cardamom pods (use the skins for making tea or you can add them to the jar containing tea leaves).
Prepping the Pottu Kadalai
You can start off by placing a pan on medium flame and roasting the Bengal fried gram on a low flame for under two minutes. This is to ensure that the fried gram crisps up just a little, but so that it gets easier to make the powder without lumps. Make sure to not allow them to turn brown during the roasting process. (You can skip this step if you are short on time). Allow the roasted gram to cool down. Once cool, add to a mixer and make it into a fine powder.
To the same pan, add a teaspoon of ghee and roast the cashew nuts into a golden brown. Take them out and keep aside in a container.
In the same pan, melt the rest of the ghee if it is in the solid form.
Rolling the laddoos
Now take a large bowl and add the powdered Pottu Kadalai and powdered sugar and mix thoroughly with a whisk. Add the cardamom powder and mix well too. Next, add the ghee and roasted cashewnuts and mix well with your hand. The laddoo mixture should neither be too wet with the ghee or too dry.
Take small quantities of the laddoo mixture and start rolling them into balls. The size of the laddoo is completely up to you.
Storage and Shelf Life
Once the Laddoos are cool, store them in an air-tight container.
You can store it on the shelf for up to a week since it has ghee and sugar. You can store them in the fridge for up to 3 weeks.
FAQs
If the pottu kadalai laddoo mixture is dry, add one more teaspoon of ghee and mix well.
If the mixture is too wet with the ghee, it will be OK. The roasted gram flour will absorb the ghee as it cools down. If you feel that the mixture is still too wet, add a teaspoon of besan/kadala maavu and mix well.
It’ll be great if you tag me on Instagram @ Makepotato, when you make this recipe.
Please do leave a rating and a comment if you can, on the recipe below – it will help me grow and reach more food lovers like you.
Recipe
Maa Laadu | Fried Bengal Gram Laddoo
A smooth and nutty flavoured laddoo made with powdered pottukadalai, powdered sugar and ghee.
Prepare the powdered sugar if you do not have it. Melt the ghee and keep aside.
Roast the pottu kadalai over a low flame for 1-2 minutes. This is done just to remove any moisture that the dal might have. It also helps with powdering the gram easily. Once done, allow it to cool down.
Once cool, grind the fried Bengal gram to a smooth powder. Keep aside.
Pound the cardamom pods to get 1/2 tsp of powder.
In a small pan, roast the cashew nuts in a teaspoon of ghee until golden and crisp.
To a big bowl, add the powdered pottu kadali, powdered sugar, cardamom powder and mix until combined well.
Next, add the roasted cashew nuts and melted ghee to the bowl.
With the use of your hands, mix all the ingredients well. Start rolling the laddoos with this mixture until all of it gets used up.
Your Maa Laadus are ready!
Keyword Diwali Recipe, Laddoo Recipe
If you are looking for more Indian Sweet Recipes, please click here.
Do follow me on Instagram at Make Potato — I post daily lunch box ideas and quick snack recipes.
Palakkad Adai is a lentil dosa made using black Urad dal and rice. I usually serve it with butter, jaggery or curd.
Palakkad Adai
Palakkad Adai is a type of dosa prepared in south Indian homes made with a variety and combinations of dals and rice. This recipe of Palakkad Adai is specifically prepared in households in Kerala and part of the recipe heritage of the Palakkad Iyer community.
This recipe for Adai is made with Black Urad dal and red rice. I remember eating this Adai in a thick Akki roti/ thalipeeth like form when I was younger. The soaked dal and rice were hand ground in a stone grinder into a semi smooth batter. Then, my mother used to take a big ball of the thick Adai maavu and pat it on an iron tawa and steam cook it like a ragi rotti while drizzling generous amounts of gingelly oil.
But I have written this recipe to make it a more spreadable consistency, like a dosa.
If you are looking for another Adai recipe, please find a more common and popular Adai recipe here.
Ingredients for Palakkad Adai
The main ingredient for Palakkad Adai is Black Urad Dal. The proportion of dal to rice varies in each household. I use more Dal than rice but some households use more rice than dal.
For every cup of Black Urad dal, you may use half a cup of rice. If you have less Urad dal, you may invert the ratios and use 1 cup of rice and 1/2 the measure of black Urad dal.
Tur dal – If you have Tur dal handy, you can add 1/2 cup of Tur dal as well. If you are not using, you can add the same measure of rice/red rice.
Red rice or white rice – You may use half a cup of either red or white rice. If you use red rice, the dosa will have a deep dark colour while the use of white rice will yield a lighter coloured adai.
Spices used for flavour
There are several ways you can add flavour to this Adai. The below mentioned ingredients add maximum flavour to the Adai.
– Whole Pepper corns – 5-6
– Dried Red chillies – 2-3
– Jeera – 1/2 tsp
– Curry Leaves – 2 sprigs
– Ginger – 1 inch
Adding all these ingredients together in small quantities will make the Adai taste absolutely brilliant!
How to make Palakkad Adai?
The Prep
To a large bowl, add the black Urad dal, Tur dal, and red rice. Wash and rinse the rice with water until the water turns clear. Add enough water to the bowl with 2-3 inches of water above the soaked dal and rice. This will give the dals a little place to expand. Allow them to soak for a minimum of 4 hours or overnight.
In a separate bowl, add 2-3 dried red chillies and add water. Allow the red chillies to soak as well.
Drain the water from the soaked dals, rinse them once, and then add them to a mixer jar. Add the soaked red chillies as well. Next, add in the jeera, curry leaves, and peppercorns to the mixer jar too.
Grind them into a smooth batter by adding little fresh water. The batter’s consistency should neither be too thick or thin. Add salt and mix well.
The cook
Place an iron tawa on medium heat. Once the tawa is hot, take a ladle full of Adai batter and spread it evenly. Once the batter dries out, drizzle gingelly oil on the sides and in the centre for crisping up the Adai. Flip the Adai and cook it on the other side too. Flip again and serve it hot.
Serving Suggestions
Adai is usually served with butter and jaggery. You may also serve it with any chutney of your choice. Check out this Apple Ginger chutney that will go fantastic with this Adai.
If you have time, you can serve this Adai with Avial, another traditional Kerala dish.
In my home, we usually eat Adai with butter, jaggery, milaga podi, curd or pickle.
Shelf life and storage
The Adai batter stores well in the fridge for up to 3 days. Adai that has already been made on the tawa has to be eaten immediately, otherwise it will get hard and rubbery.
FAQs
-If you find white foam like substances on top of the soaked dal, it is nothing to worry about. This occurs when the dal and rice have been soaked for over 8 hours. Just drain the water and rinse the soaked ingredients with water until clear.
-Always use fresh water for grinding the Adai batter, not the water the dal has been soaking in.
-It is not absolutely necessary to add all the ingredients in the spices section to make your Adai. Even if you have a couple of ingredients, the Adai will taste very good.
It’ll be great if you tag me on Instagram @ Makepotato, when you make this recipe.
Please do leave a rating and a comment if you can, on the recipe below – it will help me grow and reach more food lovers like you.
Recipe
Palakkad Adai
A dosa made with black urad and rice served at breakfast or dinner, served with butter, jaggery and curd
To a bowl, add the dals and rice. Wash and rinse them thoroughly until the water is clear. Cover and allow it to soak for minimum of 3 hours. You can soak it overnight too.
Separately, add 3-4 red chillies to water and soak for about 4 hours. (or overnight)
Next, drain the water in which the dals and rice have been soaking. Rinse it once if you see that there are bubbles or white foam on top of the water. This usually happens when you've allowed it to soak for more than 8 hours.
Add the soaked red chillies, jeera, black pepper, dals and rice to a mixer. Add a spring or two of curry leaves. Grind to a smooth paste by adding a little fresh water.
Place a pan on medium to high heat and pour of a ladle of the adai batter and spread evenly. Once the adai has dried up, drizzle some oil to the sides and on top of the adai.
Flip the adai and cook it on the other side as well.
Remove from the tawa and serve your Adai with butter and jaggery.
Keyword Adai Recipe, Dosa Recipe
If you are looking for more Dosa Recipes, please click here.
Do follow me on Instagram at Make Potato — I post daily lunch box ideas and quick snack recipes.
Idiyappam, also known as string hoppers, are a South Indian and Sri Lankan rice based noodles served with coconut milk or vegetable stew.
What is Idiyappam?
Idiyappam is a tiffin, or a breakfast dish prepared in South Indian households and Sri Lankan homes. We prepare it with rice flour that gets kneaded into a dough, pressed into thin noodles, followed by a step of steam cooking the noodles.
It is a dish that has its origins in Southern India, eaten usually with a coconut-based curry like a vegetable stew or simply plain coconut milk and jaggery. People also serve them with meat curries in some households and in Sri Lankan homes.
Idiyappam goes by several names. In the Malayalam language, “Idi” means punch and “appam” is a broad term used to describe rice based snacks/tiffin. It goes by a few names – Noolputtu or Noolappam.
It goes by the name of String Hoppers in Sri Lanka. In Indonesia, it is called Putu Mayam, a street dessert dish usually served with brown sugar and coconut milk. The name of a similar-looking dish in Malaysia is Putu Mayang.
Ingredients for Idiyappam
We make idiyappams with one principal ingredient – rice flour. You can buy packets that say rice flour or idiyappam flour from supermarkets. They are both the same. It is a bit of a process to make rice flour at home and I have to applaud the women from the previous generation who had the patience to make fresh rice flour.
Here’s a small description of how to make it – you need to soak rice in water for 3-4 hours. Drain the water, and spread the soaked rice on a cloth under a fan or in a room without direct sunlight. After thirty minutes, it will leave the rice with a little moisture; the rice when you touch it will be slightly damp. Add this rice to a mixer and grind it to a fine powder. Pass this under a sieve and grind the bigger grains of rice. Allow this rice flour to cool down and store it in an air-tight container. Before using the flour, roast it on the flame for a while to remove any semblance of moisture.
The other ingredients are salt, cooking oil and hot water.
How to make Idiyappam
The primary rule for making idiyappams is the ratio of rice flour to hot water. You may use any cup measure in your house, but the cup measure I use is 120g. For this quantity of rice flour, I can make up to 12 medium-sized idiyappams (as shown in the picture).
For every 1 cup measure of rice flour, use 2 cups of hot water. The ratio is 1:2
To a bowl, add the rice flour. Add half a teaspoon of salt and one tablespoon of oil and mix well. Now, slowly add the hot water to the rice. Mix the rice flour and water with a spatula until all the rice flour absorbs the water. It is alright if there are a few pockets of rice flour. Close the bowl and allow it to cool down for 10-15 minutes.
Once the dough is cool and you can touch the rice flour with your hand, you can apply some oil to your hand and start kneading the rice dough. If you feel that the dough is too wet, add a tablespoon or two of rice flour for the excess water to be absorbed. If the dough is dry, sprinkle some water to the dough and continue the kneading.
Knead the dough until it is smooth. The dough should look like a white ball. Keep the dough covered until you are going to use it, else the dough will dry out quickly.
Before pressing the noodles, you can get the idli steamer ready. Pour an inch of water at the bottom of the steamer and allow it to come to a slow boil. Oil the Idli plates and keep it aside.
Pressing the noodles
Place the noodles plate in the Idiyappam maker or the Idiyappam press. Smear a little oil to the sides of the press and plate. Take a tennis ball sized dough and place it in the press. Squeeze out the Idiyappam on to the oiled idli steamer plate.
Place the Idiyappams in the idli steamer and steam cook for 5 minutes. When you see the idiyappams are glossy and are holding shape, it is time to switch off the idli steamer. If not, continue to steam for another 2 minutes.
Remove the idiyappams from the idli plates and transfer to a casserole container to keep them warm. Serve Idiyappams with vegetable stew or plain coconut milk.
Storage and Shelf life
You can store the rice flour dough in the fridge for up to 3 days and use it for making idiyappams whenever needed. Store the rice flour dough in an airtight steel or glass container.
If you have extra idiyappams, store them in an airtight container and you can eat them up the next day. Once you’ve taken it out of the fridge, steam cook it for 5 minutes.
If you are looking for more Tiffin Recipes, please click here to find the recipe you are looking for.
Please do follow me on Instagram and Facebook and do subscribe to my channel on YouTube. Thank you so much!
Recipe
Idiyappam | String Hoppers | Nool Appam
Idiyappam, also known as string hoppers, are a South Indian and Sri Lankan rice based noodles served with coconut milk or vegetable stew.
1tbspCooking oil(for kneading and applying to the press)
Instructions
Take 2 cups of water and bring it to a boil. Turn off and keep aside.
To a bowl, add rice flour, salt and oil. Mix well until combined.
Slowly add the hot water to the rice flour and mix well with a spatula until all the water gets absorbed well. Close the bowl with a lid and leave aside for 10 minutes. It is Ok if all the flour is not combined well. .
After 10 minutes, once the flour and water have cooled down, start kneading the rice dough with a little oil spread on your hand.
If you feel the dough is too wet, add 1 or 2 tablespoons of rice flour. If you feel the dough is too dry, sprinkle some water until the consistency is right.
Knead the dough until you get it to a playdough consistency – neither wet nor dry. Cover and keep aside. If the dough is too wet, the Idiyappam will fall apart and be sticky once steamed. If the dough is too dry and hard, it will be hard squeeze out in the Idiyappam press.
Get the idli steamer ready by adding the water to the bottom of the pan and allowing it to come to a slow boil.
Using the noodles plate inside the Idiyappam press, add rice dough 3/4 of the way and squeeze out idiyappams on to an Idli plate.
Steam cook for five minutes or until you can see that the surface of the Idiyappam is glossy.
Remove from the idli steamer and serve it hot with some veg stew.
Instant Mango pickle is a simple and quick pickle recipe often made during the summers in South Indian households with Thothapuri mangoes
Instant Mango Pickle is a quick and easy mango pickle recipe you could indulge in your kitchen this summer. This is one of the many pickle varieties that are prepared in South India. But this is the best mango pickle recipe because it will be ready in just 15 minutes! It is a raw mango pickle served at a lot of South Indian weddings and, not surprisingly, made every other week during summer in many households.
You can eat this spicy pickle with curd rice or eat as a side dish with dosa or chapathi.
Ingredients for the Instant Mango Pickle
Thothapuri Mango – This pickle tastes best with raw thothapuri mangoes since this variety of mango has a combination of both sweet and sour tastes. The other green raw mangoes that are used for pickling require a rather a long process, but thothapuri variety does not. In case you buy a thothapuri and miss making this instant pickle, the mango will be perfect to just cut and eat with a little salt, red chilli powder and lemon.
Red chilli powder – You may use the proper red chilli powder or Kashmiri red chilli powder as per your preference. For every mango that is cut, you must use 2 teaspoons of red chilli powder. If you have slightly smaller mango, you may reduce the quantity accordingly.
Salt – Normal table salt is the best salt to use for this instant mango pickle. For every mango used, you can add 1 teaspoon of table salt. (Rock salt is best used for mango pickles that involve soaking and rest time).
Turmeric powder – You may use 1/2 tsp of turmeric powder per mango. I use turmeric powder since it provides a nice golden colour when combined with the red chilli powder.
Menthiam powder – This is an optional ingredient, but if you have the time to prepare the powder, you can use it. I usually methi seeds directly in the tempering.
To prepare the methi powder, roast 1/2 to 1 tsp of methi seeds on a low flame for 30-40 seconds. Allow to cool and grind it into a fine powder. Use only 1/4 to 1/2 teaspoon of this powder per mango used. Methi powder has a strong flavour, so you don’t want this taste to overpower the mango taste.
For the tempering
GingellyOil – I use gingelly oil for almost all pickles since the flavour is absolutely the best. Gingelly oil is the name given by Indians to sesame oil. You will need two tablespoons of gingelly oil per mango in this recipe.
Mustardseeds – Any tempering or tadka in Indian cuisine starts with mustard seeds. You may use 1 tsp of mustard seeds for every mango that you will be using.
Methiseeds – Methi seeds, when popped in oil, provide a delicious flavour with muted bitterness that usually is associated with methi seeds. You may use 1/2 tsp of methi seeds for every mango used. You can methi seeds if you are already using methi powder.
Asafoetidapowder – Any South Indian tempering is incomplete without hing powder. You may use 1/4 tsp of asafoetida powder for each mango used.
CurryLeaves – Curry leaves, when added to the tadka, get crispy and this crunch factor it adds is why I add curry leaves. If you do not have curry leaves handy, you may skip it.
How to make Instant Mango Pickle
Wash the thothapuri mangoes thoroughly and wipe them with a cloth until completely dry. Cut the mangoes into small “tooth-sized” pieces and add all the pieces to a large dry bowl.
Now add the red chilli powder, turmeric powder, salt and menthiam powder (if you are using it). You may use the ratios I have mentioned in the earlier section for each ingredient. Mix well with the mangoes with a dry spoon. Make sure that the powders coat each piece thoroughly.
Place a tadka pan on a low flame. Add the required amount of oil and allow it to warm. Once warm, add the mustard seeds and allow it to crackle. Next, add the methi seeds (skip if you are using methi powder) and roast for five seconds. Next, add the asafoetida powder and mix well. Lastly, add the curry leaves and turn off the flame.
Add this tempering to the bowl of spice coated mangoes and mix thoroughly. Your instant mango pickle is ready!
Storage and Shelf Life
Once the tempering has cooled down, spoon the instant mango pickle into a clean glass or ceramic jar.
You can keep the pickle out for a 4-5 days and finish it or you can store in the fridge for up to two months.
Instant Mango Pickle
It’ll be great if you tag me on Instagram @ Make Potato when you make this recipe
Please do leave a rating and a comment if you can, on the recipe below – it will help me grow and reach more food lovers like you.
Instant Manga Curry
Recipe
Instant Mango Pickle
Instant Mango pickle is a simple and quick pickle recipe often made during the summers in South Indian households with Thothapuri mangoes
Carrot Bread Toast is a quintessential Bangalore delicacy available at local “Iyengar” bakeries – the dish is a simple piece of toast topped with a spicy carrot masala!
Carrot Bread Toast
Carrot Toast is a classic bakery delicacy with a slice of toasted bread with a spiced carrot topping prepared with spices and herbs.
If you live in Bangalore, I am sure you’ve had an “Iyengar Bakery” close to your home. As for me, who’s a Bangalorean, I grew with this Carrot Toast. I have fond memories of the time I used to cycle from school or walk home from the bus stop. I could smell this carrot toast from a mile away.
Bakery Style Carrot Bread Toast
Ingredients to make Carrot Bread Toast
Bread – For this recipe, you can use any bread from a local bakery. They make these classic carrot bread toast on a square piece of toast, but the choice is totally up to you.
Carrots – You can use the local variety or the slightly sweeter variety of Ooty carrots – both options will work. Grate 4 medium-sized carrots to make four carrot toasts.
Onions – One small onion, finely chopped or thinly sliced, is what I have used for this recipe.
Green chillies – Depending on how spicy you want the toast to be, you can add as many. I would recommend to use less green chillies since we will be adding several spice powders that also have heat/spice in them.
Curry leaves and Coriander leaves – You can use either or both of them. It enhances the flavours when you use both the leaves.
Spices – The spice powders are the major flavour drivers to this carrot masala. You can use red chilli powder, turmeric powder, coriander powder and garam masala powder in equal but small quantities. Add sufficient salt to season your carrot masala.
Butter – You need butter to toast the bread.
Cooking Oil and Mustard seeds – You will need one tablespoon of cooking oil (any neutral flavoured oil will do) and one teaspoon of mustards seeds.
How to make Carrot Bread Toast
Wash, peel and grate all the carrots and keep aside. Finely chop the onions and cut the green chillies into long strips. Wash and finely chop coriander leaves as well.
Place a pan on medium heat and add some cooking oil. Once the oil is warm, add some mustard seeds and allow them to sputter.
Next, add the green chillies and onions. Saute the onion until the onions look soft. Next, add all the spice powders you are going to use and give it a mix. Add 1/4 cup of water to provide a medium for the spice powders to cook in.
Next, add the grated carrot to the pan and give it a good mix. Carrots cook really fast, so it should take less than two minutes until the carrots get soft. Once the carrots are soft, turn off the flame. The carrot masala is ready.
To a slice of bread, smear a pat of butter. On the other side, place 2-3 tablespoons of the carrot masala. Place the buttered side of the bread on a warm pan and allow it to toast. Press down on the carrots so that they stick to the bread.
Once the bottom browns slightly, flip the toast so that the carrot side of the bread gets slightly toasted. Gently flip back and remove it to a serving plate. Repeat the process for the rest of the slices. Your carrot bread toast is ready.
Shelf Life and Storage
It is recommended to eat carrot bread toast immediately. But if you do want to store and eat, you can make the carrot masala and put it in the fridge. You may make the toast as and when you feel like it. The carrot masala will be good in the fridge for a couple of days.
Variations in Carrot Bread Toast
By adding several other vegetables, you can make the taste of the carrot masala much tastier. Some bakeries add capsicum (bell peppers) to the masala. You can even add paneer or toasted peanuts to the carrot mixture.
It’ll be great if you tag me on Instagram @ Make Potato when you make this recipe.
Please do leave a rating and a comment if you can, on the recipe below – it will help me grow and reach more food lovers like you.
Recipe
Bakery Style Carrot Toast
Carrot Bread Toast is a quintessential Bangalore delicacy available at local "Iyengar" bakeries – the dish is a simple piece of toast topped with a spicy carrot masala!
Grate the carrots, finely chop the onions, slit the green chilli and finely chop the coriander leaves. Keep all the ingredients ready.
Place a pan on medium heat, add 1 tablespoon of cooking oil.
Once the oil is hot, add mustard seeds and allow it to crackle.
Next, add the curry leaves, green chillies and onions. Sauté until the onions are soft.
Add all the spices, mix well and add a tablespoon or two of water for the masalas to cook.
Next add the grated carrots, mix well. Adjust salt according to your taste.
Carrot takes less than two minutes to cook, once it looks soft, turn off the heat and garnish with coriander leaves. Your Carrot filling is ready.
Take a slice of bread and scoop 2-3 tablespoons of the carrot masala. Fill it to the edges.
Place a tawa on medium heat, add a pat of butter. Place the slice of bread with the carrot mixture on top of the butter. Allow for that side to toast while pressing the carrot masala into the bread.
Now, flip the bread to the carrot masala side and allow it to toast for 30 seconds.
Flip the carrot toast again and make sure the carrot stays on top of the bread. Repeat for the other slices of bread.
Your Bakery Style Carrot bread toast it ready!
Keyword Bakery
If you are looking for more Tiffin Recipes, please click here.
Do follow me on Instagram at Make Potato — I post daily lunch box ideas and quick snack recipes.
This tomato onion gravy is the simplest and easiest sauce that you can make for all your curries! Just add potatoes or paneer and your curry is ready!
Tomato Onion Gravy
Tomato Onion gravy is a gravy base prepared with tomatoes and onions, which serve as a wonderful base for several Indian curries and gravies.
You can prepare this gravy and use it whenever you need to make a side dish for your rotis – you have to just heat up this gravy base with some oil and add in the cooked vegetables or paneer.
It makes your weeknight dinners an easy breeze with one less thing to do.
Why do I make this Tomato Onion Gravy every week?
When I eat rotis, I love a nice smooth curry to go along with it. I definitely think there is something fulfilling about tearing off a piece of roti and scooping up some vegetables along with a rich gravy sauce. Now, if you also think similarly, this recipe is definitely for you.
So, before I learnt and perfected this recipe, I was making gravies in the long and tedious way too. I have to say, that method involved way too much time standing around the stove and waiting for the tomatoes and onions to cook down. This wasn’t very appealing to me.
Now, this recipe has none of the waiting around. The reason for it is that of the use of my favourite kitchen appliance – the pressure cooker! If you are a fan of using your pressure cooker to make your life simpler, keep reading on.
Ingredients needed for the Tomato onion gravy
To make this sauce, you are going to need the two main ingredients – tomatoes and onions. The ratio of tomatoes to onions is simple – for every kilogram of tomatoes, you can use two medium-sized onions.
The other ingredients are ginger and garlic. An Indian curry isn’t a curry without these two ingredients. A good thumb sized piece of ginger for every kilo of tomatoes is your ideal ratio. In India, cloves of garlic are small, so it is safe to use 10-12 cloves for this recipe. If you are in a place in the world where the cloves are large, you may use 3-4 cloves.
Next comes the heat – dried red chillies. These provide a nice hit of heat as well as the lovely deep red colour to the gravy. This recipe calls for 3-4 red chillies, but you can add a few more according to your taste.
Bay leaves are optional, but they do add great flavour to the overall gravy. So, I think you must use them!
How to make this best and easy tomato onion gravy?
You can start off by washing the tomatoes and then cutting them into quarters. You can also cut them into halves, but I prefer them in quarters as it makes removing the skin easier after the pressure cooking.
Peel and dice the onions into quarters.
Wash the ginger and peel the skin. Cut the ginger into smaller pieces since it makes it easier to cook and grind.
You can next, peel and de-skin 10-12 small cloves of garlic. I mostly buy the peeled garlic available on most online platforms or my closest Bangalore Hopcoms – makes it easy, I say!
Begin by placing a pressure cooker on the stove on a medium-high heat. You can add the chopped tomatoes, onions, ginger, garlic, dried red chillies and bay leaves. The tomatoes do have enough water in them for the whistles, but I prefer to add a 1/4 cup of water. Close the lid and allow for 2-3 whistles to pass.
Turn off the pressure cooker and let the pressure come down naturally. Wait for all the ingredients to cool down as well.
Once the pressure cooker has cooled down, pick the pieces of tomatoes and remove the skin – they should come off easily. Now add these peeled tomatoes to a mixer jar. Fish out the cooked onions, red chillies, garlic and ginger from the pressure cooker and add them to the mixer. You may leave out the bay leaves and the remaining water.
Grind all these ingredients to a smooth paste and transfer to a clean and dry jar. Your tomato onion gravy is ready to make your favourite curries.
What curries can I make with this Tomato Onion gravy?
“Indian Curry”
This tomato onion gravy will serve as a base for any sort of “Indian curry” that you want to make.
In a pan, add a tablespoon of oil and add any whole spices you want. Sauté the spices in the oil for under a minute.
Now, add any vegetable of your choice – potatoes, peas, cauliflower, haricot beans, etc. Add a bit of water and allow the vegetables to cook for about 5-7 minutes. If you want to make Aloo-Matar curry, the potatoes and peas should cook in about 5 minutes (smaller the size of the aloo, the faster it cooks). Once they are cooked, add the tomato onion gravy and let it simmer for another five minutes. Turn off the flame and add a small pat of butter and chopped coriander.
If you want to use baby potatoes or chickpeas, get them cooked separately with some salt. All you will need to do is add them to the gravy. You can add garam masala, Channa masala, coriander powder, jeera powder to this gravy and achieve the taste that you are going for.
If it is paneer curry that you want to make, it is pretty straightforward. You can just add the paneer to the gravy and allow to simmer for a few minutes. The Paneer Masala curry will be ready in less than 10 minutes.
Makhni Gravy
If you wish to make a makhni gravy, you need the gravy to be a thick and rich. To make this happen, you have to add a handful of cashew nuts (80-100g) to the pressure cooker along with the rest of the ingredients. When you grind the tomatoes and onions with these cashews, the gravy will be rich and thick.
In a pan, you can start off with a small pat of butter along with a tablespoon of cooking oil. Add whole spices like cardamom, cinnamon and star anise. Sauté the spices in the butter and oil for a few seconds. Now add this thick gravy to the pan and mix it well. Adjust salt levels and you now add panner to this gravy. Let the gravy simmer for 4-5 minutes and then you can turn off the flame. To make this gravy even richer, you can finish off the curry with another (big) pat of butter! Yum!
Pasta Sauce
If you wish to make pasta sauce using this method, the ingredients you need to omit from pressure cooking are ginger and dried red chillies. You can increase the quantity of garlic by a few more cloves.
Once the cooking is done, add the ingredients to the mixer jar along with a few leaves of basil, one teaspoon of tomato paste, salt and pepper. Let all of them blend well and your pasta sauce is ready!
Add this sauce to the cooked pasta and season the sauce with oregano and finish it off with grated parmesan. Your pasta is ready for serving!
Dal
You can also use this tomato onion gravy to make a flavorful dal by adding 2-3 tablespoons of the tomato onion gravy to the dal and allowing it to simmer for a few minutes.
Tips and Tricks
If you end up adding more red chillies and you feel that the gravy got too spicy, you can add a tablespoon or two of sugar to reduce to the heat. You can also add curd to bring down the heat.
You can also add cloves, cardamom or fennel seeds while pressure cooking the tomatoes and onions. When you blend all the ingredients, you will have a slightly different but equally delicious taste to which you may add your vegetable of choice.
Shelf Life and Storage
This gravy can be stored in the fridge for up to 5 days and used for various recipes during the week.
If you wish to freeze the gravy, there will be an extra step in preserving the gravy in oil. To a pan, add 2-3 tablespoons of cooking oil, and add the gravy to it. Add required amount of salt and allow the gravy to simmer for 15-20 minutes. This step will ensure the removal of moisture from the gravy, thereby increasing its shelf life. Keep stirring and once you see that the oil has left the gravy and risen to the side of the pan, you can turn off the heat. Allow the gravy to cool down and store it in a clean glass or stainless steel container.
It’ll be great if you tag me on Instagram @ Make Potato when you make this recipe
Please do leave a rating and a comment if you can, on the recipe below – it will help me grow and reach more food lovers like you.
Recipe
Tomato Onion Gravy for curries
This tomato onion gravy is the most simplest and easiest sauce that you can make for all your curries! Just add potatoes or paneer and your curry is ready!
Red coconut chutney is a coconut-based chutney with onion and red chillies. It is a brilliant accompaniment to Dosas, Idlis and Utappams but specifically goes well with Neer dosa.
Red Coconut Chutney
Red Coconut chutney is a chutney prepared with grated coconut, red chillies and onions. This chutney makes a fantastic pairing with any dosas, but I make this specifically when it’s Neer Dosa for breakfast.
I make this red chutney quite often, as the ingredients are always available in my fridge and pantry. Grab the coconut from the fridge, an onion and red chillies from the pantry, grind and that’s it.
Red coconut chutney is a frequent dish made in my kitchen as it involves very few ingredients to
Ingredients for Red Coconut Chutney
Grated Coconut – I prefer to use grated coconut since it takes less time to make it. You can also use diced coconut but be sure to pulse grind the pieces of coconut and make them look like grated coconut before adding the onions and red chillies. For this recipe, I have used 1 cup (or 1/2 coconut when split equally) for my family of 3.
Onion – In India we only get only 2 varieties of onions – the purple one and the white one. So most dishes which call for onions refer to the purple variety. Since we do not want an overwhelming onion taste, half a medium-sized onion or 1 small onion should be sufficient.
Red Chillies – Depending on the levels of spice that your family can handle, you can add as many. I do not add more than 2 red chillies since the kiddo can’t handle any more spice than that. I usually use the byadagi chilli variety as it renders a lovely red colour. They also have less heat as compared to the guntur variety.
For the tempering –
Coconut oil is the best for any tadkas that involve coconut based chutney.
Wash the curry leaves and keep aside.
How to make Red Coconut chutney
The process of making red coconut chutney is fairly straightforward. Add one cup of grated coconut, 2-3 red chillies, the diced onions into the mixer jar and grind until you get a smooth paste.
You can now pour the chutney out to a bowl and add 1/2 teaspoon of salt. Mix well and adjust salt levels.
Place the tadka pan on to a medium-low flame. Add a tablespoon of coconut oil to the pan. Once the oil is hot, add the mustard seeds and allow it to sputter.
You may follow it up with a teaspoon of urad dal split and allow it to slightly brown. Turn off the flame and add 2 sprigs of curry leaves.
Add half a teaspoon of asafoetida and mix the tadka well.
Pour the tadka over the chutney and mix well. Your red coconut chutney is ready.
Variations to making red coconut chutney
Mangalore Style
Start by roasting the red chillies until they are crisp. Add the onions to the same pan along with the red chillies and roast for a minute or so. Turn off the flame and roast the coconut in the residual heat. Add asafoetida to this and allow the ingredients to cool down before grinding it to a chutney. Follow this up with a tadka of mustard seeds, curry leaves and asafoetida.
The roasting process will reduce the pungency of the onions and make it easier to grind the red chillies. This recipe will be close to the Mangalore style red coconut chutney.
Kerala Style
The only difference in Kerala style of red coconut chutney is the use of Sambar Onions / Pearl Onions / Indian Shallots instead of normal purple onions.
Other Variations
The other ingredients that you can add into this chutney are ginger, tamarind and fried Bengal gram. Adding these ingredients will give you different flavours. The ginger will add more heat, the tamarind will give you a sour taste and the fried Bengal gram will yield a thicker chutney.
Shelf Life
Any coconut based chutneys are for immediate consumption, else they tend to go bad in about a couple of hours when kept outside even in cooler temperature cities like Bangalore.
You can refrigerate the chutney up to a day. You may take it out and allow it to come to room temperature or add a little warm water and consume immediately.
Serving Suggestions
Red chutney goes very well with Dosas, Idlis, Uttapams and even hot rice with ghee. This Red coconut chutney is especially prepared and served along with Neer Dosas in a lot of Mangalore homes.
Notes to make Red Coconut chutney
Sambar Onions or pearl onions are a great alternative to normal onions in the recipe. This will transform the taste of the chutney. Pearl onions render a sweet taste as against the pungent taste of normal onions.
This recipe calls for 2 red chillies – You can adjust the red chillies according to the spice level consumption in your household. In households that have a lot of adults, up to 10 red chillies are used.
Always use fresh coconut and not desiccated coconut or dry coconut (cobri/copra) as the chutney will get very oily. You can use the frozen variety of fresh coconut. If using frozen coconut, take the needed quantity into a cup and add a little warm water to bring it to room temperature.
It’ll be great if you tag me on Instagram @ Make Potato when you make this recipe
Please do leave a rating and a comment if you can, on the recipe below–it will help me grow and reach more food lovers like you.
Recipe
Red Coconut Chutney
Red coconut chutney is a coconut based chutney with onion and red chillies. It is a brilliant accompaniment with dosas but specifically with neer dosa.
Tomato, Apple and Ginger chutney is a sweet, sour and spicy chutney that you can pair with dosas or rotis.
Tomato, Apple and Ginger Chutney
Finding tomatoes, apples and ginger in the markets is easy in all seasons. So the next time you want to make a chutney that is unique, I think that this recipe should be your go to!
The recipe is simple, as it only involves grinding the ingredients together as the first step. It is followed by sauteing the puree until you get the desired consistency. That’s it!
Apples and tomatoes are water laden fruits, so when you grind, all the water becomes part of the chutney. I prefer my chutneys on the thicker side, so the cooking process takes 15-20 minutes.
How to make tomato apple and ginger chutney?
The first step is to cut the tomatoes into small chunks. You can peel, core, and dice the apples into small chunks next. Take a thumb sized piece of ginger and peel the skin.
You can then add all these ingredients along with 2 de-seeded dates and 2 pieces of cardamon to the mixer jar.
Grind into a smooth or chunky paste – it is up to, entirely!
Next, you can add the puree to a pan and allow the water to evaporate by slowly cooking it down. But the chutney should take anywhere between 10-20 minutes to cook, depending on your desired consistency.
This cooking process all removes the intense heat that you will taste because of directly grinding the ginger. Cooking it also removes the raw taste of tomatoes and also helps increase the sweetness of the apples.
Once the chutney is cooked, turn off the stove and wait for it to cool down.
Shelf Life
You can add the cooled chutney to a clean glass jar and refrigerate it. The chutney should be good for a week to 10 days, if properly refrigerated.
Tomato Apple and Ginger chutney – Serving Suggestions
Since the chutney has all the notes of sweet, sour and spicy, it will go well with rotis and dosas. This chutney will make a fantastic spread for sandwiches too.
It’ll be great if you tag me on Instagram @ Make Potato when you make this recipe
Please do leave a rating and a comment if you can, on the recipe below – it will help me grow and reach more food lovers like you.
Recipe for Tomato Apple and Ginger Chutney
Tomato Apple and Ginger Chutney
Sandhya Gopalakrishna
Tomato, Apple and Ginger chutney is a sweet, sour and spicy chutney that can be paired with dosas or rotis.
Dill potatoes is a potato recipe flavoured with fresh dill leaves sauteed in butter and garlicand finished with a drizzle of lemon.
Dill Potatoes
Potatoes are a universally loved vegetable, and dill is an herb available in most parts of the world. This dish is easy to prepare and goes well with rice and dal or you can serve them as an appetizer too.
Dill potatoes are famous in Scandinavian countries, Eastern Europe, Ukraine and Russia, as dill came to these countries from the northern African-southwest Asian part almost millennia ago. Similarly, dill found a way into the kitchens of South India and since then has been a staple in many dishes in Karnataka.
Fresh dill finds its stage in almost every dish in Karnataka, from Akki rotti, Dosa, dal, Idlis and Vadas. Its unique flavour of fresh and peppery and the powerful aroma while cooking and eating make dill either a highly loved or loathed herb amongst many people.
I have always loved dill and try to use it twice or thrice a month in various recipes.
How to make Dill potatoes?
Pluck the thin tendrils of leaves and collect them all for a wash. They are pretty easy to pick and break off easily from the stem. Once all the little leaves are collected, wash them and let them air dry on a towel. Once partially dry, chop them up finely and keep them aside.
You can use regular potatoes or baby potatoes – wash them thoroughly so that we can use the potatoes with the skin on.
If you are going to boil the potatoes, halve them and boil them until they are cooked but firm. If you are pressure cooking the potatoes, allow for two whistles in the cooker and allow them to cool naturally.
Remove from the hot water and dunk in cold water to stop cooking.
Chop the potatoes along with the skin into small pieces or any size you choose and keep them aside. Chop or mince garlic into small pieces and keep aside.
To a pan on medium flame, add about ten gms of butter. Once the butter has melted, add the chopped garlic and saute for a minute. Add the chopped dill leaves to the pan and cook it on a low flame.
Add some salt and pepper seasoning and cook down the leaves – it takes less than 2 minutes for the dill leaves to cook.
Once the leaves cook, add the chopped potatoes and mix them well once the leaves cook until the dill leaves are coated well on the potatoes. If the potatoes are slightly dry, drizzle a tablespoon of olive oil into the pan.
If you wish, you could roast the potatoes until golden.
Pairings suggestions
Dill potatoes go great with any form of rice or roti. We usually eat dill potatoes with rice and dal. You can even serve it as an appetizer if you are hosting a party.
Dill potatoes are served with grilled or roasted meat in European countries. You can make it vegan by using olive oil instead of butter.
How to store Dill Potatoes
Dill potatoes are best served hot and fresh off the stove. They store well in the fridge in an air-tight container for a day or two.
It’ll be great if you tag me on Instagram @ Makepotato, when you make this recipe.
Please do leave a rating and a comment if you can, on the recipe below–it will help me grow and reach more food lovers like you.
Recipe
Dill Potatoes
Dill potatoes sauteed in butter and garlicand finished with a drizzle of lemon.
Pressure cook the potatoes for 2 whistles and allow the pressure to release naturally. If you are boiling the potatoes, add the halved potatoes to a pot of boiling water and cook for 7-8 minutes or until they are soft but not mushy.
Drain the potatoes once they are cooked and add them to a bowl of cold water to stop the cooking. Chop the potatoes to a size of your choosing.
In a large skillet, add some butter and allow to melt on a low-medium flame.
Add the minced garlic to the butter and saute for a minute.
Add the chopped dill leaves to the pan. Add salt and pepper and allow the dill leaves to cook.
Once the leaves are cooked, add the chopped potatoes and mix until the dill is coated well on the pieces of potatoes.
If you want, roast the potatoes until golden. Drizzle a little lemon on top the potatoes and turn off the flame.
Your Dill Potatoes are ready!
Keyword Dill Potatoes, Potatoes with fresh dill
If you are looking for more Potato Recipes, please click here.
Do follow me on Instagram at Make Potato — I post daily lunch box ideas and quick snack recipes.
Doddapatre Tambuli or Ajwain leaves Tambuli is a curd-based side dish made with doddapatre leaves, pepper, jeera and coconut.
Doddapatre leaves grow aplenty in my terrace garden, and they are one of the few herbs that I love to grow because they are low-maintenance. The leaves are thick and have a peppery taste when you eat them raw. But this herb is best for my two frequent dishes – Tambuli and Kashaya.
The word Tambuli is used in Kannada to indicate the use of curd as the base for the dish. Tamilians usually call curd-based dishes pachadi.
I learnt this recipe for Doddapatre Tambuli from my aunt, who makes it regularly. I treasure recipes such as this because they call for using local ingredients that I can grow in my small garden.
Ingredients for Doddapatre Tambuli
Doddapatre – This herb goes by Indian Borage, Mexican mint, country borage, Ajwain ki patta in Hindi, Parnayavani in Sanskrit and Karpooravalli in Tamil. The leaves are thick, but their stalks are pretty brittle. I have had two pigeons come to my balcony and fight atop my doddapatre plant, leading to many of the stalks breaking.
Doddapatre leaves are available in a few local markets in Bangalore, but mostly it’s an herb grown in old-timey houses with gardens in Bengaluru. I have seen Doddapatre leaves available in apps such as Healthy Buddha and Farmizen.
The other ingredients you need are :-
Pepper
Jeera
Green chillies
Coconut – You can use fresh shredded coconut.
Curd – homemade curd would be the best option. If you do not have this, you can use store-bought packet curd but not the thick-set curd you get in plastic tubs.
Ghee and mustard seeds for seasoning
How to make Doddapatre Tambuli
Wash the leaves thoroughly and break them into pieces. You can use the smaller stalks of the plant, but you may discard the thicker stems.
Keep the grated coconut, peppercorns, jeera seeds and ghee ready. Add curd to a bowl, whisk it and keep it aside.
To a warm pan, add a tablespoon of ghee. Once the ghee has warmed, add the pepper and stir it for a few seconds. Ensure the flame is low so that the pepper does not pop. Next, add the jeera seeds to the pan and lightly toast them in the oil for a few seconds.
Add the chopped Doddapatre leaves, and roast them until they change colour. This will take roughly 3-5 minutes depending on the quantity of the leaves. Keep stirring, so the leaves don’t stick to the bottom of the pan. Once the colour has changed, add the grated coconut and turn off the flame. Allow the coconut to toast in the residual heat. Let all these ingredients cool down.
Add the pan’s contents to a mixer jar – doddapatre, coconut, jeera and pepper. Grind it to a smooth paste with a little water or curd.
Add this paste to the whipped curd and season the Tambuli with salt. Mix it thoroughly and keep it aside.
To a small tadka pan, add a teaspoon of ghee. Once the ghee is warm, add mustard seeds and allow them to sputter. Add a teaspoon of jeera and allow it to toast. Turn off the flame and add this seasoning to the Tambuli. Mix thoroughly.
Relish this delicious doddapatre Tambuli with some hot rice and ghee.
How to grow your doddapatre plant
If you get access to a stalk long enough with a few leaves, you can propagate it and grow them in your garden.
Doddapatre Tambuli should be consumed on the same day or preferably during the same meal. If you leave it out on the counter for too long, it will get sour in taste.
You can store the tambuli in the fridge for a couple of days, but you should finish it in one meal after you take it out of the fridge.
Do not reheat the dish. It is best served at room temperature.
Doddapatre Tambuli
It’ll be great if you tag me on Instagram @ Makepotato, when you make this recipe.
If you are looking for more Chutney Recipes, please click here.
Doddapatre Tambuli – A classic Karnataka side dish!
Recipe
Doddapatre Tambuli
Doddapatre or Ajwain leaves Tambuli is a curd-based side dish made with pepper, jeera and coconut.
Clean the leaves thoroughly, break them into small pieces and keep aside. Whisk the curd and keep aside.
To a warm pan, add one tablespoon of ghee. Once the ghee is warm, add pepper and jeera. Keep the flame low to ensure that the pepper does not pop. Toast for a few seconds and then add the chopped doddapatre leaves.
Stir the leaves on the pan on a low flame unti it changes colout. It will take roughly 5 minutes.
Once the leaves have changed colour, add the half cup coconut and turn off the flame. Let the coconut get toasted in the residual heat. Allow all the ingredients to cool down.
To a mixer jar, add the contents of the pan and grind it to a smooth paste.
Add this paste to the whisked curd until they combine well. Your Tambuli is almost ready. Add a teaspoon of salt and mix.
To a warm tadka pan, add 1 tablespoon of ghee. Once the ghee is warm, add one teaspoon of mustard seeds. Once the mustard seeds start to sputter, turn off the flame and add this seasonign to the tambuli.
Serve this delicious Doddapatre Tambuli with hot rice and ghee.
Ragi Rotti is a deliciously nutty, soft and flavourful bread and a staple food in Karnataka.
Ragi Rotti
Ragi rotti is an easy dish to prepare and takes significantly less time to prep. You can eat it for breakfast, lunch or dinner. This ragi rotti dough stores well in the fridge for 2-3 days, which gives you the advantage of including this healthy millet in your diet multiple times a week.
This particular recipe I have written down is what I learnt from a mom friend. From my earlier experience, Ragi rotti usually hardened when it got cold. One day, my son mentioned that his friend brought ragi rotti in his lunch box; I was curious whether the child liked hard rottis or if his mum had found a way to make soft ragi rottis.
I asked her about it, and she told me the magic ingredient to make rottis – rice or ragi- is adding grated cucumbers to the dough! That was brilliant! So, I had to pen this down since ragi rotti makes for a filling and healthy lunch box item.
Ingredients to make Ragi Rotti
Main Ingredients
Ragi flour – You can make ragi flour at home or buy the flour like me. Ragi flour can be made by soaking ragi in water for a few hours, sun drying the soaked ragi on a cloth, and grinding it into a fine powder. You may also let the ragi sprout and repeat the drying and grinding process for a healthier version of the ragi flour.
Rice flour – Rice flour is readily available in all stores. Similar to making ragi flour, you can make rice flour at home. My mother used to make rice flour since they weren’t available as readily in the 80s and 90s.
Cucumbers – This magic ingredient helps keep the ragi rottis soft in your lunch box.
Jeera
Other ingredients (definitely add flavour when included).
Finely chopped onions
Grated carrots
De-seeded green chillies
Finely chopped coriander leaves
How to prep?
Add ragi flour and rice flour in equal quantities to a large bowl. Add salt to this bowl and give them a mix. Keep aside. You can choose the cup size to measure the ingredients depending on your family’s size.
Next, you can get your vegetables ready.
Use one cucumber for every 2 cups of flour (ragi and rice combined). Peel the cucumber and grate it. Place a bowl under the grater instead of a cutting board since the cucumber will ooze water.
Grate carrots and keep them aside. Slit a green chilli vertically, and remove the seeds and veins to reduce the heat. If you are comfortable with the heat, you may include the seeds too. Chop an onion as fine as possible and keep it aside.
Add all the chopped vegetables to the flour.
In a tadka pan, warm some oil and toast mustard seeds, jeera seeds and asafoetida. Once the mustard seeds start popping, turn off the flame and add this oil to the bowl with the ragi flour.
With the help of a spoon, bring it all together. Once the heat from the oil has reduced, you can use your hands to mix the dough thoroughly by adding sprinkles of water to bring the dough together. Remember that the cucumber already has a water content that will contribute to the dough.
The dough is ready when all ingredients are well combined and the dough is soft and wet. Spread some oil on top of the dough, cover it with a lid and let it rest for at least 20 minutes.
How to cook the ragi rotti?
The next step is to spread the rotti before cooking it. You can use banana leaves, parchment paper, or a plastic sheet to spread the rotti.
(If you use a banana leaf to pat the dough, move it back and forth over a flame to make it tender. If the leaf is crisp, it might tear while you spread the dough.)
Roll a large handful of ragi rotti dough from the bowl into a ball. Place this ball on the parchment paper (I use this most of the time) and start spreading it by pushing the dough outwards from every direction. You can dip your fingers in a bowl of water to assist you in spreading the dough.
(Some expert aunties and grandmas can quickly spread the dough directly on the skillet without burning their fingers)
This process takes some time to get right, but you’ll get there if you do this often enough. Let this process not discourage you from making this delicious dish. It doesn’t have to be perfect.
Place a few holes in the spread-out dough, allowing it to cook evenly.
Take the parchment paper and invert it onto a hot skillet. Press the parchment so that the rotti sticks to the surface of the iron tawa. In a few seconds, you can peel off the parchment easily. Next, add a little oil to the rotti and place a lid on top of the tawa to steam cook the ragi rotti.
The rotti will cook in less than a minute, so do not step away from the stove. Lift the lid, and remove the cooked Ragi rotti from the skillet.
Serving Suggestions
Ragi rotti goes well with any chutney – our favourite is coconut and tangy tomato chutney. If you do not have time to make the chutney, you can eat it with some butter too. You may, of course, eat ragi rotti alone, with curd or even Chutney Pudi.
Ragi Rotti
Types of Ragi Rotti
Since roti is a common word to describe flatbread, ragi rotti can be prepared in a few ways apart from the one I have described.
The recipe I have written includes ragi flour, rice flour, and grated cucumbers – this recipe makes a soft version of akki rotti convenient to pack in lunch boxes.
Ragi rotti can also be made without the grated cucumber. If you skip the cucumber, the rotti can be prepared in a crispy manner that needs to be consumed hot off the skillet; otherwise, it gets tough as it cools down.
You can also make ragi rotti like jowar roti – by using hot water to knead it into a dough and roll it out like a chapati.
The last version is to add an equal measure of ragi and wheat flour (atta) and make it into a ragi chapati. This is the most common version of ragi roti since it is easily rolled like rotis.
Here’s a link demonstrating how to make soft ragi rotti for your next meal –
It’ll be great if you tag me on Instagram @ Make potato, when you make this recipe.
Please do leave a rating and a comment if you can, on the recipe below – it will help me grow and reach more food lovers like you.
Recipe
How to make Soft Ragi Rotti
Ragi Rotti is a deliciously nutty and flavourful bread and a staple food in Karnataka. It is made from ragi flour, rice flour, onions, and various spices.
Add Ragi flour, Rice flour and salt to a large bowl, mix it well and keep aside.
Grate cucumbers, carrots; finely chop the onions and green chillies. Add all of them to the bowl with the ragi flour.
In a tadka pan, add some cooking oil and allow it to warm up. Once the oil is warm, add mustard seeds, jeera and asafoetida. When the crackling stops, add this oil to the bowl with the ragi flour.
Mix all the ingredients well until its a uniform mixture. Ensure that there are no flour pockets in the dough. Apply some oil on top of the dough and let it rest for a minimum of 20 minutes. (You can make this dough at the night and store it in the fridge and make them for breakfast)
Making the Ragi Rotti
Take a tennis ball sized dough and spread it out over parchment paper or a banana leaf.
Rotate the leaf while patting the dough for even thickness of the rotti. Make five holes in the roti – this will ensure even cooking of the dough.
On a hot iron skillet, place the parchment paper with the rotti side down so that the rotti sticks to the skillet. Reduce the flame to medium.Within 10 -15 seconds, you will be able to peel off the parchment paper.
Drizzle some oil over the rotti and cover the skillet with a lid. Allow the ragi rotti to steam cook for about a minute.
Lift the lid, once you see that the rotti is cooked, remove the rotti from the skillet.
Serve this delicious Ragi rotti with chutney, butter, curd or chutney podi. Enjoy!
Keyword Ragi Rotti
If you are looking for more Tiffin Recipes, please click here.
Do follow me on Instagram at Make Potato — I post daily lunch box ideas and quick snack recipes.
Channa Sundal is a dish prepared with white chickpeas and tempered with South Indian flavours of mustard seeds, grated coconut and curry leaves.
Sundal is a steamed chickpea snack with South Indian flavours of mustard seeds, curry leaves, and grated coconut.
Channa also goes by the name of chickpeas, Kabuli Channa, Chhole, Safed Channa, Konda Kadalai and Garbanzo Beans.
Sundal is a general term used to describe any bean/ lentil based dish that is boiled and then flavoured with South Indian spices.
There are several sundal recipes, but they pretty much follow the same steps for preparation.
Sundal is the most popular dish that one serves at any Navarathri Golu function. Each day, a different variety of sundal is prepared and given to guests who visit as a snack along with coffee or tea.
Ingredients for Channa Sundal
White Channa or chickpeas is the chief ingredient.
The other ingredients are for flavour as a tadka – mustard seeds, split urad dal, curry leaves, asafoetida powder and green chillies.
You will also need a pinch of baking soda to aid the channa cook into a soft texture.
I also use grated coconut to add a fresh flavour to the dish.
How to make Channa Sundal
In India, we mostly used dried chickpeas; using canned chickpeas is really rare.
If you are using dried chickpeas, soak them in water overnight. Add the required quantity of chickpeas to a bowl and give it a quick rinse. Add lots of water – at least two inches of water above the soaked channa. They expand a lot and sometimes, if you do not add enough water, some chickpeas might not have enough water to bloom. A lot of water is definitely the way to go. Let the chickpeas soak in the water overnight or at least for 7-8 hours.
The next morning, you drain the channa and rinse them a couple of times. This step is crucial. If you end up using the soaking water to cook the channa, your stomach might not agree with it. So it’s important that you rinse the soaked channa and use fresh water to cook it in the pressure cooker.
If you are using canned chickpeas, you have one less step to do. Open the can, drain the water and rinse the chickpeas and they are good to go. You don’t have to cook canned chickpeas, as they are already done.
Once rinsed, you can add the dried chickpeas to a bowl, fill it up with water and place it in a large pressure cooker. If you are using a small pressure cooker, you can directly add the washed chickpeas to it along with enough water to cover it.
Next, add a pinch of baking soda and salt. The soda will aid in the cooking process and yield a soft texture in the mouth when chewing.
Pressure cook for 5-6 whistles on a high flame and lower the flame and allow it to boil for another 5 minutes. Turn off the flame and allow the pressure to release naturally.
Check if the channa sundal is cooked well by pressing a couple of pieces of them. If they aren’t cooked, put it back in the pressure cooker and cook for 2 more whistles OR low flame for 3-4 minutes. You need the texture of the channa to be smooth when you press them between your fingers, not al dente.
Tempering the Channa Sundal
Scoop out the cooked channa into a bowl and season it with a little salt.
Place a tadka pan on low-medium flame and add one tablespoon of cooking oil. Once the oil is warm, add mustard seeds and allow it to sputter. Next, add the split urad dal and curry leaves. Finally, add the asafoetida powder and turn off the flame. Add 1/2 tsp of asafoetida powder to this tadka bowl and mix.
Add this tadka to the bowl of cooked chickpeas and give all the ingredients a good mix.
This is an optional step but if you want to add an extra zing to the channa sundal, you can take a handful of grated coconut along with a green chilli and pulse them in the mixer a couple of times. Use this coconut mixture as a garnish for this sundal and you will get a mild spice to the dish without it being overwhelming. Finish it off with some lemon juice and mix the ingredients until well combined.
If you want to keep it simple, garnish it with freshly grated coconut and a generous squeeze of lemon juice. – This is a simpler step for the beginners.
You can also jazz up the salad by adding grated carrots, pomegranate seeds and fried cashew nuts as well.
Shelf Life and Storage
Channa Sundal has a good shelf life – on the counter it will last for more than half the day. But if you do add grated coconut, it’s best to eat it at the earliest. If you live in a warm place, it is best to put it in the fridge.
You can store Channa sundal in the fridge for up to 2 days. Try not to reheat it several times.
Frequently Asked Questions
How to make channa sundal as a beginner
The simplest way to make this would be to use a can of tinned chickpeas, drain & rinse them and add the basic seasonings of mustard seeds and curry leaves.
How many whistles should I cook channa in the pressure cooker?
You can have 5-6 whistles and simmer it to low flame and leave it on for 2-3 minutes before turning it off.
What do I do if the channa has not cooked
Put the channa back into the pressure cooker and let out another 2-3 whistles on a high flame followed by 2-3 minutes on a low flame before turning it off.
What is the English name for sundal?
Sundal does not have a direct translation, but it is a salad with various forms of chickpeas as the main ingredient.
Are chickpeas and channa the same thing?
Yes, they are the same ingredient. They also go by the name of Garbanzo beans
If you are looking for more Tiffin Recipes, please click here to find the recipe you are looking for.
Please do follow me on Instagram and Facebook and do subscribe to my channel on YouTube. Thank you so much!
White Channa Sundal
White Channa Sundal is a dish prepared with white chickpeas and tempered with South Indian flavours of mustard seeds, grated coconut and curry leaves.
1cupWhite Channasoaked overnight and pressure cooked
For the tempering
1tbspCooking oil
1tspMustards Seeds
1tspSplit white Urad dal
2sprigCurry leaves
½tspAsafoetida Powder
For Garnish
2tbspGrated Coconut
1Green Chillislit lengthwise
1/2Juice of half a lime
Instructions
Take a cup of dried white channa in a container and give it a rise. Fill the container with water 3-4 inches above the white channa. Let it soak overnight.
The next morning, drain the water and give the channa a thorough rinse. Add fresh water to the same container and place it in a pressure cooker with 2-3 inches of water at the base. Add ½ tsp of salt and a pinch of baking soda to the channa. This will aid in cooking the channa faster. (You can add the rinsed channa directly to the pressure cooker along with water submerging the channa)
Allow 5-6 whistles and then turn the flame to low, and allow to cook for another five minutes on that low flame. Turn off the cooker and allow the pressure to release gradually.
Remove the container from the cooker and drain the water into another container. You should press a couple of pieces of channa to ensure it's fully cooked.
Season the cooked white channa with 1/2 tsp of salt and adjust it accordingly.
Tempering and Garnishing the White Channa Sundal
Place a small tadka pan on low-medium heat. Once the pan is warm, add 1 tablespoon of cooking oil.
Once the oil is warm, add the mustard seeds and allow it to crackle. Next, add the split urad dal and allow it to turn slightly golden.
Now, add the curry leaves and let them crisp up.
Finally, add 1/2 tsp of asafoetida powder and turn off the flame.
Mix the tadka well and pour it over the cooked black channa. If you are using grated coconut and green chilli for the garnish, add both ingredients to a mixer and pulse grind it 2-3 times.
Use this coarse coconut mixture as the garnish, along with generously drizzled lemon juice on top.Mix all the ingredients well and serve this White Chana Sundal as a healthy snack in the evenings.
Masala Vada is a popular South Indian lentil based fritter seasoned with red chillies and asafoetida along with finely chopped onions, curry leaves and dill leaves.
Jump To
What is Masala Vada?
Masala Vada is a deep fried snack/tiffin with Chana dal as the main ingredient. Chana dal is soaked and ground with ginger and red chillies followed by flavouring with finely chopped onions and dill leaves.
This delicious snack is crunchy on the outside when deep fried and soft on the inside.
I serve this as an after-school snack or make it during festivals such as Diwali or Dussera. Masala Vada is almost always a part of the elai sapadu or banana leaf meal at weddings.
It can also be served as an appetizer at parties along with a spicy chutney like Coconut Chutney or Red Chutney. It goes by the name of Paruppu Vadai in Tamil, Ombode in Kannada, or Dal Vada in Hindi.
Ingredients to make Masala Vada
The hero ingredient of Masala Vada is Chana Dal. You will need up to one cup or 180 grams to make about 15-18 small masala vadas.
The ingredients that you use while grinding the chana dal are ginger and red chillies. If you do not like the taste of red chillies, you can use green chillies too. Ginger provides a nice warmth to the vada without it being too spicy.
Once the dal is ground and ready, the ingredients you can add to make it flavourful are onions, dill leaves, curry leaves and asafoetida, along with salt for seasoning.
The other ingredients you can add are cumin seeds, fennel seeds and coriander leaves. Since this recipe has dill leaves in the vada mixture, I have not used these 3 ingredients.
How to make Masala Vada
The first step to making the paruppu vadai is soaking the chana dal. Wash the dal thoroughly in water until it runs clear. Soak the dal in a large bowl as it will expand upon soaking.
You should soak for a minimum of 3 hours and a maximum of 6 hours.
Once the dal has soaked, drain the water and keep the dal aside. I like to have a few kernels of chana dal as whole in the vada batter, as it will provide a nice crunchy texture when deep fried. So, at this stage I keep a handful of soaked chana dal aside to be mixed later in the ground up vada batter.
I like to add red chillies to the mixer along with the soaked chana dal. I also add ginger. This provides a nice heat to the vada without it having pockets of spice from a green chilli. Grind the chana dal, ginger and red chillies to a coarse paste without adding any water. If you feel that the mixture is getting too dry while grinding, add a teaspoon of water and nothing more than that.
The more water you add to the vada batter, the softer it will get. It is best to avoid moisture.
Take the ground batter in a bowl and add your chopped dill leaves. These leaves are my favourite and I would choose this over any greens anytime. Along with the dill leaves, you can add chopped onions too.
Mix it all with your hand and season with salt. You have to ensure that the vada batter is not too soft or too dry. If the batter is too soft, it means that there is excess water – you can fix this by adding a teaspoon or two of rice flour. If the batter is too dry, sprinkle some water and get it slightly moist.
Frying the Vadas
Once the batter is ready, the last step is to deep fry it.
Place a deep kadai with cooking oil on low to medium heat and allow it to warm up. Make sure you have at least 250 ml of oil or enough oil to ensure that the vadas rise to the top.
Take a small ball of the Vada batter and flatten it on your hand. You may use a dab of water to flatten it out on your hand and transfer it to the oil. (If you are a beginner, this might not come easily, but keep trying. The shape does not matter, only the flavour does when you are a beginner.)
Add as many vadas as possible without crowding them. They need the space to fry. Once the oil has stopped bubbling on one side, flip the vada to the other side to cook evenly.
At no point should you increase the temperature of the oil. Let it cook on low – medium heat. If the oil is on high heat, the outside of the masala vada may have cooked, but the insides might still be raw batter.
After cooking the vada on both sides, use a slotted ladle to drain the vadas onto a plate with kitchen tissue paper.
You can serve this delicious, crunch vada immediately with chutney. But I prefer to eat them as they are.
Masala Vada variations & serving suggestions
If you are not using dill leaves, you can add coriander leaves and curry leaves along with onions. You can also add cumin seeds and fennel seeds for extra flavour when not using dill leaves.
During festivals and family functions, Paruppu Vadai is prepared without onions. So jeera and curry leaves are the flavouring herbs used.
Storage & Shelf Life
Vada is best eaten hot, but they stay good for a day on the counter. You can make them in the morning and eat them at night too. This is because deep fried food does not go bad that quickly.
I will not recommend keeping vadas in the fridge, but you can prepare the Masala Vada batter and keep it in the fridge for a day or two.
It’ll be great if you tag me on Instagram @ Makepotato, when you make this recipe.
Please do leave a rating and a comment if you can, on the recipe below – it will help me grow and reach more food lovers like you.
Recipe
Masala Vada
Masala Vada is a lentil based fritter seasoned with red chillies and asafoetida along with finely chopped onions and dill leaves.
250-300mlCooking oil for frying. Increase the quantity of oil when using a bigger kadai.
Instructions
Wash and soak the chana dal with water. Soak the dal in water for a minimum of 3 hours and a maximum of 6 hours.
Meanwhile, prep the other ingredients – plucking and washing dill leaves will take some time. Cut an onion and dice them into small bits. Wash and peel the ginger and cut them into small pieces.
Drain the water from the soaked dal and rinse it out. Make sure to drain out all the water before adding it to the mixer jar for making the batter. To the chana dal, add the chopped ginger and dried red chilles. If you like, you can keep a handful of soaked chana dal aside to add to the batter.
Grind into a coarse paste. Transfer the batter to a bowl.
To the batter, add the chopped onions, chopped dill leaves, soaked full chana dal and salt. Mix all the ingredients well and check for seasoning. Once done, keep the batter aside and get the oil ready for deep frying.
Frying the Masala Vadas
Place a kadai on low to medium heat and add the cooking oil. Once the oil is warm, take a small piece of batter and check if the oil is hot enough. If it floats to the top, then the oil is ready.
Take a small ball of the masala vada batter and flatten it out on your left palm with some water. Take it with your right hand fingers and transfer it to the hot oil. (The flatter the vada, the crispier it will be. The rounder the vada, the denser it will be. )
Add as many vadas as possible without crowding the oil. Once the bubbling slows down on one side, flip the vada to the other side and allow it to cook.
Do not change the temperature of the oil to hasten the cooking process. You might end up with a vada cooked on the outside but raw on the inside.
Once both sides are done, with the help of a slotted spoon/ladle, remove the vadas from the oil to a plate lined with kitchen tissue paper.
Serve your Masala Vadas hot with a chutney of your choice.
Keyword Vada Recipes
If you are looking for more Indian Appetizers Recipes, please click here.
Do follow me on Instagram at Make Potato — I post daily lunch box ideas and quick snack recipes.
Pongal is a South Indian porridge prepared with cooked rice and lentils and topped with a seasoning of ghee, curry leaves, mustard seeds and cumin seeds. This recipe for Pongal is easy to prepare, and you can eat it for breakfast, lunch or dinner.
About Pongal
Pongal is a typical dish prepared in homes in South India as a meal at any time of day – breakfast, lunch or dinner. The main ingredients are white rice and yellow lentils/moong dal.
You can use any rice to make pongal, but it tastes best with medium-grain rice like sona masoori or small-grain rice like Jeeraga Samba rice.
It also goes by the name of Ven Pongal owing to the colour of the dish, which is white. (Ven = White). It also goes by the name of Khara Pongal, which translates to spicy Pongal as against its famous counterpart, Sakkara Pongal, which is sweet.
You can make Pongal throughout the year, as rice and dal are always available. It is light on the stomach owing to the two simple ingredients – Rice and Moong Dal.
How to make Pongal?
The rice to Dal ratio should ideally be 1 part dal to 3 parts rice. This ratio is a golden rule when consuming dal and rice. If you want to make the dish heavier, add equal quantities of rice and dal.
The first step is roasting the yellow moong dal on a low flame until it is fragrant. This should take no more than 2 minutes. This only helps bring forth flavour from the yellow moong dal. Switch off the flame, add it along with the measured-out rice and rinse them until the water runs clear.
If you have the time, you can soak them in water for about 10-15 minutes, drain them, and add fresh water before cooking them.
Pressure cooker method
Most kitchens in India have a pressure cooker, either the large 10lt one or a small 2/3 l cooker primarily used for cooking vegetables.
Large pressure cooker
If you are using the large pressure cooker, fill that pressure cooker with 1 inch of water. If you have a trivet, place it, else you can use a small plate instead. This will help situate the vessel with dal rice on top of it; else, you might hear the rattle of the vessel when the water boils – quite annoying and unnerving, actually.
Add the washed rice and dal in a vessel/container and the finely chopped ginger and peppercorn. Add water and make sure the water is 1 inch above the dal and rice. The more water, the better, because the desired consistency of Pongal is soft and mushy. Close that container with a lid/plate and place it in the large pressure cooker.
Close the lid of the pressure cooker, and keep the flame high. Once the pressure cooker has let out 3-4 whistles, reduce the flame to low and let it be for a minute or two. Switch off the flame and let the pressure cooker cool down naturally.
While you wait for the pressure to come down, prep the ingredients needed for tempering. Remove the vessel from the pressure cooker and check the consistency. If the cooked rice-dal isn’t mushy enough, add half a cup of hot water to bring it to that mushy consistency. Some folks prefer it non-mushy, but that is perfectly fine too.
Small pressure cooker
If you use a small pressure cooker, you can add the washed dal-rice, pepper, and ginger directly. Add enough water, so there is one inch above the rice and dal.
Close the lid and let 4-5 whistles go. Since it is a small cooker, you’ll get the whistles faster. Once you’ve heard 4-5 whistles, reduce the flame to simmer and let it be for another 2 minutes. Switch off and let the pressure to reduce naturally.
The Tempering
Pongal’s flavour comes primarily from the spices that are tempered in ghee. By itself, it is just a bowl of mushy dal rice.
Place a tadka pan or a small pan on medium heat. Add 2-3 tablespoons of ghee. Once the ghee has melted, add the mustard seeds. Wait for the crackle. You want the mustard seeds to crackle/pop open.
Next, add the cumin seeds, followed by asafoetida. Some people add turmeric powder, but it is entirely up to you. Next, add in the cashew nuts and give it all a good stir until the cashew nuts are golden brown. Turn off the heat and add the curry leaves. The curry leaves will crisp up in the residual heat of the pan. Add this tempering to the cooked dal rice. You have now tempered your Pongal.
Add salt – mix, mix, mix. Pongal is ready!
Serving Suggestions
You can eat Pongal by itself, but they pair well with:-
Coconut Chutney
Vegetable Sambar
Brinjal Gothsu
Papad and Pickle
Pongal – the festival
Pongal happens to be the name of a South Indian dish, as well as the name of a harvest festival celebrated in the month of January.
In about mid-January, when the sun turns north in South India, the first harvesting season of the calendar year begins. Farmers harvest fresh rice and lentils, and they use the harvest to prepare Pongal. As per tradition, people decorate a mud pot or a brass pot (vengala paanai) with fresh turmeric, mango leaves, and kumkum to mark the occasion, and then they cook rice and dal in it.
Dal and rice are allowed to boil until it froths up and boils over the pot’s rim. At this point, the family gathers around the pot and calls out, “Pongalo, Pongal”. Pongal in Tamil means boiling over. Letting the pot overflow symbolizes the hope and prayer for abundance in terms of health, wealth, harvest, and happiness for the rest of the year.
Tips for making a delicious Pongal
Why should we roast the dal?
Roasting dal gives the Pongal a better flavour. If you do not have the time to roast dal right before making the Pongal, you can roast a whole batch of it and use it when needed. Roasting dal also helps ward off insects from entering/growing in the container.
Why should we soak Dal?
Soaking moong dal or soaking any lentils before cooking removes the phytate or anti-nutrients present in lentils and pulses. Removing these anti-nutrients helps our body digest the lentil better, leading to better absorption of nutrients from the dish. If you have ever experienced bloating or flatulence after consuming lentils or pulses, it is because dal has not soaked before cooking.
Once you soak the dal, let the water drain. Wash the soaked lentils in freshwater before cooking them.
Tips for beginners
This is a dish that any cooking novice can prepare without too much effort. If a person is staying on their own or new to cooking, you only need a small pressure cooker to get you started.
You can skip the roasting of dal and the soaking dal. Just wash and pressure cook dal and rice with adequate water and peppercorns.
Add salt after cooking the dal and rice. Mix it well. Add ghee on top of the Pongal and voila – a simple version of Pongal is ready.
Pepper Corns in Pongal
In my recipe, I have noted that whole black peppercorns are added to the rice dal and cooked together. I do this because they are easy to remove when children do not like chewing into back pepper. I also do not add them during tempering in ghee because they tend to burst and create quite a mess when added to the hot ghee. But many do not take this approach. So you can choose to add pepper at any stage.
Crush it and add it to the rice-dal when cooking so there are smaller chunks of pepper through the pongal
Add the whole peppercorn to the rice-dal when cooking, that is easy to pick out when not eaten.
Add pepper powder after cooking rice-dal
Temper whole black pepper in ghee along with the other ingredients used for tempering.
Variations
Pongal can be prepared not only with rice as the primary grain but also rava/semolina, broken wheat or little millet. They make a good change in flavour and texture.
Below is my recipe on how to make pongal for 2 adults. You may double or triple it based on your requirement.
If you are looking for more Tiffin Recipes, please click here to find the recipe you are looking for.
Please do follow me on Instagram and Facebook and do subscribe to my channel on YouTube. Thank you so much!
Recipe
Pongal
A comforting rice and lentil porridge tempered in ghee with south Indian spices and curry leaves
Wash the rice and moong dal together in a container until the water is clear. Add 2 cups or 500 ml of water to the washed rice-dal. Add the peppercorns and finely chopped ginger. Close the container with a plate.
Add an inch or two of water in your pressure cooker and place on the stove. Keep the container with the washed rice and dal in the large pressure cooker.If you are cooking directly in a small pressure cooker, add 500 ml water and the washed rice-dal along with the peppercorns and ginger.
Let the dal and rice pressure cook for 3 whistles on medium to high flame. Once 3 whistles are done, lower the flame to low and let the pressure cooker be on for another 2 minutes. Switch off the flame and let the pressure come down on its own.
While the pressure cooker is cooling down, keep the ingredients that are necessary for tempering/ seasoning. Wash the curry leaves, keep aside 1/3 cup of cashew nuts.
Once the pressure cooker has cooled down, bring out the container of cooked dal and rice. Your pongal is almost ready. All it needs is tempering. If you are using a small pressure cooker, you don't have to change the container, you can add the tempering directly to the cooked rice-dal.
Tempering the Pongal
Keep the tempering pan/ tadka pan on low flame, once the pan is warm add the 2 tablespoons of ghee. Once the ghee is warm, add mustard seeds and cumin seeds. Let them crackle.
Next, add the asafoetida powder and cashew nuts. Stir until the cashews are golden. Switch off the flame and add the curry leaves, the leaves will crisp up in the residual heat. The curry leaves will sputter all over, so stand back.
Add this tempering to the cooked rice and dal. Add salt and give it a good mix. If you have grated coconut, you can add 2 tablespoons of it and mix it too.
Your Pongal is ready.
Notes
Shelf Life : Pongal is best eaten when hot or within a few hours of it being made.Since it contains lot of water, its best to put it in the fridge if it is not going to be eaten right away. Keeping pongal in the fridge will thicken it. So when you bring it out of the fridge, keep it at room temperature for at least 5-10 minutes. Add hot water and give it a good mix so that the congealed ghee can melt. If you do want to make pongal and store in the fridge, it is best eaten within 2 days of having made it.
Gobi Manchurian is an Indo-Chinese fried cauliflower dish served in a Manchurian sauce. It’s a popular evening snack available at local food carts and restaurants.
Gobi Manchurian
Gobi Manchurian is a sweet, spicy and tangy, deep fried cauliflower appetizer made with fried cauliflower in a Manchurian sauce.
Blanched cauliflower is deep fried with a cornflour/flour batter and swirled is a delicious base prepared with soy sauce, tomato ketchup, vinegar and generous amount of onion, ginger, garlic, spring onions and green chillies.
You can find Gobi Manchurian in roadside food carts, “Chinese” restaurants and even as part of the menu at weddings and special events.
A Small History of “Chinese Cusine” in India
The entry of Chinese cuisine in India dates back to a couple of hundred years ago when a few hundred Chinese escaped war and famine. They landed close to the city of Kolkata, where they set up shops that served food from their culture. This was the origin point for Chinese cuisine to infiltrate in its various forms that we see now.
Gobi Manchurian truly won the hearts of Bangalore localities when it started getting popular in the late 90s and early 2000s. A lot of Chinese restaurants opened up, as did food carts with their take on this flavour bomb of a dish. A raining evening Bangalore meant getting a parcel of Gobi Manchurian from the local food cart! There still exists one such cart guy till date, for almost 28 years- Ravi Gobi. Check him out if you are in Bangalore.
If you want to know more about Indo-Chinese cuisine, check out this excellent article.
Cauliflower – Buy the freshest Gobi available to you. For this recipe, you will need a cauliflower that weighs around 600-800 grams. This will yield a plate of Gobi Manchurian that serves 2-3 people.
Corn Flour – One of the principal ingredients in any Indo-Chinese recipe is corn flour. For this recipe, you will need 6-7 tablespoons of cornflour. One part is for coating the florets for deep frying, the other part is to make the Manchurian sauce.
Kashmiri Red Chilli powder – Red Chilli powder adds flavour and colour to the cornflour. It makes the Gobi Manchurian look red without having to use food colouring.
Salt and pepper – seasoning is a crucial part of any Indo-Chinese cuisine. Add salt and pepper to the cornflour to give the fried florets some flavour. Else you will have bland florets coated in a flavourful sauce.
Cooking Oil – You may use any refined vegetable oil. You will approximately need 3/4 cup of cooking oil for deep frying the cauliflower florets.
Ingredients for the Manchurian sauce
Onions, Spring Onions, Green Chillies, Ginger and garlic – These are the ingredients that provide the base for the sauce in which they will coat the Gobi Manchurian.
Soy sauce, red chilli sauce, ketchup, vinegar and sugar – These ingredients provide the dish with that much loved oomph that we all love in Gobi Manchurian.
Cornflour Slurry – For this recipe, we require 4-5 tablespoons of cornflour mixed with 70-100 ml of water to make a thin slurry. This slurry will absorb all the flavours from the aforementioned sauces and sit beautifully on the fried gobi florets.
How to make Gobi Manchurian
The prep work
Pull or cut out the individual florets and ensure they are all the same size. If you use different size florets, the cooking time will vary. Once you have your florets ready, dunk all of them in a pot of hot water with a teaspoon of salt. Allow it to blanch for about five minutes. Remove the florets from the hot water and transfer to another bowl.
Sprinkle 2-3 tablespoons of cornflour and ensure each floret has sufficient coating of the cornflour. At this stage, add the salt, pepper and red chilli powder. Toss them all together in the bowl. Once each gobi floret has a coating, you can keep it aside to deep fry.
Dice the onion into small pieces, finely chop the green chillies, garlic and ginger. Wash the spring onions and remove the roots. You can use the white and green parts for the cooking and only the green parts for the garnish at the end.
Mix all the sauces together – soy sauce, vinegar, ketchup, red chilli sauce and sugar.
Prepare the cornflour slurry with 4-5 tablespoons of cornflour and 70-100 ml of water. Make sure the slurry is thin.
Frying the Gobi florets
If you are deep frying, place a Kadai with 3/4 cup of cooking oil and allow it to warm up. Drop the florets one by one and deep fry until each floret is crisp. Drain them on a kitchen tissue paper. This stage will take roughly twenty to thirty minutes, considering how large the cauliflower is and how big your Kadai is.
If you want to bake or air fry the Gobi Manchurian florets, to the bowl of cornflour coated florets, add 2-3 tablespoons of the cooking oil and coat each floret well.
For baking in an oven, preheat at 200C for 10 minutes. Meanwhile, place each floret on a baking tray with a little space. Bake at 200C for 20-25 minutes. Take out the tray at around the 15 minute mark and give it a shake to ensure even baking of each floret.
The same applies to the air fryer as well, but you may have to do in batches since the space available in an air fryer will be lesser. But the air fryer will take less time. Place each floret in the basket and bake at 180C for 10 minutes. Remove the basket around the 5 minute mark and give it a shake to ensure they get fried evenly.
The final cooking part for the Gobi Manchurian
Place a pan on medium heat and add 2-3 tablespoons of cooking oil. Once the oil is warm, add the onions, ginger, garlic, green chillies and spring onions. Cook on a medium to high flame, so that the ingredients cook fast. Now lower the flame, add all the sauces and mix well.
Take the bowl of cornflour slurry and mix it well. You can now add this slurry to the pan and continuously stir the ingredients in the pan while adding it. Cornflour slurry cooks fast and thickens when it comes into contact with heat. So, keep an eye while stirring. If you feel that the sauce looks too thick, you can add a splash of water to thin it down. Do not add too much, otherwise the flavours of the sauces will thin down too.
Now, you add the fried Gobi florets and stir them well so that each floret gets coated well. You can turn off the heat and mix thoroughly. Do a little taste test in between to make sure it is up to the spice you desire.
Garnish your Gobi Manchurian with finely chopped spring onions and serve hot!
It’ll be great if you tag me on Instagram @ Makepotato, when you make this recipe.
Please do leave a rating and a comment if you can, on the recipe below – it will help me grow and reach more food lovers like you.
Recipe
Gobi Manchurian
An Indo-Chinese dish with batter fried cauliflower dunked in a Manchurian sauce (an Indian sauce with a Chinese name)
1Green Capsicuma small piece, finely chopped (optional)
1tbspRed Chilli Sauce
1tbspKetchup
1tbspVinegar
1tspSugar
1tspSoy Sauce
4-5tbspCornflourfor the slurry
For Garnish
Spring Onionsfor sprinkling on top
Instructions
Prep Work
The Cauliflower – Prep Work
Put the kettle on or boil a pot of water. You are going to need this to dunk the cauliflower florets to remove any creepy crawlies snuggled inside the florets. We need water's temperature in the range of warm – hot, not boiling hot.
Cut the cauliflower in such a way that you have small even-sized florets to make it easier to fry. Once you have the florets ready, dunk them in the warm water with a teaspoon of salt. Let it be for 15 minutes. You can use this time to prep other ingredients.
After 5 minutes, take them out of the water and place in a bowl. (Pick the florets from the water carefully, not disturbing the bottom since you'll find that's where all the dirt has settled)
For the batter – Prep Work
Mix the dry ingredients for the batter together – Cornflour, red chilli powder, pepper and salt.
Toss the blanched florets in the cornflour mixture and ensure each floret gets coated evenly.
Keep a plate with paper towel lined for draining the fried cauliflower.
For the sauce – Prep Work
Dice the onions, garlic, green chillies, capsicum and spring onions – You want it really small. If you want, the capsicum can be of bigger size, but the rest have to be small.
Get the sauce ready in a bowl- red chilli sauce, ketchup, sugar, vinegar and soy sauce. It is best to keep them ready in a bowl than adding it directly from the bottles. (I've had instances where a large quantity of soy sauce spilt and the dish ruined)
Take a 4-5 tablespoons of corn flour and add 70-100 ml of water. Give it a good mix. Your corn flour slurry is ready. Corn flour will sink to the bottom if kept unused for a long time. But you can bring the slurry back to the correct consistency by mixing it before using.
How to make Gobi Manchurian
The first step is to fry the cauliflower florets. Place the pan of oil on medium-high flame. Dip the gobi floret in the prepared batter and gently place them in the hot oil. Do the frying in batches, you do not want to crowd the oil. It should take anywhere between, 3-5 minutes per batch to achieve that golden brown, crispy texture.
Drain the golden brown gobi on a paper towel to drain excess oil. Repeat other batches and keep the golden brown delicacies aside.
Place a fresh pan on medium-low flame, add a tablespoon of cooking oil. Once the oil is hot, add the diced onions, garlic, green chillies and spring onions. Cook it down until the onions are soft.
Add the prepared sauce mix and give it a good mix.
Next add the corn flour slurry that you have prepared. Its ok if the flour has settled and water is on top. Just give it a good mix and add it to the pan.
The corn flour slurry will thicken fast, so keep an eye on it. If you think the sauce has thickened, add a little water.
This step is the best part – Add the deep fried Gobi to the sauce. Give it a mix and you'll see your Gobi Manchurian coming together. Once the sauce has coated well on the Gobi, your Gobi Manchurian is ready!
Garnish with spring onion and eat it hot!
Notes
If you plan on making a Gobi Manchurian sauce or a side dish gravy to go with noodles or fried rice, the only extra step is to make about 1 cup of corn flour slurry and add it to the sautéed vegetables and sauces. 1 cup of corn flour slurry will require – 4 tablespoons of corn flour and 1 cup water.
Keyword Cauliflower Dishes, Street Food
If you are looking for more Indian Snack recipes, look now further from this link.
Do follow me on Instagram at Make Potato — I post daily lunch box ideas and quick snack recipes.
Paneer Tikka is an appetizer made with Indian Cottage cheese marinated with spices & herbs, roasted on a grill and served with mint yoghurt chutney.
Paneer Tikka
Paneer Tikka is an Indian appetizer made using paneer that is coated with various herbs and spices and grilled in an oven called a ‘Tandoor’. At home, we grill paneer tikka on a grill pan, oven or an air fryer.
Usually served with mint-yogurt chutney, paneer tikka has a lovely, charcoaly-spicy taste with a soft and moist paneer at the center.
A Tikka is any dish marinated and grilled on an open flame or a tandoor. The most popular of vegetarian tikkas is Panner Tikka. Paneer Tikka is the most ordered dish by vegetarians at restaurants.
I’ve eaten some amazing Paneer Tikka, and it surprised me to learn that paneer tikka was an invention of the 1960s!! I thought it was much earlier than that. Read here to know more about it.
Ingredients to make Paneer Tikka
There are three main ingredients needed to make Paneer Tikka
Paneer
Hung Curd or thick curd
Besan or chickpea flour
Your choice of spices
How to make paneer at home?
If you plan to make paneer at home, you will need 1l of milk. Bring the milk to a boil and switch off the flame.
Add two tablespoons of lemon juice or vinegar. Give this a good stir, and you will observe the milk curdling. To this mixture, add a teaspoon of salt and mix it well. After 2-3 minutes, collect all the paneer pieces into a muslin cloth and shape it into a large cube that you can cut into equal pieces later.
Pack the paneer tightly and place a heavy object on top, such as a stone mortar and pestle, so the paneer sets well. Give this process about 30 minutes to an hour; your fresh paneer will be ready.
How to make hung curd at home?
To make hung curd at home, you will need either 500g of homemade curd or store-bought packet curd. Please put a muslin cloth in a large bowl to cover the base. Pour the curd over the muslin cloth, lift it from the bowl, and let it hang for a few hours. Once the whey has dripped into the bowl below, the hung curd is ready.
You can also buy hung curd, or any curd packaged in a plastic tub sufficiently thick enough for the marinate.
Besan and the spices to be gathered
I have noticed that roasting the besan or chickpea flour on low heat for two minutes works wonders to get the best flavour of Paneer tikka.
Add the hung curd, roasted besan, ginger-garlic paste, red chilli powder, coriander powder, onion powder (optional), mustard oil and kasuri methi in a large bowl. Please give it a mix before adding in the cubes of paneer. Add squares of diced onion and capsicum to the marinate to alternate between the paneer cubes.
Mix it gently so the marinate coats each paneer and vegetable evenly. Let this rest for at least 30 minutes. Resting the marination bowl in the fridge overnight will yield wonderful flavours for the next meal.
How to make a restaurant like Paneer Tikka at home?
In restaurants, chefs usually grill paneer Tikka in a tandoor, yielding that delicious charcoal-y flavour.
If you want to recreate that taste, you can get a piece of charcoal from your local dobhiwala. Heat the piece of coal with the help of a tong until you can see it is red. Place the charcoal piece in a cup, and place the cup inside the bowl in which you’ve been marinating the paneer pieces.
Now, pour some ghee on top of the hot coal. You’ll see that it will start smoking. Place a lid on the marinate bowl and let the paneer pieces absorb the charcoal flavour from the smoke. Keep the lid on until the smoke from the coal stops, and I assure you that you will taste the smokiness in your paneer.
Serving Suggestions
If you have kids in the house who cannot handle the heat from spices, you can marinate the paneer with salt and pepper. Grill it on the pan and squeeze some lemon juice before serving it to the kids. They will love it.
Serve the paneer tikka with a side salad of finely sliced cabbage, onions and slices of limes and mint-yoghurt dip. The paneer’s heat and the mint chutney’s cooling effect will work wonders on your palette and experience.
Storage and Shelf Life
Paneer Tikka, once grilled, is best eaten immediately. The paneer tends to get a rubbery texture as it cools down to room temperature.
You may prepare the marinate and coat the paneer pieces in it and keep them in the fridge overnight. This will aid in the paneer absorbing the flavours from the spices very well.
It’ll be great if you tag me on Instagram @ Makepotato, when you make this recipe.
Please do leave a rating and a comment if you can, on the recipe below – it will help me grow and reach more food lovers like you.
Recipe
Paneer Tikka
Paneer Tikka is a north Indian cottage cheese appetizer marinated with yoghurt, herbs & spices, grilled and served with a mint-youghurt chutney.
Cut the paneer pieces into equal size cubes. Cut the onions, tomatoes and capsicum in similar size as the paneer so that all pieces can be skewered and grilled evenly.
Roast the besan on a slow flame for 2 minutes. The roasting will yeild a lovelt flavour to the mariante.
Add the hung curd, roasted besan and rest of the ingredients under the "For the marinate" to a large bowl.
Mix well and add the cubed paneer pieces and vegetables. Give it a good mix until all the pieces get coated evenly with the masala. Keep aside at room temperature for at least 30 minutes. You could even make it overnight, but make sure to leave the bowl out of the fridge at least 30 minutes before you grill them.
How to make Paneer Tikka on the grill pan
Take pieces of marinated paneer and pierce them on to a skewer. You can alternate it with cubed pieces of capsicum, tomato and onion.Prepare all the skewers of paneer and vegetables and keep aside. If you do not wish to skewer them, you can even place the individual pieces to grill them.
Place a grill pan on medium flame and let it warm up. Brush the pan with some oil.
Place the skewers on the grill and let the grill do its job. It will take about 45-60 seconds on each side for a nice charred/grilled finish. Flip the skewered on to the other 3 sides until all sides get a nice grill finish. (Please cut the paneer cubes equally so that each of the paneer piece gets grilled evenly.)
Once done, repeat it for all the skewers. Place them on a plate and drizzle some lime juice over it. Serve with mint & yogurt chutney.
If you have leftover masala from the paneer sticking to the sides of the bowl, just toss a few of those cubed vegetables in it, skewer the vegetables and grill them too.
How to grill Paneer Tikka in the air fryer?
Pre heat the air fryer for 5-6 minutes on 170C.
Place the pieces of marinated paneer and vegetables in the air fryer with sufficient space next to them.
Close the fryer and begin the grilling at 170C for a total of 15 minutes. Around the 8 minutes mark, turn the pieces of paneer and vegetables around and brush a little oil over them.
Once the machine beeps, remove and place the pieces in a serving tray with some mint yogurt chutney.
Keyword Paneer Recipes
If you are looking for more Indian Snack recipes, please click here.
Do follow me on Instagram at Make Potato – I post daily lunch box ideas and quick snack recipes.
HomemadeChutney Powder is a semi-spicy South Indian condiment made with lentils, dry coconut and red chillies that is an excellent accompaniment to Idlis, Dosas, and Rice.
Chutney Powder has the right mix of spice, salt, tang and sweetness – the epitome of any well-made dish. Since it has that all-in-one palette, it goes well with dosas, idlis or steamed rice.
Chutney Powder is a condiment found in several south Indian homes. It is an easy substitute for fresh coconut chutney, usually made with idlis and dosas. Along with piping hot idlis or dosas, add a spoonful of chutney powder, make a small hole in the centre, and fill it with sesame oil. Mix the oil and chutney powder; now you have an equal contender for fresh coconut chutney.
Popular Homemade Chutney Powder Stores in Bangalore
This chutney powder will be available at most small mom & pop stores in old-time/traditional parts of Bangalore that sell homemade snacks, pickles and sweets.
Subamma Stores in Gandhi Bazaar, Basavanagudi area in Bangalore, is one such popular store known for its homemade pickles, powders, and sweets. But each store has its formulation of dals, dry coconut and red chillies ratio.
Chutney powder, or in Kannada known as Chutney Pudi, is a common condiment found in most Karnataka homes. Adukale is one brand that is loved by my family and we’ve tried almost all their varieties.
In Tamil households, it’s known as Milaga podi, which slightly differs from this recipe.
Ingredients for the Homemade Chutney Powder
The main ingredients used for the Chutney powder are:-
Channa Dal
Split Urad Dal
Byadagi red chillies
Dry Coconut or dessicated coconut
Jaggery Powder
The first step to making the chutney powder is to roast all the ingredients on low heat. You can start with channa dal first in the order of ingredients mentioned above.
Place a shallow pan and allow it to warm up on medium to low heat. Add the Channa dal and roast it with the help of a large spoon on low heat. Remove the pan from the flame and pour the golden dal onto a plate for them to cool down. This process will take roughly 5 minutes to see the channa dal turn brown.
Next, split Urad dal is a small-sized dal; hence, this should take less than 5 minutes to roast. Once the dal turns light brown, remove the pan from the heat and pour the contents onto the same plate containing the channa dal.
Next, you can roast the red chillies. You must stand next to the stove to ensure they roast evenly on all sides. The red chillies are sufficiently roasted when they do not look shrivelled anymore and make a rough sound as they scrape the pan’s surface. Add the roasted chillies to the plate.
Dry coconut will roast quickly. It will take less than thirty seconds. Once the dry coconut turns brown, add it to a separate plate to cool down. Add the asafoetida to this plate; it will get toasted in the residual heat.
Grinding the chutney powder
Once all the ingredients have cooled down, add the dals and red chillies to the mixer and grind it to an almost smooth powder. Scrape down the elements so that all the ingredients blend well.
Next, add the dry coconut, jaggery powder, and salt per your taste (roughly one teaspoon).
Grind all the ingredients together. Add the chutney powder to a plate and let it cool down.
Store your freshly ground homemade chutney powder in an air-tight container and use it for up to a month.
Chutney Powder and Its uses
When eating chutney powder, add a generous tablespoon of chutney powder and a generous tablespoon of gingelly oil/sesame oil to the chutney powder – give it a good mix to make it a paste or the consistency of coconut chutney.
If you want extra crunch and flavour in your veggie stir-fries, Chutney powder makes for a great additive in them – try it.
If your sambar or dal gets too watery, add this chutney powder to help thicken it.
Variations to Homemade Chutney Powder
With this recipe as the base, you can add many ingredients to make it more nutritious. Some of the popular ones are:
Crushed peanuts or powdered peanuts
Flaxseed powder or crushed flaxseeds
Curry Leaves
Bengal Fried Gram (Hurikadale/ Pottu kadalai)
With this recipe, you get a yield of 500 gm of Chutney powder, which should last you at least a month.
Homemade Chutney Powder
If you are looking for more Spice Mix Recipes, please click here to find the recipe you are looking for.
Please do subscribe to my channel on YouTube. Thank you so much!
Homemade Chutney Powder
Recipe
Homemade Chutney Powder
A coarse powder made with lentils and spices, eaten as a side dish doused in sesame oil as a condiment along with idlis and dosas.
12-15piecesByadagi Red Chilliesreduce for a less spicy version
10gmTamarindlime sized
1tspAsafoetida
1tbspRock Salt
4tspsJaggery Powderor more if you want sweeter
Instructions
Prep Work
Measure and keep all ingredients aside separately. It is advisable not to mix all the ingredients and roast them together, since each ingredient takes different time to get properly roasted.
Remove the stems of the red chillies.
If you do not have dry coconut / copra / desiccated coconut – you can make your own by cutting fresh coconut into tiny pieces, roasting them on a low flame until the coconut shrivels and you feel like the moisture is out. Dry coconut contains no moisture thereby adding to the shelf life of the chutney powder.
How to make Homemade Chutney Powder
Place a pan on medium -low heat and let it warm up. Add Chana dal and roast it until golden brown. This process should take around 5 minutes. Once done, transfer the roasted chana dal to a large plate for it to cool down.
Keep the pan back on the flame, roast the urad dal next, until golden brown. Roasting urad dal will take less than 5 minutes. Transfer the Urad dal to the same plate as the chana dal.
Next, roast the dry chillies: you know they are well roasted when the chillies puff up and make a scratchy/crunchy noise when roasting it. Once done, transfer to the same plate.
Now add the dry coconut into the pan for a light roast. Dry coconut will roast quite quickly, so do not move away from the pan. Once you see that the copra/dry coconut is slightly brown, switch off the flame, add the asafoetida powder and give it all a good mix. The powder will roast in the residual heat. Transfer the dry coconut to a separate plate and allow to cool down.
Once all the roasted items have cooled down, add the roasted dals and red chillies to the mixer first. Grind until you get an almost smooth powder. Next, add the roasted dry coconut along with the powdered jaggery and salt.
Grind it to a fine consistency. Spread the homemade chutney powder on the plate and let it cool down. Once cool, store this brilliant chutney powder in an airtight container.
Notes
Storage: Store the freshly ground chutney powder in an air-tight container on the shelf. If you plan to make large quantities, it is best to store them in a zip lock bag in the fridge and take out as much quantity as needed. Shelf Life: The shelf life of chutney powder is around two months. It will lose its freshness and taste after two months. It will technically not go bad, but it’s better not to eat stale chutney powder.
South Indian Roast potatoes is a soul-warming potato dish commonly prepared in South Indian holes that pairs well with curd rice, rasam rice or rotis.
South Indian Roasted Potatoes
South Indian roast potatoes are a comfort food with a crispy exterior with the holy trinity of South Indian spices – mustard seeds, curry leaves and asafoetida. The dish has mild heat due to the use of red chilli powder.
As a lover of anything potato, this South Indian Style roast potato curry is my go-to recipe for something simple and understated. My stand-in request to my mother was always to make these potatoes when visiting home for the weekend.
These potatoes are comforting after you’ve had one of those days when it has been never-ending. All you need are roast potatoes and curd rice, and all will be well with the world.
In Tamil, this dish goes by the name of Urulai roast or Urulakazhangu roast.
Ingredients for South Indian Roast Potatoes
Potatoes – It is important to use medium-sized potatoes so that when you pressure-cook them, they all get cooked evenly.
Gingelly Oil – I highly recommend using gingelly oil since they add a great flavour to the dish. If you do not have it, normal refined oil will do too.
Curry Leaves – They add freshness to the dish by rendering their fantastic flavour. I use at least two sprigs of curry leaves for roasting 4 medium-sized potatoes.
Turmeric powder and red chilli powder – The mixture of turmeric and red chilli powders creates that golden hue when roasting the potatoes. You can use regular red chilli powder or Kashmiri red chilli powder, depending on the spice levels that you and your family are comfortable with.
Asafoetida and Mustard seeds – These two ingredients complete the classic south Indian spice palette. While both mustard seeds and asafoetida aid in digestion, the asafoetida renders that classic umami flavour that no other ingredient can do in South Indian vegetarian cooking.
How to make South Indian Roast Potatoes
The first step is to cook the potatoes. You may choose to pressure cook or boil the potatoes in a pot of water. If you are choosing the former, you can rinse and place the potatoes in a small pressure cooker with an inch of water at the bottom. Let 2-3 whistles and then switch off the cooker.
If you are boiling the potatoes on an open pot of water, place a heavy-bottomed pan filled with water. Once the water begins to boil slightly, add the potatoes and let them cook until tender. This should take close to 15 minutes.
Remove the skin off the potatoes and cut them into large chunks or small chunks depending on your preference.
If you want to make your morning a little easier, you can cook the potatoes and leave them in the fridge overnight. Chop them up next morning. The taste of your roast potatoes will be even better.
You must read this article about roasting potatoes – it gives the science behind potatoes and roasting techniques.
Roasting the potatoes
In my experience, the use of a cast iron or iron kadai has yielded the best results in terms of taste and colour on the potatoes. You can use a nonstick or stainless steel kadai too. I’ve even roasted these potatoes in the air fryer (your job will get done, but it’s not the same in terms of taste).
Place a kadai on medium heat and allow it to preheat. Add a generous two tablespoons of gingelly oil and let the oil warm up. Once warm, add the mustard seeds and split Urad dal – allow it to sputter.
Follow the mustards seeds with curry leaves and asafoetida. Toast it for a few seconds and now you can add the chopped potatoes. Make sure the potatoes are thoroughly coated in oil.
Now comes the spice powders – turmeric powder and red chilli powder. Add them and mix well. Once mixed, make sure to spread the potatoes in the kadai so that each piece is touching the surface of the pan.
The process of roasting has begun. Allow it to roast on each side for 3-4 minutes on one side. It might tempt you to move the piece of potatoes around, but resist. After 4 minutes, mix the potatoes and allow it to roast on the other sides. The entire roasting process should take you about twenty minutes. Trust me, the wait it worth it.
Finally, season the potatoes with salt and serve these delicious South Indian roast potatoes with hot rasam rice or curd rice.
Variations in South Indian Roast Potatoes
This recipe isn’t too spicy, but if you have kids or older people who can’t handle spice, just leave out the red chilli powder and add a bit of black pepper to the potatoes instead.
Sambar Powder or Rasam powder – Instead of adding turmeric and red chilli powder, use sambar or rasam powder for that extra zing. I have tried them several times, and they taste great, I must say.
Notes for Beginners
This is a simple recipe that first-time home cooks can master without difficulty. If you cannot source all the ingredients, it is alright. If you don’t have many ingredients, you can still make delicious roast potatoes by using potatoes, oil, turmeric powder, and red chilli powder..
Notes
Cooking on an iron pan helps with the roasting and adds to the dish’s nutritional profile.
You can pre-boil the potatoes, store them in the fridge and roast them the next day. (The taste gets better)
Shelf Life and Storage for South Indian Roast Potatoes
Shelf Life–These pan roasted potatoes can stay on the shelf without spoiling during the day. If you’ve made them for dinner, it’s best to put them in the fridge.
Storage–These roasted potatoes are best eaten fresh since it will lose the crispness when stored in the fridge. Store cooked food either in a stainless steel box or glass box.
If you are looking for more Potato Recipes, please click here to find the recipe you are looking for.
Please do subscribe to my channel on YouTube. Thank you so much!
Recipe
South Indian Roast Potatoes | Urulai kazhangu Roast Recipe
A soul-warming potato side dish with typical South Indian spices, roasted to a crisp on an iron pan
1tspKashmiri Chili Powderadjust according to taste
Saltaccording to taste
Instructions
Prep Work
Clean the dirt off the potatoes, put it in a cup and place it in a pressure cooker containing an inch of water. Pressure cook the potatoes for 3 whistles on medium heat. Once done, let the pressure come down naturally.
Once the pressure is down, remove the potatoes from the cooker and pleace them in a bowl of cold water. At this point, the skin should come off easily.Dice the potatoes and keep them aside.
If you are boiling potatoes in water, place the washed potatoes in a pot of water with 2 inches of water over the potatoes. It will take roughly 20 minutes for the potatoes to cook completely. Once the potatoes are cooked, cool them down, peel the skin and dice them.
Wash curry leaves, dry them and keep aside.
How to Make South Indian Roasted Potatoes
Place a pan on medium flame and let the pan warm up. Add the gingelly oil and wait for 10-15 seconds for the oil to warm.
Once the oil is warm, add the mustard seeds. Wait for the seeds to sputter. Once they do, add the urad dal. Give it a good stir until the dal is slightly golden.
Now add the turmeric powder and asafoetida. Toasting the spices slightly in this oil will ensure that the spices get coated evenly on the potatoes.Toast the spices for a few seconds only so as not let them burn.
Next, add the curry leaves and wait for them to crisp up. You will now be able to smell the curry leaves and asafoetida predominantly.
Add the chopped potatoes and give it a good mix. Add salt to taste and mix it well until the masalas and oil are coated well on the potatoes.
Sprinkle red chili powder on the potatoes and give it a mix until each potato has been coated. Once mixed, spread the potato pieces so that they touch the surface of your pan.
Make sure the flame is on low and let the pan do its job of crisping up the side of the potatoes with the spices.
Every 3-4 minutes give the potatoes a mix and see if you can get another surface of the potato get roasted.
Pan roasting the potatoes for a good 15 minutes will give it a good crispy exterior with a soft interior.
When you see the golden hue of the crisp potatoes, turn off the flame and let the potatoes roast in the residual heat.
Enjoy your South Indian Roast Potatoes with Rasam rice or curd rice.
Darshini Style Dosa is a unique dosa made in restaurants in Bangalore. This dosa has a crunchy, crispy outer layer with a soft and pillowy texture inside.
Darshini style dosa is a variety of dosa available exlusively in quick service restaurants in Bengaluru.
These dosa have a crispy outer texture and a pillowy soft inner texture that makes a perfect dish for a takeaway.
They usually serve this restaurant style dosa with thick coconut chutney, sambar and a big dollop of white butter.
Where can you find Darshini Style Dosa?
When I say restaurants, these places are small eateries, commonly a two-word name ending with a Darshini or Sagar, that serve these delectable dosas. They are Bangalore style “Corner Cafe” that serve tiffin items such as Idlis, Dosas, Masala Dosas, Khara Bath, Chow Chow bath, Puri Sagu etc etc.
They are the QSRs (Quick Service Restaurants) of Bangalore serving fresh food that makes every office goer’s breakfast plans easy or solve every parent’s “what should I make for dinner” dilemma. In Bangalore, specifically in South Bangalore, every other street has a darshini style restaurant catering their unique dosa – Upahara Darshini, SLV, Vidyarthi Bhavan, Sukh Sagar, Adigas etc etc. where you can enjoy these them. But almost all corners of Bangalore have these darshinis, so if you are new to Bangalore, eating a dosa at a darshini must be on your to-do list.
Ingredients to make this Darshini Style Dosa
Typically, most restaurants have a unique recipe that revolves around the same set of ingredients but different proportions of it – red raw rice, parboiled rice, aval, chana dal, tur dal and methi seeds. Each darshini or sagar will have something unique about its dosa or the accompaniment that goes with it.
If you don’t have access to red raw rice, you can use normal white rice (sona masoori or basmati).
The red raw rice, tur dal and chana dal adds to the golden colour while parboiled rice gives the dosa a body. Rice along with Urad dal – soaked, ground and fermented gives the dosa the nice tang/sourness thereby upping the flavour. Methi seeds and Aval add to the pillowy texture of the dosa.
Some people might not like the sourness from the fermentation, so sugar is added to mask it. Adding rice flour just before making the dosa, will yield that all-famous crackling crispiness on the outside.
How to make Darshini Style Dosa?
You can start by soaking rice, urad dal, aval, chana dal and tur dal together for a minimum of five hours after washing them. But if you plan on making restaurant-style dosas for dinner, soaking dals and rice overnight is alright, but make sure to drain out the soaked water and use fresh water. One hour before grinding the batter, wash and soak 1 cup of poha until it absorbs all the water.
Add the soaked rice, dal and poha into a grinder or a mixer and let it go on until you achieve a smooth consistency. Some people drain the water and use fresh water to grind the ingredients, but using the soaked water is fine too.
Add the ground batter to a large container, give it a good mix with your hand. With the hand, you ask? – The answer to that is the wild yeast! Wild yeast lives in the air, around us and on our hands. The action of mixing the batter with your hands enables the wild yeast to get incorporated into the batter, causing perfect fermentation.
Place the mixed batter in a large container, giving it enough space to ferment and rise. A good 5-6 inches above the batter should be available for fermentation. I always keep a plate underneath the container to avoid any cleaning hassles. We can do overnight fermentation or 6-8 hours, depending on the weather.
Once fermented the next morning, add salt, sugar, rava and rice flour along with some water – give it all a good mix. The batter should be thick, but of spread-able consistency. Thirty to forty minutes before making dosas, add the rice flour and mix it thoroughly through the batter.
Preparation to making Darshini Style dosas
Before making darshini style dosas, make sure that the pan is hot and sizzles when you sprinkle some water on it.
Pour out a large ladle of the batter on the hot tawa and let it steam cook. Once the batter dries up on the tawa, you can add oil or ghee to the sides, which will help with the crisping factor. This dosa doesn’t need to be flipped – once the insides are porous and soft, that’s when you know it’s done.
You should also see the outer layer of dosa, turn into the characteristic golden red. Keep the flame on medium high so the heat can remain even. At this stage, you can even smear a layer of Red Chutneyfor an extra zing to the dosa.
Take the dosa off the pan and serve with the accompaniments you have prepared.
You can eat this Bangalore Style dosa with coconut chutney or Red Coconut Chutney too.
What do I eat it with?
Restaurant style dosas at Darshinis and Sagars are served with Restaurant style Sambar and coconut chutney. Typically, people eat dosas only with chutney, and Idlis go with sambar. However, most places commonly serve both chutney and sambar.
Shelf Life and Storage
Shelf Life – You can keep the dosa batter out for an hour or two after fermenting and making it. Else, the fermentation will continue and might end up tasting really sour. So it is best to pop it back into the fridge as soon as you’ve eaten.
Storage – You can store the fermented batter in the fridge for up to 3 days, after which the sourness would’ve increased.
If you are looking for more Dosa Recipes, please click here to find the recipe you are looking for.
Please do follow me on Instagram and Facebook and do subscribe to my channel on YouTube. Thank you so much!
Recipe
Darshini Style Dosa
Darshini style dosa is unique to its category, as it holds its shape, has a lovely golden colour, crispy on the outside and pillowy soft on the inside – a must try for those lazy sunday morning breakfasts or brunches.
Wash and soak together – dosa rice, red raw rice, urad dal, tur dal, chana dal, methi seeds in enough water. (2 inches of water above the soaked rice and lentils)Half an hour before grinding the dosa batter, wash and soak one cup poha until the poha has completely absorbed the water.
It should be soaked for a minimum of 5 hours. Once soaked, drain the water (save it, use it to water your plants) and grind it in a grinder for an even texture. Add fresh water in small quantities to ensure that the grains don't stick to the grooves of the grinder. If you do not have a wet grinder, you can use a mixer, but do it in batches so that you don't crowd the jar.
Pour the batter into a large vessel, giving it enough room to ferment. Leave this batter to ferment for at least 8 hours or overnight.
You know that the batter is fermented when you see air bubbles trapped in the batter.
Dosa Preparation
Once fermented, add sugar, salt and water and give it all a good mix. Next, add in the rice flour, rava and mix until there are no lumps of rice flour in the batter. The consistency of the batter should be thick and flowy ( like thick pancake batter). Let this sit for at least 30 minutes if you are in a hurry or an hour, so that the rice flour has had a chance to blend in with the batter.
Heat a tawa to high heat, reduce the flame to medium and pour a ladle of batter and spread it evenly on the tawa.
In this dosa, you do not have to flip and cook on the other side. You can let the dosa cook on one side while letting the other side crisp up to a golden brown colour.
Once the inside portion is cooked, fold the dosa in half and enjoy the textures and tastes of the dosa along with this restaurant style chutney or sambar
Notes
It is always better to leave the batter out from the fridge 20-30 minutes before making the dosa. Cold batter on a hot dosa pan will yield broken dosas.